1. Floor
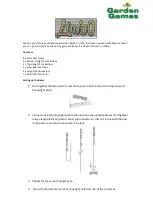
Prepare a level area for the shed to sit. Attach three treated wooden or similar bearers of size 50 x 50 x 1175mm to
each floor panel (Not supplied in kit). Position the floor on the prepared area and ensure level.
Drill
3mm
50mm
3. Wall panels
Position the back panel and a side panel on the floor as shown. Note how the panel frames sit on the floor with the
panel cladding overhanging the floor edge. Ensure square and secure using 3 x 50mm screws, screw through the
frame of the side panel into the frame of the back panel. Attach the other side panel and front panel in the same way.
To VALIDATE the guarantee, this item should be erected on
50mm x 50mm treated wooden or similar bearers (These are
not supplied with the kit.) Ground contact must be avoided.
25mm
2. Front panel
Lay the front panel on a clean soft surface. Place the door into position. Fix the three T-hinges to the door with 4 x
25mm screws per hinge. Secure the hinges to the door frame using 3 x 25mm screws per hinge. Fit the turn button
to the door panel as shown using 1 x 25mm screw. Fit the padbolt to the door using 4 x 25mm screws and 2 x 50mm
coach bolts, nuts and washers. It will be necessary to drill holes for the coach bolts using a 6mm diameter drill bit. Fit
the catch plate to the front panel, Ensure the bolt is able to slide into the catch plate, attach using 2 x 25mm screws
and 2 x 50mm coach bolts, nuts and washers, as shown below. Fix the weather strip above the door, using 3 x 50mm
screws. Screw through the frame of the front panel into the strip.
50mm
25mm
50mm
Weatherstrip
Turn button
It is recommended to drill
pilot holes for each screw
before assembly.
50mm
Back Panel
Important
Use this diagram to check
the correct orientation of
the corners
Front Panel
Side P
anel
Side P
anel
Back Panel
Side Panel
Panel frames rest on
the floor
Panel cladding
overhang floor edge
25mm
Drill
6mm
Drill
3mm


