background image

11

EN

2. Prepare your steam

generator:

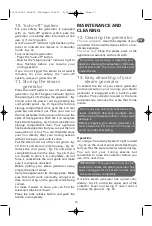
If your generator is stored on a shelf or if you
have to cross an obstacle or go up or down
steps,  carry  your  generator  by  the  handle
located above the pedals on one side and by
the part under the tube on the other side 

- fig.

5

, then set it down on a stable surface. Press

the telescopic tube release button 

- fig. 6

and

pull  on  the  handle  until  it  comes  out
completely.
Wheel the appliance to your ironing board 

-

fig.  7

.  Make  sure  that  both  cords  are  neatly

arranged  in  their  housing  when  you  move
the appliance. If you are right-handed, set the
appliance  to  the  right  of  your  ironing  board
and position the pedals on the side you iron.
If you are left-handed, position it on the left of
your ironing board.

For  optimal  use  of  the  product,  unfold  the
cord guide. To do so, take the upper part of
the cord guide 

- fig. 8

(built into the telescopic

handle)  and  pull  it  upwards  until  it  clicks 

-

fig.  9

.  Ensure  the  cord  guide  is  locked  into

position.
Note  the  cord  guide  should  not  be  used  at
mid-height 

- fig.10

. Pull the steam cord from

its housing and insert it into the cord guide 

-

fig.  12

.  Open  the  iron  storage  compartment

door 

-  fig.  11

.  Slide  the  iron  rest  plate  out

using the grip 

- fig. 14

. and pull out the iron 

-

fig.  15

.  Careful,  the  iron  rest  plate  is  not

removable. Once the iron has been taken out,
push  the  iron  rest  plate  back  and  close  the
door.
Remove the removable water tank using the
handle (located on top of the tank)

- fig. 16

. Open the filler flap and fill the water

tank without exceeding the Max level 

- fig. 17

.

Close  the  filler  flap  and  push  the  tank  fully
into its slot until you hear a "click" 

- fig. 18

.

Unwind the power cord completely. Connect
your  steam  generator  to  an  "earthed"
electrical outlet 

- fig. 19

. For optimum use of

your  steam  generator,  position  it  as
described in 

figure 46

.

USE 

3 • Switching on your steam

generator

Press  the  on-off  pedal 

-  fig.  20

.  The  green

indicator light on the display board flashes.
When  starting,  and  regularly  while  it  is  being
used,  your  steam  generator's  electric  pump
injects water into the boiler. It makes a noise but
this is quite normal.
The steam generator and the iron are ready to
iron when the steam ready indicator light is on,
without flashing, and the iron indicator light is
off.

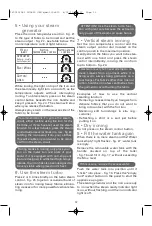
4 • Operating the control

panel

• Green  indicator  light  on  (flashing  or

steady): the generator is on 

- fig. 23

.

• Flashing  green  light  :  the  water  is  heating

up in the boiler.

- fig. 20

.

• Green indicator light on not flashing: steam

is ready for use 

- fig. 23

.

• Red  indicator  light  on  not  flashing:  the

water tank is empty 

- fig. 27

.

• The “Calc-Away System” orange indicator

flashes  :  the  collector  needs  to  be  rinsed.

-

fig. 37

.

• Red  "auto  off"  indicator  light  flashing:

Your  appliance  is  in  standby  mode

- fig. 28.

The first time the appliance is used, there

may be some fumes and smell but this is not
harmful. They will not affect use and will di-

sappear quickly.

Do not remove or carry the tank by the fil-

ler flap.

WARNING this steam generator is to be

used on the floor, do not place it on your
ironing board. The floor surface must be
stable and horizontal. Do not use the ap-

pliance on carpets or thick rugs.

1800116289 DG9860 GRG.qxd:150x210  4/01/10  9:26  Page 11

Summary of Contents for DG9860

Page 1: ...www rowenta com LIBERTY PRESSING 1800116289 DG9860 GRG qxd 150x210 4 01 10 9 26 Page C2...

Page 2: ...2 3 4 1 22 23 20 21 24 7 24 5 11 19 18 13 14 12 6 9 10 8 15 16 17 25 a 25 b 25 c 25 e 25 d 25 1800116289 DG9860 GRG qxd 150x210 4 01 10 9 26 Page C3...

Page 3: ...O COLOCA O DO MASTRO TELESKOBIK BORUNUN YERINE TAKILMASI PR PARATION PREPARATION VORBEREITUNG VOORBEREIDING PREPARAZIONE PREPARACI N PREPARA O T I I HAZIRLAMA MAX MAX CLICK fig 2 fig 1 fig 3 fig 4 fig...

Page 4: ...KULLANIM fig 20 fig 21 fig 22 fig 23 fig 24 fig 28 fig 25 fig 26 fig 27 RANGEMENT STORAGE AUFBEWAHRUNG OPBERGEN RIPORRE ALMACENAMIENTO ARRUMA O YERLE T RME fig 29 fig 30 fig 33 fig 32 fig 34 fig 35 fi...

Page 5: ...1800116289 DG9860 GRG qxd 150x210 4 01 10 9 26 Page C6...

Page 6: ...NTENANCE MAINTENANCE INSTANDHALTUNG REINIGING MANUTENZIONE MANTENIMIENTO MANUTEN O I BAKIM fig 37 fig 38 fig 39 fig 40 fig 41 fig 42 fig 43 fig 44 fig 45 fig 46 1800116289 DG9860 GRG qxd 150x210 4 01...

Page 7: ...pareil n est pas pr vu pour tre utilis par des personnes y compris les enfants dont les capacit s physiques sensorielles ou mentales sont r duites ou des personnes d nu es d ex p rience ou de connaiss...

Page 8: ...ens d insertion la poign e doit se trouver au dessus du rangement cordon vapeur fig 2 et 3 Appuyez sur le m t jusqu au click fig 4 Une fois le m t bien positionn rabattez le clapet de fixation du m t...

Page 9: ...sation optimale de votre centrale vapeur positionnez la comme d crit dans la figure 46 UTILISATION 3 Mettez votre centrale vapeur en marche Appuyez sur la p dale marche arr t fig 20 Le voyant vert sit...

Page 10: ...issez jamais un v tement sur une per sonne mais toujours sur un cintre Pour les tissus autres que le lin ou le coton maintenez le fer quelques centim tres afin de ne pas br ler le tissu Attention Util...

Page 11: ...ssion de repassage sans avoir besoin d attendre qu il refroidisse Sortez le cordon vapeur du guide fil fig 33 Pliez le puis rangez le dans son logement fig 34 D verrouillez le guide fil fig 35 et rent...

Page 12: ...ve Pour bien nettoyer le collecteur il suffit de le rincer l eau courante pour liminer le tartre qu il contient fig 41 Remettez le col lecteur dans son logement en le revissant completement pour assur...

Page 13: ...tifs dans l eau de repassage N ajoutez jamais aucun produit dans le r servoir d eau ou dans la chaudi re voir 1 La semelle est sale ou brune et peut tacher le linge Vous utilisez une temp rature trop...

Page 14: ...ting it is stable The appliance must always be placed on the floor when it is being used This appliance is not intended for use by per sons including children with reduced physical sensory or mental c...

Page 15: ...n the slot provided for that purpose making sure you respect the insertion direction the handle must be located above the steam cord storage fig 2 and 3 Press the tube down until it clicks fig 4 Once...

Page 16: ...water tank without exceeding the Max level fig 17 Close the filler flap and push the tank fully into its slot until you hear a click fig 18 Unwind the power cord completely Connect your steam generato...

Page 17: ...he Water tank empty light flashes fig 27 water tank is empty Remove the removable water tank with the handle located on top of the tank fig 16 and fill it fig 17 without exceeding the Max level Push t...

Page 18: ...ank of water Carry the appliance to its storage place Make sure that both cords are neatly arranged so they do not drag on the ground while being carried To make it easier to store you can fold the te...

Page 19: ...ig 41 Replace the collector in its housing by completely screwing it to en sure it is watertight fig 42 During this ope ration water may drip from the tank into the collector cover If this happens rem...

Page 20: ...high temperature See our recommendations regarding temperature control setting You are using starch Always spray starch on the reverse side of the fabric to be ironed There is no steam The water tank...

Page 21: ...n Sie stets den Netzs tecker das Elektrokabel vor dem Sp len des Kalksammelbeh lters vor dem Reinigen des Generators nach jedem Gebrauch Das Ger t muss auf einer stabilen waagrechten und hitzeunempfin...

Page 22: ...issen und Treppen muss das Ger t ge tragen werden Falls das Ger t gefallen ist und dabei sichtbare Sch den davongetragen hat Wasser verliert oder Betriebsst rungen auftreten darf es nicht mehr be nutz...

Page 23: ...sens wieder zur ck und schlie en Sie die Abdeckung Nehmen Sie den herausnehmbaren Wassertank an seinem Griff auf der Oberseite des Wassertanks heraus Abb 16 Machen Sie die Einf ll ffnung auf und f lle...

Page 24: ...raturen geeigneten Anti Rutsch F en ausgestattet Ihr B geleisen steht ebenfalls u erst stabil wenn man es auf dem Heck aufstellt Einstellen des Temperaturreglers B geln Sie zuerst die Stoffe die eine...

Page 25: ...ampfgenerator und das B geleisen sind bereit zum B geln sobald die Dampf Anzeige aufleuchtet und nicht blinkt und die Leuchte des B geleisens ausgegangen ist 10 Auto Off System Um Ihre Sicherheit zu g...

Page 26: ...Ihres B gelautomaten Reinigen Sie die abgek hlte Sohle Ihres B geleisens mit einem feuchten Tuch oder einem nicht scheuernden Schwamm Das Geh use Reinigen Sie die Kunststoffteile des Ger ts von Zeit z...

Page 27: ...estschrauben um zu gew hrleisten dass er dicht ist Abb 42 Bei diesem Vorgang kann Wasser vom Boiler in die Abdeckung des Kalksammlers laufen Nehmen Sie in diesem Fall die Abdeckung des Kalksammlers ab...

Page 28: ...nterlassen Sie b geln mit zu hoher Temperatur Beachten Sie unsere Hinweise zur B geltemperatur Ihre W sche wurde nicht ausreichend gesp lt oder Sie haben ein neues Kleidungsst ck geb gelt ohne es vorh...

Page 29: ...p zijn steunplaat zet controleer dan of het oppervlak waarop u deze plaatst stabiel is Tijdens het gebruik moet het apparaat altijd op de vloer geplaatst wor den Dit apparaat mag niet gebruikt worden...

Page 30: ...mzakje Steek hem in de hiervoor bedoelde ruimte in de juiste richting de handgreep moet zich boven de opbergruimte voor het stoomsnoer bevinden fig 2 en 3 Duw de buis tot u een klik hoort fig 4 Als de...

Page 31: ...pcontact fig 19 Plaats voor een optimaal gebruik van uw stoomstrijkcentrale deze zoals aangegeven in figuur 46 GEBRUIK 3 Stel uw stoomgenerator in bedrijf Druk op het aan uit pedaal fig 20 Het groene...

Page 32: ...met strijken het strijkijzer alleen op het metalen strijkij zerplateau van uw strijkplank als deze voor zien is van hittebestendig anti slipprofiel Uw strijkijzer is eveneens zodanig ontworpen dat di...

Page 33: ...hakelen 11 De stoomgenerator opbergen Druk op het aan uit pedaal om uw stoomstrijkcentrale uit te schakelen fig 29 Het controlelampje op het bedieningspaneel gaat uit Haal de stekker uit het stopconta...

Page 34: ...met kraanwater om de kalkaans lag te verwijderen fig 41 Zet de collector te rug in zijn zitting door deze volledig vast te draaien om een goede afdichting te garan deren fig 42 Tijdens deze handeling...

Page 35: ...eroorzaakt vlekken op het strijkgoed U strijkt op een te hoge temperatuur Controleer of de stand van de thermostaat overeenkomt met het strijkvoorschrift in uw kleding Uw strijkgoed is niet voldoende...

Page 36: ...chio deve essere sem pre posato a terra durante il suo utilizzo L apparecchio deve essere utilizzato e appoggiato su una superficie stabile Quando posate il ferro sul poggiaferro assicuratevi che la s...

Page 37: ...mete sull asta finch non sentite un clic fig 4 Una volta che il portafilo periscopico in posizione abbas sate il dispositivo di fissaggio del portafilo da sinistra verso destra finch non sentite un cl...

Page 38: ...mete il pedale On Off fig 20 La spia verde situata sul pannello comandi lampeggia Dopo circa un minuto e regolarmente durante l uso la pompa elettrica di cui dotato l apparecchio invia l acqua nella c...

Page 39: ...ccezio nale potenza del vapore pu provocare delle bruciature Dato che il vapore prodotto molto caldo non togliete mai le grinze di un abito su una persona ma sempre su una gruccia Per i tessuti divers...

Page 40: ...aspettare che si raffreddi Estraete il cavo vapore dal guidafilo fig 33 Piegatelo poi ritiratelo nel suo alloggiamento fig 34 Sbloccate il guidafilo fig 35 e fatelo rientrare completamente nell asta...

Page 41: ...er pulire bene il col lettore basta sciacquarlo con acqua corrente per eliminare il calcare che contiene fig 41 Rimettete il collettore nel suo alloggiamento riavvitandolo completamente per assicurare...

Page 42: ...terno dei capi da stirare Non c vapore o c poco vapore Il serbatoio d acqua amovibile vuoto spia rossa Riempite il serbatoio d acqua amovibile Premete sul tasto sul pannello comandi per spegnere la sp...

Page 43: ...suelo mientras se est utilizando Este aparato no est previsto para que lo utilicen personas incluso ni os cuya capacidad f sica sensorial o mental est disminuida o personas sin experiencia o conocimie...

Page 44: ...bien colocado baje la v lvula de cierre del m stil de izquierda a derecha hasta que oiga clic fig 4 1 Qu tipo de agua debe utilizar El aparato se ha dise ado para funcionar con agua del grifo Sin emb...

Page 45: ...Esto genera un ruido que es normal La central de vapor y la plancha estar n listos para planchar cuando el piloto de vapor se encienda y permanezca fijo y el piloto de la plancha se apague 4 Funcionam...

Page 46: ...e desbordamiento elimine el excedente El vapor que se produce es muy caliente no desarrugue nunca la ropa puesta sobre una persona vestida utilice siempre una per cha Para los tejidos que no sean el l...

Page 47: ...el tubo fig 36 Si no consigue introducirla completamente no la fuerce vuelva a montar la gu a del cable y aseg rese de que est bien desbloqueada Antes de guardar la central de vapor vac e siempre el...

Page 48: ...el colector en su compartimento apret ndolo de nuevo completamente para asegurar la es tanqueidad fig 42 Al realizar esta opera ci n puede ocurrir que salga agua por el de p sito dentro del ocultacol...

Page 49: ...chado No a ada nunca ning n producto en el dep sito de agua independiente o en el calder n 1 La suela est sucia o marr n y puede manchar la ropa Usted utiliza una temperatura muy elevada Rem tase a nu...

Page 50: ...vel O aparelho deve estar sempre colo cado no ch o durante a utiliza o Este aparelho n o foi concebido para ser utilizado por pessoas incluindo crian as cujas capacidades f sicas sensoriais ou mentai...

Page 51: ...essione o mastro at ouvir um clique fig 4 Uma vez o mastro de vidamente colocado incline o acess rio de fixa o da esquerda para a direita at ouvir o clique de bloqueio fig 4 1 Que tipo de gua utilizar...

Page 52: ...ntegrada no seu aparelho injecta gua para a caldeira Esta ac o ir produzir um ru do normal para este procedimento A central de vapor e o ferro est o prontos para engomar quando o indicador de vapor es...

Page 53: ...pessoa utilize sempre um cabide Para tecidos que n o o linho ou o algod o mantenha o ferro a uma dist ncia de alguns cent metros para n o queimar o tecido ATEN O Utilize a fun o vapor turbo com cuida...

Page 54: ...com partimento fig 34 Desbloqueie o guia do fio fig 35 e coloque o por completo no mastro fig 36 Se n o conseguir enfi lo na totalidade n o force volte a montar o guia do fio e veri fique se est devi...

Page 55: ...or no respectivo compartimento apertando o correc tamente para garantir a sua estanquidade fig 42 No decorrer desta opera o pode sair gua da cuba para a tampa do colector Neste caso retire a tampa do...

Page 56: ...no lado oposto ao que vai ser engomado Vapor inexistente O dep sito est vazio luz acesa Encha o dep sito amov vel e carregue no bot o no painel de comandos Existe pouco ou nenhum vapor A sa da de vapo...

Page 57: ...52 YMBOY 2 220 240 V 16A A ROWENTA 1 2 Rowenta 1800116289 DG9860 GRG qxd 150x210 4 01 10 9 27 Page 52...

Page 58: ...3 4 5 6 7 8 9 10 11 12 13 14 15 2 16 17 18 ON OFF 19 20 21 22 23 24 BCalc Away SystemN 25 a b c calc away d auto off e T I I fig 1 fig 2 3 fig 4 fig 4 1 T 50 50 1800116289 DG9860 GRG qxd 150x210 4 01...

Page 59: ...54 2 fig 5 fig 6 fig 7 fig 8 fig 9 fig 10 fig 12 fig 11 fig 14 fig 15 fig 16 Max fig 17 fig 18 fig 19 46 3 U on off fig 20 4 1800116289 DG9860 GRG qxd 150x210 4 01 10 9 27 Page 54...

Page 60: ...3 fig 20 fig 23 fig 27 BCalc Away SystemN fig 37 auto off fig 28 5 fig 21 fig 22 fig 24 6 Turbo 2 3 Turbo fig 25 7 T Max Turbo Min fig 24 T T I T T T T I T 1800116289 DG9860 GRG qxd 150x210 4 01 10 9...

Page 61: ...8 9 d e f fig 27 fig 16 fig 17 Max fig 18 10 auto off auto off 8 auto off fig 28 auto off 8 auto off 11 on off fig 29 fig 30 fig 31 fig 32 fig 33 fig 34 1800116289 DG9860 GRG qxd 150x210 4 01 10 9 27...

Page 62: ...57 GR fig 35 fig 36 T I I 12 T 13 3 5 BCalc Away SystemN fig 37 fig 38 fig 39 fig 40 fig 41 fig 42 fig 43 fig 44 fig 45 calc away 1800116289 DG9860 GRG qxd 150x210 4 01 10 9 27 Page 57...

Page 63: ...58 I IT I T T I d On Off Turbo 2 3 T T B minimum maximum T U T B Rowenta 1800116289 DG9860 GRG qxd 150x210 4 01 10 9 27 Page 58...

Page 64: ...e her zaman yere konulmal d r Bu cihaz fiziksel duyumsal veya zihinsel kapasiteleri zay f olan ya da bilgi ve deneyimden yoksun ki iler taraf ndan ocuklar da d hil ancak g venliklerinden sorumlu bir k...

Page 65: ...ez kutup konumundayken kutup vana montaj kapa na arka soldan sa a do ru oturtun ekil 4 1 Ne t r su kullan lmal d r Cihaz n z musluk suyu ile al mak zere tasarlanm t r Bununla birlikte deniz kenar ndak...

Page 66: ...trikli pompa kazan i erisine su enjekte eder Bu normal olan bir ses kar r Buhar g stergesinin yand nda ve sabit oldu unda ve t n n g sterge s nd nde buhar santrali ve t kullan ma haz rd r 4 G sterge t...

Page 67: ...d nde Ta mas halinde fazla suyu al n D KKAT Turbo buhar fonksiyonunu ok dikkatli bir ekilde kullan n nk buhar ok g l oldu undan yan klara sebep olabilir kan buhar ok s cak oldu undan bir k yafetin bur...

Page 68: ...n Buhar santralinizi yerle tirmeden nce her seferinde haznedeki suyu bo alt n r n yerle tirme b l m ne kadar ta y n Ta ma esnas nda yere s r nmemesi i in iki kablonun d zg n bir ekilde yerle mi olmas...

Page 69: ...koyun ekil 42 Bu i lem esnas nda hazneden kolekt r kapa na su akabilir Bu durumda ko lekt r kapa n kar n ekil 43 i erisindekini la vaboya d k n ekil 44 ve ard ndan yeniden ye rine tak n ekil 45 Bir so...

Page 70: ...or t leme suyunda kire giderici veya yard mc kimyasal ek r nler kullan yorsunuz Su haznesi veya kazan i erisine asla hi bir r n eklemeyin bak n z 1 t taban kirli veya kahverengi renkte ve ama r lekele...

Page 71: ...nde giderilmemesi halinde imalat veya itha lat r n n tamiri tamamlan ncaya kadar benzer zelliklere sahip ba ka bir sanayi r n n t keticinin kullan m na tahsis etmek zorundad r 6 r n n garanti s resi i...

Page 72: ...iz Plaza Dereboyu cad Meydan sok No 28 Kat 12 34398 Maslak s tanbul DANI MA HATTI 444 40 50 F RMA YETK L S N N MALIN Markas ROWENTA Cinsi R Modeli DG87xx serie DG50xx serie DG84xx serie DG98xx serie B...

Page 73: ...68 1800116289 DG9860 GRG qxd 150x210 4 01 10 9 27 Page 68...

Reviews: