background image

5

P/N 1011283 Rev. A 03/15

INSTALLATION

1.  Remove unit and all packing mate-

rials from shipping carton.

2.  Open the Accessories Box. It should 

contain the following:
a.  Bun Chute
b.  Bun Feeder
c.  1 Belt Set
d.  Owner’s Manual

NOTE:

  If any parts are missing or dam-

aged, contact Antunes Techni-

cal Service IMMEDIATELY at 

1-877-392-7854 or 1-630-784-

1000.

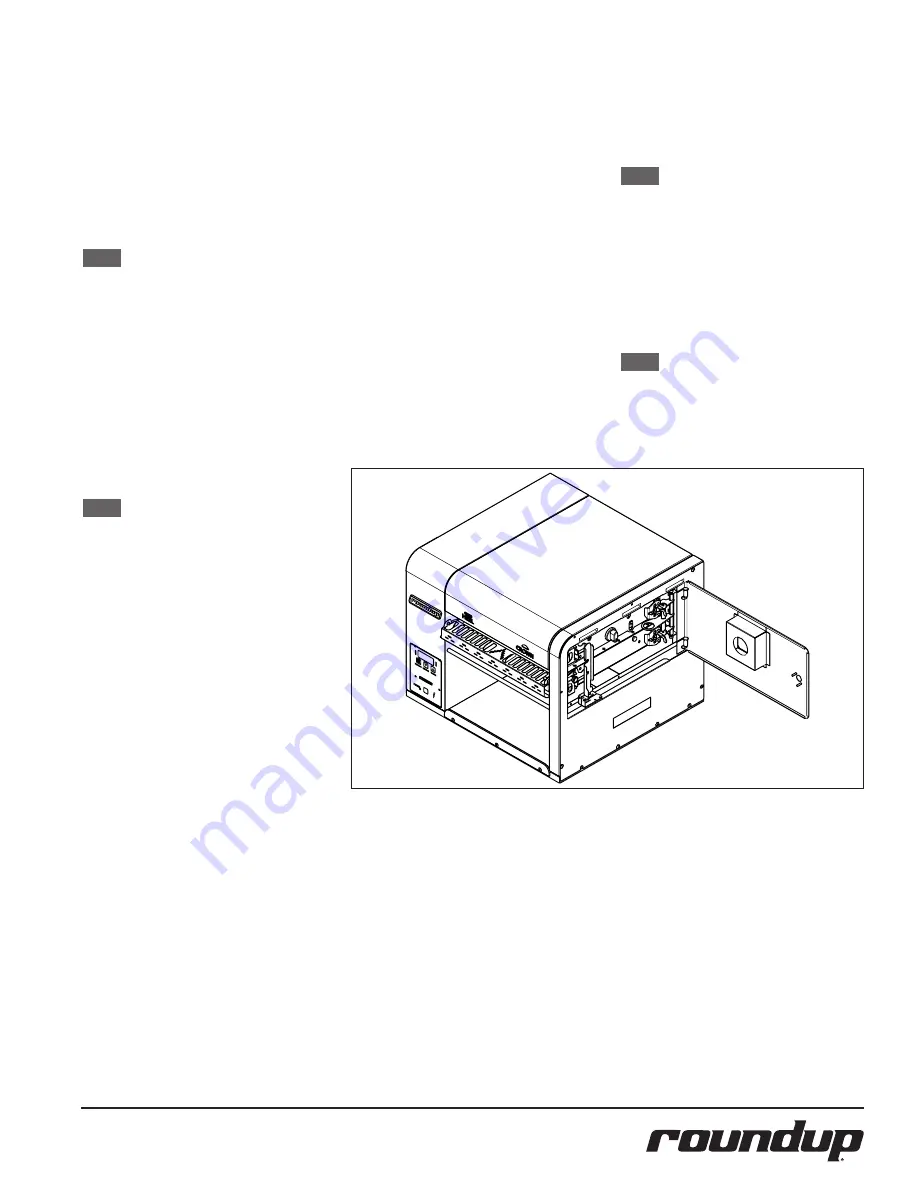
3.  Open the side door (Figure 1) and 

remove all of the plastic ties secur-

ing the toaster mechanism.

4.  Remove all packing materials and 

protective coverings from the unit.

5.  Wipe the entire exterior of the 

toaster and the accessories men-

tioned above with a hot damp 

cloth. Allow to air dry

NOTE:

  Do NOT use a dripping wet 

cloth. Wring out before use.

6.  Attach the Bun Chute, Bun Feeder, 

and Butter Wheel assembly.

7.  Make sure the Compression Knob 

is set to 3, the default setting.

When placing the toaster into service, 

pay attention to the following guidelines.


y

The power cord is located at the 

bottom of the unit. The unit is 

designed to be placed on a table 

that will NOT pinch the power cord.


y

Make sure the power switch is off 

and the unit is at room temperature 

before plugging in the power cord.


y

Do not block or cover any 

openings on the unit.


y

Do not immerse the power 

cord or plug in water.


y

Keep the power cord away 

from heated surfaces.


y

Do not allow the power cord to 

hang over edge of table or counter.


y

Place the unit on a sturdy, level 

table or other work surface.


y

Turn the power switch to 

off (if it is set to on).


y

Ensure the line voltage cor-

responds to the stated voltage 

on the specification label and 

power cord warning tag.

8.  Plug the power cord into the ap-

propriate power outlet. Refer to the 

specification plate for the proper 

voltage.

Figure 1. 

OPERATION

1.  Press and release the Power button 

to turn the toaster on.  Allow the 

toaster to warm up until USE ap-

pears in the display

2.  Set the Compression Knobs to the 

desired setting. The recommended 

Compression Settings are: 

CROWN - #4 

HEEL - #3

3.  Insert product into the appropriate 

lane on the Bun Feeder according 

to Bun Feeder labels. Insert buns 

with the cut side facing down.

4.  Finished product drops into the bun 

landing zone.

Light/Dark Adjustments

The light/dark value can be adjusted when 

the unit is displaying “USE”. To adjust the 

light/dark value, press the LIGHTER or 

DARKER button. The display will change to 

show the current light/dark value.

NOTE:

  The default light/dark value is 

d0.

Press the LIGHTER or DARKER buttons to 

change the light/dark value. The adjust-

ment range is L1-L9 and d0-d9. L9 is the 

lightest, d0 is the middle, and d9 is the 

darkest setting.

To save the light/dark value, press the PRO-

GRAM button or wait 5 seconds until the 

screen displays “USE”.

NOTE:

  Adjusting the light/dark value 

does NOT change the tempera-

ture. It changes the speed of the 

conveyors. The light/dark value 

will reset to the default value of 

d0 when the unit is turned off.

Summary of Contents for GST-2H

Page 1: ...P N 1011283 Rev A 03 15 Wendy s GST 2H Horizontal Toaster Manufacturing Numbers 9210888 www ajantunes com...

Page 2: ...ment or damage as result of improper use y y Installation of electrical service y y Normal maintenance as out lined in this manual y y Malfunction resulting from improper maintenance y y Damage caused...

Page 3: ...be in accordance with lo cal electrical codes and any other applicable codes y y Do not clean this appli ance with a water jet WARNINGS Be advised of the following warnings when operating and perform...

Page 4: ...3 15 SPECIFICATIONS Model Mfg No Volts Watts Hertz Plug Description GST 2H 9210888 20 2000 60 NEMA 6 20P 20 Amp 250 Volt Right Angle Model Mfg No Width A Depth B Height C GST 2H 9210888 22 559 mm 21 5...

Page 5: ...e of table or counter y y Place the unit on a sturdy level table or other work surface y y Turn the power switch to off if it is set to on y y Ensure the line voltage cor responds to the stated voltag...

Page 6: ...e any changes NOTE The unit exits Manager Mode after 30 seconds of keypad inac tivity SAFETY FEATURES Hi Limit Control A Hi Limit Control turns off electrical power to the heaters and control circuits...

Page 7: ...tears or discoloration of the belt at which point all belts should be replaced NOTE Belts should be removed ONLY during Belt Replacement or when required in a service situation For proper operation re...

Page 8: ...over and Bun Feeder Assembly 11 Plug in the toaster and test the unit before returning to service Cleaning the Top Cooling Fan and Electrical Housing Annually Follow these steps to clean the top fan 1...

Page 9: ...ain or sprockets damaged Failed Motor Failed Control Board Control Display flashes SpEd Mechanical bind in one or both conveyors Enter user mode to check motor speed Check both conveyors for mechanica...

Page 10: ...ncy and Electrician for service Faulty Transformer Replace Transformer Conveyors not turning Belt is damaged Replace Belts Motor Drive Chain is detached from sprockets Reinstall the Drive Chain Failed...

Page 11: ...1 41 0600143 Spring Compression Setting 1 42 0600158 Spring RollerTension 4 43 0600161 Torsion Spring Locking BracketTop 1 44 0700737 Power Cord 20A 250V Right Angle 1 45 0800467 Bun Chute 1 46 080047...

Page 12: ...3 101 72 15 102 77 96 77 53 105 46 27 9 8 44 44 60 35 100 60 35 67 67 4 4 82 4 9 67 38 82 30 89 65 83 65 43 66 7 88 41 95 71 17 78 57 54 59 76 76 71 104 70 52 50 83 101 72 15 102 77 96 77 53 105 46 27...

Page 13: ...2 Label Caution Hot 1 52 1001213 Label Shock Hazard 1 53 1001505 Label Control 1 54 1001585 Label Compression LH 1 55 1001586 LAbel Compression RH 1 56 1001589 LAbel Wiring Diagram 1 57 2100212 Handle...

Page 14: ...1 Item Part No Description Qty 10 0022006 Heel PlateWldmt 1 11 0100290 Platen Main 208V 1900W 1 12 0400458 Insulation Main Platen 1 13 0506853 Frame Cover 1 14 0507092 Insulation Plate 1 15 0507140 A...

Page 15: ...1 208 240 12VAC 15VA 12345678 CONTROL J5 SSR CONTACTOR J8 123 NC J3 TC1 J2 TC2 2 1 2 1 2 1 2 1 3 TC1 NOT USED TC2 PLATEN AC PWR 12V J6 J4 HI LIMIT SENSE INPUT MOTOR CAP1 MOTOR TACH M1 CONTROLS FAN F1...

Page 16: ...ding maximum weight capacity 4 lbs This warranty does not cover water contamination problems such as foreign material in water lines or inside solenoid valves It does not cover water pressure problems...

Reviews: