background image


Seite 3 von 13 


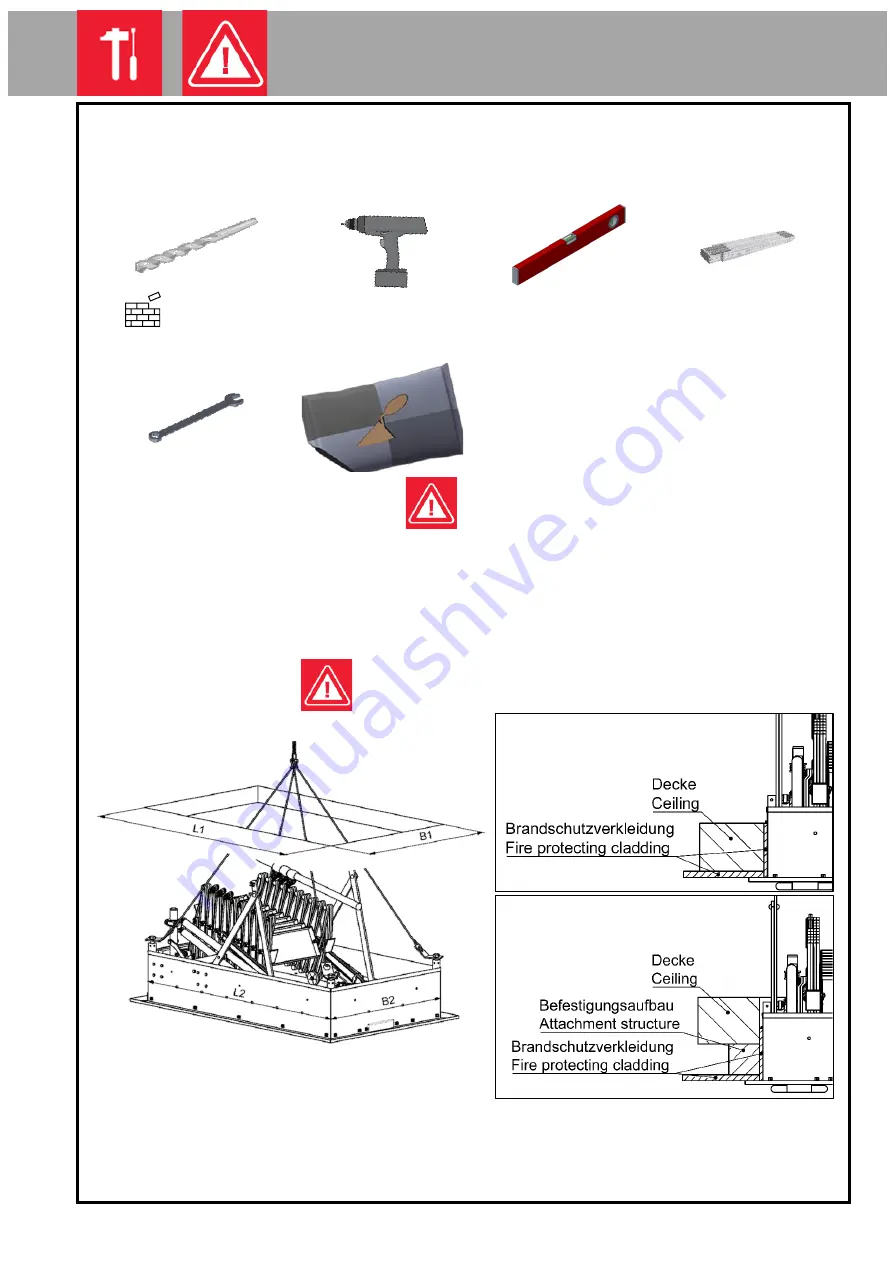
Notwendige Werkzeuge und Materialien 
Necessary tools and materials 


Ø 6,5 

TX 30 

Wasserwaage / 

Level 

Gliedermaßstab / 

folding rule 


  Ring-Maulschlüssel 

SW24 / wrench 24 

mm 

Mörtel 

Mortar 


Einbau der Stahlluke von unten  


Installation of the steel hatch from below 


L1 - L2 

≈ 

25mm 

B1 - B2 

 15mm 


Dicke der Decke 
Thickness of the ceiling 

Abgehängte Decke 
Suspended ceiling 

Summary of Contents for EI230

Page 1: ...nstall the stair completely before you use the stair FR Instructions instructions de sécurité Chaque changement du produit ou utilisation detournée comme défini supprime la garantie automatiquement Respectez les instructions pour la prévention des accidents Sécurisez le chantier contre la chute des pieces Respectez les principes de la physique du bâtiment comme isolation termique et protection con...

Page 2: ...Seite 2 von 13 Lieferumfang Package Contents Zugstab Pull stick 7 5x92 TX30 Kranhaken Öse Bracket for Rigging M16 x 180 4 3 2 1 12x 4x 4x ...

Page 3: ...s Ø 6 5 TX 30 Wasserwaage Level Gliedermaßstab folding rule Ring Maulschlüssel SW24 wrench 24 mm Mörtel Mortar Einbau der Stahlluke von unten Installation of the steel hatch from below L1 L2 25mm B1 B2 15mm Dicke der Decke Thickness of the ceiling Abgehängte Decke Suspended ceiling ...

Page 4: ...Seite 4 von 13 Kranaufhängung Crane rigging Ring Maulschlüssel SW24 wrench 24 mm Stahlluke in Deckenöffnung heben Lifting the steel hatch into its hole in the roof 1 2 ...

Page 5: ... the ceiling Wasserwaage Level Ø6 5 TX 30 7 5x92 TX30 Gliedermaßstab folding rule Zugstab gripping stick Rechtwinkligkeit vor dem Verschrauben prüfen D1 D2 Check squareness before screwing the hatch to the ceiling D1 D2 Luke öffnen Seite 7 Open the hatch Page 7 3 ...

Page 6: ...en Schrauben in die gebohrten Löcher schrauben 7 5x92 mm TX30 Screw the included screws into the drilled holes 7 5x92 mm TX30 Den Spalt zwischen Luke und Decke mit Brandschutzmörtel nach EN 998 2 Klasse M10 füllen Fill the gap between hatch and ceiling with fire protection mortar according to EN 998 2 class M10 Horizontalität prüfen Check for horizontality L2 1 50 m 10 Schrauben Screws L2 1 5 m 12...

Page 7: ...Seite 7 von 13 Luke Öffnen und Schließen How to Open and close the hatch Öffnen open 1 2 3 4 Schließe close 4 3 2 1 1 2 3 4 langsam slow ...

Page 8: ...Seite 8 von 13 Betrieb Wartung und Zubehör Use maintenance and accessories Roto 365 Tage days 365 Tage days ...

Page 9: ...rohres aufkleben Glue the rubber sealing 5 7 mm from the edge of the square tube Gummidichtung an alle vier Stahlprofile Kleben Glue rubber sealing on all four square tubes Die Ecken der Dichtungen wie folgt ausführen Install the seal in the edges like it is shown in the picture below Luke von unten Hatch from below ...

Page 10: ...raube am Schwenkarm A Scherentreppe 1 öffnen und auf Fußboden aufsetzten B Skt Mutter 8 beidseitig lösen C Stellschraube 7 drehen bis Schwenkarm 4 beidseitig aufliegt D Skt Mutter 8 beidseitig festziehen 1 Scherentreppe 2 Lukenkasten 3 Lukendeckel 4 Schwenkarm 5 Lagerbock 6 Zugfeder 7 Stellschraube M8 8 Skt Mutter M8 1 2 3 4 5 6 7 8 ...

Page 11: ...tzung Einbau nur bei Treppen ab 13 Stufen A Lukendeckel komplett öffnen und Scherentreppe 1 bis Anschlagbolzen 8 ausziehen und wenn möglich auf Fußboden aufsetzen Wenn nicht möglich Treppe über Fußboden schweben lassen und nicht belasten B Bei unbelasteter Treppe Skt Muttern 7 beidseitig lösen Lagerbock 5 auf C Schiene 6 soweit verschieben bis Treppe am Fußboden aufsteht und Anschlagbolzen 8 an Mi...

Page 12: ...rs stair 1 fully so that it touches the floor B Loosen the hex nut 8 on both sides C Turn Adjustment screw 7 on both sides till it touches the swivel arm 4 D Tighten hex nut 8 on both sides 1 scissors stair 2 Hatch box 3 Hatch cover 4 Swivel arm 5 Bearing block 6 Tensioning spring 7 Adjustment screw M8 8 Hex nut M8 1 2 3 4 5 6 7 8 ...

Page 13: ...d pull out the scissors stair 1 until it hits the stop bolt 8 if possible let the stair touch the ground If it is not possible let the stair hover above the ground but to not put any load on it B While the stair has no load on it loosen the hex nuts 7 and move the bearing block 5 on its C rail 6 until the stair touches the ground or the stop bolt 8 hits the end of the center support 4 C Tighten nu...

Reviews: