background image

15

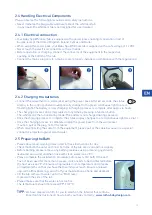
2.4 Handling Electrical Components

Please observe the following precautions and safety instructions:

• 

Never immerse the plug, cable and outer side of the whirlpool tub 

   in any liquid (the whirlpool tub is not designed for use in water).

2.4.1 Electrical connection

• Your Baby Spa Whirlpool tub is equipped with a power pack enabling its operation in all of

   Europe (except the United Kingdom, Ireland, Cyprus and Malta).

• 

When using this power pack, your Baby Spa Whirlpool tub is supplied with a safe voltage of 12 VDC.

• 

Never touch the electrical connectors with wet hands.

• Before operation or charging, connect the connector of the equipment in the respective

   opening at the bottom of the tub.

• 

Connect the mains plug only to a mains socket properly installed in compliance with the regulations!

2.4.2 Charging the batteries

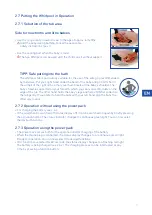
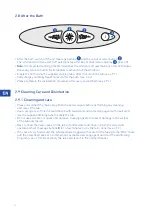
• Connect the equipment to a wall socket using the power pack. After 60 seconds, the status

   display in the control panel will automatically change from a green continuous light to a red 
   flashing light. The battery is now charging. A charging process is complete after approx. 6 hours.

• 

The charging process can be interrupted at any time by pressing a function button. 

   The whirlpool is then in operating mode. The battery is not charged during operation.

• 

Once the charging process is complete, the status display changes to a red continuous light (see 2.6.1).

• 

Once the charging process is complete, unplug the power pack from the wall socket 

   (Caution: pull at the plug, not at the cable).

• When disconnecting the cable from the equipment, please pull at the cable because it is a special    

   connector protected against splash water.

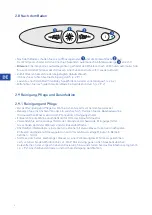
2.5 Preparing the Bath

• 

Please observe all warning notes listed in these Instructions for Use.

• 

Check that both the outer and inner bottoms of the tub are clean and not slippery.

• 

Before bathing, please remove any bathing residues using a cleaning agent with 

  neutral pH and water and then rinse with clean water (see 2.9.1).
• 

Please complete the disinfection procedure before every 3rd bath. If the bath 

   has not been used for more than 3 weeks, it also needs to be disinfected before 
   the next use (see 2.9.2). Ensure an agreeable room temperature and prepare 
   all needed items so that you have them within your reach. Ensure a relaxed
   and calm atmosphere (e.g. switch off your mobile phone, phone and doorbell).

• 

Fill the tub with warm water up to the “MAX” level 

   marked on the side of the tub.

• 

Please make sure that the water is not too hot. 

   The temperature should not exceed 99°F (37°C).

  TIPP:

 We have prepared a film for you to watch on the Internet that contains 

               important instructions on how to bath your baby correctly: 

www.rotho-babydesign.com

Summary of Contents for KOLLER 20306 0001 01

Page 1: ...TILISATION BABY SPA WHIRLPOOL 20306 0001 01 USER S MANUAL BABY SPA WHIRLPOOL 20306 0001 01 ISTRUZIONI PER L USO BABY SPA WHIRLPOOL 20306 0001 01 INSTRUCCIONES DE USO BABY SPA WHIRLPOOL 20306 0001 01 GEBRUIKSHANDLEIDING BABY SPA WHIRLPOOL 20306 0001 01 装配和操作手册 BABY SPA WHIRLPOOL 20306 0001 01 ...

Page 2: ...ischer Anschluss 2 4 2 Akku laden 2 5 Vorbereitung des Bades 2 6 Das Bedienfeld 2 6 1 Aktivierungstaste und Statusanzeige 2 6 2 Funktionstasten 2 7 Inbetriebnahme des Whirlpools 2 7 1 Auswahl des Wannenbereichs 2 7 2 Betrieb ohne Verwendung des Netzadapters 2 7 3 Betrieb unter Verwendung des Netzadapters 2 8 Nach dem Baden 2 9 Reinigung Pflege und Desinfektion 2 9 1 Reinigung und Pflege 2 9 2 Desi...

Page 3: ...icherheitshinweis Lesen Sie vor der ersten Inbetriebnahme diese Gebrauchsanleitung grundlich durch Befolgen Sie vor allen Dingen die Sicherheitshinweise Das Produkt darf nur so bedient werden wie in dieser Gebrauchsanleitung beschrieben Bewahren Sie diese Gebrauchsanleitung für spätere Informationen auf Falls Sie das Produkt einmal weitergeben legen Sie bitte diese Gebrauchsanleitung dazu Die Gebr...

Page 4: ...adapter und Kabel vor jeder Benutzung auf Schäden Ein beschädigtes Gerät darf nicht in Betrieb genommen werden Um Gefährdungen zu vermeiden reparieren Sie Gerät und Kabel nicht selbst sondern wenden Sie sich an die angegebenen Service Adressen auf der letzten Seite Verwenden Sie nur Original Zubehör 2 3 Sicheres Aufstellen Wählen Sie einen sicheren Ort um das Gerät auf einen ebenen waagerechten st...

Page 5: ...ach Beendigung des Ladevorgangs wechselt die Statusanzeige auf rotes Dauerlicht s 2 6 1 Nach Beendigung des Ladevorgangs den Netzadapter aus der Steckdose ziehen Achtung ziehen Sie hier am Stecker nicht am Kabel Um das Kabel aus dem Gerät zu ziehen ziehen Sie bitte vorsichtig am Kabel da es sich hier um eine spezielle Spritzwasser geschützte Steckverbindung handelt 2 5 Vorbereitung des Bades Beach...

Page 6: ...ge Gerät ist ausgeschaltet 2 6 2 Funktionstasten Hinweis Alle Funktionstasten können gleichzeitig oder separat benutzt werden Luftmassagetaste Links Ein und Ausschalten der Luftmassage Die Softdüsen auf der linken Seite des Whirlpools werden in Gang gesetzt bzw gestoppt Luftmassagetaste Rechts Ein und Ausschalten der Luftmassage Die Softdüsen auf der rechten Seite des Whirlpools werden in Gang ges...

Page 7: ...nt sowohl zum Betrieb als auch zum Laden des Akkus Wird der Netzstecker eingesteckt wechselt die Statusanzeige auf grünes Dauerlicht Betriebsbereitschaft Jetzt können Sie die gewünschten Funktionen wählen Erfolgt keine Funktionswahl so wechselt die Statusanzeige nach 60 Sekunden auf rotes Blinklicht Der Akku wird geladen s 2 4 2 Dieser Ladevorgang kann jederzeit durch die Betätigung einer Funktion...

Page 8: ...d Pflege der Wanne ziehen Sie bitte vorher den Netzstecker Benutzen Sie einen Schwamm oder ein weiches Tuch Reinigen Sie die Babybadewanne mit lauwarmen Wasser und einem PH neutralen Reinigungsmittel Entleeren Sie die Wanne anschließend mit Hilfe des Ablaufschlauches Verwenden Sie keine Lösungsmittel oder ätzende und scheuernde Reinigungsmittel Sie schaden damit der Wannen und der Düsenoberfläche A...

Page 9: ...ller Desinfektionsmittel in den Whirlpool Anschließend den Desinfektionsmodus aktivieren Desinfektionsmodus Beide Lufttasten gleichzeitig 3 Sekunden lang drücken Dieser Modus wird durch rotes Blinken des Farblichtes signalisiert In einem Zeitraum von 30 Minuten wird die Luftmassage automatisch im Wechsel betrieben Nach Beendigung der Desinfektion wechselt das Farblicht auf blaues Dauerlicht Durch ...

Page 10: ...meinden 6 Garantie Es gilt eine Garantie von 6 Monaten ab Kaufdatum Kassenbon bitte aufbewahren Innerhalb der Garantiezeit werden unentgeltlich Mängel an Gerät und Zubehör die auf Material oder Herstellungsfehlern beruhen durch Reparatur oder nach Ermessen des Herstellers durch Umtausch beseitigt Sowohl Defekte an Verbrauchszubehör bzw Verschleißteilen z B Akku als auch Reinigung Wartung oder der ...

Page 11: ...20 384 370 411 office jhradec cz rkoller com VERKAUFSBÜRO BENELUX und FRANKREICH KOLLER Benelux Tel 34 660 474 911 Fax 356 21 497 018 office france fr rkoller com office benelux nl rkoller com KOLLER SPANIEN Fine Austrian S L Polig Ind Mediterraneo Calle Mitjera Nº 15 Nave 7 46560 Massalfassar Valencia Spanien Tel 34 96 140 40 49 Fax 34 96 140 40 50 office spain es rkoller com KOLLER EMIRATES FZE P ...

Page 12: ...nection 2 4 2 Charging the batteries 2 5 Preparing the Bath 2 6 Control Panel 2 6 1 Activation button and status display 2 6 2 Function buttons 2 7 Putting the Whirlpool in Operation 2 7 1 Selection of the tub area 2 7 2 Operation without using the power pack 2 7 3 Operation using the power pack 2 8 After the Bath 2 9 Cleaning Care and Disinfection 2 9 1 Cleaning and care 2 9 2 Disinfection 3 Tech...

Page 13: ...er above the line shown Safety information Thoroughly read these user instructions prior to initial use Above all observe the safety information The device must always be used as described in these user instructions Keep these user instructions for information purposes If you pass the product on to someone else please include this copy of the user instructions The user instructions are a part of t...

Page 14: ...ect Function Before every use check the equipment power pack and cable for damage Do not put the equipment into operation if damaged To prevent danger do not attempt to repair the equipment and cable yourself refer to the service addresses listed on the last page Only use original accessories 2 3 Safe Positioning Choose a safe place and position the equipment on a flat horizontal and stable surface...

Page 15: ...ery is not charged during operation Once the charging process is complete the status display changes to a red continuous light see 2 6 1 Once the charging process is complete unplug the power pack from the wall socket Caution pull at the plug not at the cable When disconnecting the cable from the equipment please pull at the cable because it is a special connector protected against splash water 2 ...

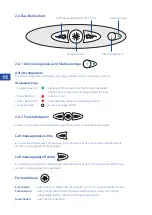
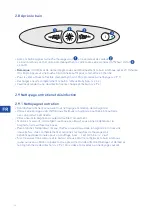
Page 16: ...tus display Colour selection button Activation button 2 6 2 Function buttons Note All function buttons can be used simultaneously or separately Left air massage button Switches the air massage on off The fine jets on the left side of the whirlpool tub will start stop operating Right air massage button Switches the air massage on off The fine jets on the right side of the whirlpool tub will start sto...

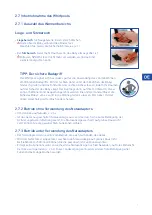
Page 17: ...eration and for charging of the battery When the mains plug is connected the status display changes to a continuous green light Ready for operation You can now select the desired functions If no function is selected for 60 seconds the status display changes to a flashing red light The battery is being charged see 2 4 2 The charging process can be interrupted at any time by pressing a function butto...

Page 18: ... Cleaning and care Please disconnect the mains plug from the power supply before performing any cleaning and care of the tub Use a sponge or soft cloth Clean the tub with tepid water and a cleaning agent with neutral pH Use the supplied draining tube to empty the tub Do not use solvents or caustic and abrasive cleaning agents to prevent damage to the surface of the tub and the jets Next connect th...

Page 19: ...AX indication Then add approximately 0 6 ounces 18 ml or 4 caps of Koller disinfectant in the whirlpool Activate the disinfection mode Disinfection mode Press both air buttons simultaneously and hold for 3 seconds This mode is indicated by red flashing of the colour light The air massage will automatically be run alternately for 30 minutes Once disinfection is complete the colour light changes to ...

Page 20: ...our country 6 Warranty The warranty is 6 months from the date of purchase please keep the receipt Within the warranty period any faults on the equipment and accessories1 caused by defects in material or workmanship will be remedied free of charge either by repair or replacement at the discretion of the manufacturer Any faults on the consumable accessories or wear parts e g the battery as well as t...

Page 21: ...e jhradec cz rkoller com SALES OFFICE BENELUX and FRANCE KOLLER Benelux Tel 34 660 474 911 Fax 356 21 497 018 office france fr rkoller com office benelux nl rkoller com KOLLER SPAIN Fine Austrian S L Polig Ind Mediterraneo Calle Mitjera Nº 15 Nave 7 46560 Massalfassar Valencia Spanien Tel 34 96 140 40 49 Fax 34 96 140 40 50 office spain es rkoller com KOLLER EMIRATES FZE P O BOX 329930 RAK FREE TR...

Page 22: ...4 2 Recharge de la batterie 2 5 Préparation du bain 2 6 Le tableau de commande 2 6 1 Touche d activation et afficheur d état 2 6 2 Touches de fonction 2 7 Mise en marche du bain à remous 2 7 1 Choix de l espace de la baignoire 2 7 2 Utilisation sans adaptateur réseau 2 7 3 Utilisation avec adaptateur réseau 2 8 Après le bain 2 9 Nettoyage entretien et désinfection 2 9 1 Nettoyage et entretien 2 9 ...

Page 23: ...respecter le remplissage d eau ne doit pas dépasser la ligne marquée Consignes de sécurité Lisez attentivement ce mode d emploi avant la première utilisation Respectez en priorité les consignes de sécurité Le produit ne doit être utilisé qu aux fins décrites dans ce mode d emploi Conservez le présent mode d emploi pour pouvoir le consulter par la suite Si vous transmettez le produit à un tiers n ou...

Page 24: ...lisation contrôlez toujours que l appareil l adaptateur réseau et le câble ne sont pas endommagés Ne jamais mettre en route un appareil endommagé Pour éviter tout risque d accident ne réparez jamais seul votre bain à remous ou son câble adressez vous aux SAV mentionnés en dernière page N utilisez que des accessoires d origine 2 3 Installation stable Choisissez un emplacement sûr et placez l appare...

Page 25: ... alors en mode marche Il ne se charge pas en cours de fonctionnement A l achèvement du cycle de charge l affichage d état passe au rouge fixe voir 2 6 1 Vous pouvez alors retirer l adaptateur réseau de la prise attention tirez sur la fiche et non pas sur le câble Lorsque vous retirez le câble de l appareil veuillez cette fois ci tirer sur le câble il s agit en effet d un raccord spécial protégé co...

Page 26: ...e Aucun affichage appareil éteint 2 6 2 Touches de fonction Remarque les touches de fonction s utilisent séparément ou simultanément Massage d air gauche Mise en marche et à l arrêt du massage d air Les buse douces situées sur le côté gauche du bain à remous se mettent en marche ou à l arrêt Massage d air droite Mise en marche et à l arrêt du massage d air Les buse douces situées sur le côté droit...

Page 27: ... adaptateur réseau L adaptateur réseau permet d utiliser la baignoire et de charger sa batterie Dès qu on branche la fiche d alimentation l afficheur d état passe au vert fixe La baignoire est prête à l utilisation Vous pouvez alors choisir la fonction souhaitée Si aucune fonction n est sélectionnée après 60 secondes l afficheur d état passe au rouge clignotant La batterie se recharge v 2 4 2 Le proc...

Page 28: ...ien Débranchez la fiche réseau avant tout nettoyage et entretien de la baignoire Utilisez une éponge ou un chiffon doux Nettoyez la baignoire pour bébé à l eau tiède avec un produit à pH neutre Videz ensuite la baignoire à l aide du flexible d écoulement N utilisez ni solvant ni détergent caustique ou abrasif sous peine de détériorer la baignoire ou la surface des buses Puis branchez l adaptateur rés...

Page 29: ... bouchons de Koller désinfectant dans le bain à remous Activez ensuite le mode désinfection Mode désinfection Effectuez un appui long simultané de 3 secondes sur les deux touches d air Ce mode est signalé par un clignotement rouge de l indicateur lumineux Pendant 30 minutes le massage par air se fera en alternance A l achèvement du cycle de désinfection l indicateur lumineux passe au bleu fixe Pour...

Page 30: ...hat veuillez conserver votre preuve d achat Dans le cadre de la période de garantie il sera remédié aux défaillances de l appareil et de ses accessoires dues à des défauts de matière ou de fabrication ou selon l appréciation du fabricant l appareil sera remplacé Les défauts apparus sur les accessoires de consommation ou les pièces d usure par ex la batterie le nettoyage l entretien ou le changemen...

Page 31: ...k Tel 420 384 370 410 Fax 420 384 370 411 office jhradec cz rkoller com BUREAU DE VENTE BENELUX et FRANCE KOLLER Benelux Tel 34 660 474 911 Fax 356 21 497 018 office france fr rkoller com office benelux nl rkoller com KOLLER ESPAGNE Fine Austrian S L Polig Ind Mediterraneo Calle Mitjera Nº 15 Nave 7 46560 Massalfassar Valencia Spanien Tel 34 96 140 40 49 Fax 34 96 140 40 50 office spain es rkoller c...

Page 32: ...lettriche 2 4 1 Collegamento elettrico 2 4 2 Caricamento della batteria 2 5 Preparazione del bagnetto 2 6 Il pannello di controllo 2 6 1 Tasto di attivazione e spia di indicazione 2 6 2 Tasti funzione 2 7 Messa in funzione dell idromassaggio 2 7 1 Come scegliere la zona corretta per la vaschetta 2 7 2 Funzionamento senza utilizzo dell adattatore di rete 2 7 3 Funzionamento con l utilizzo dell adat...

Page 33: ... per la prima volta leggere attentamente queste istruzioni per l uso Attenersi soprattutto alle istruzioni per la sicurezza È consentito usare il prodotto solo come descritto in queste istruzioni per l uso Custodire le presenti istruzioni per l uso per riferimento futuro Se si cede il prodotto a terzi consegnare anche queste istruzioni per l uso Le istruzioni per l uso sono parte integrante del pr...

Page 34: ... corretto Prima di ogni uso verificare che l apparecchio l adattatore di rete e il cavo non siano danneggiati Non mettere in funzione l apparecchio se è danneggiato Per evitare pericoli non riparare l apparecchio o il cavo da soli ma rivolgersi agli indirizzi dei centri assistenza riportati nell ultima pagina Utilizzare solo accessori originali 2 3 Installazione sicura Scegliere un posto sicuro e ...

Page 35: ... in modalità di esercizio Durante l esercizio il caricamento della batteria è sospeso Alla fine del processo di carica la luce rossa della spia resta fissa p 2 6 1 Alla fine del processo di carica rimuovere l adattatore di rete dalla presa elettrica tirare la spina non il cavo Quando si rimuove il cavo dall apparecchio tirare il cavo stesso perché in questo caso si tratta di una giunzione speciale...

Page 36: ... 2 Tasti funzione Nota Tutti i tasti funzione possono essere usati in contemporanea o separatamente Tasto massaggio aria sinistra Attivazione e disattivazione del massaggio con aria Gli ugelli delicati presenti sul lato sinistro della vaschetta idromassaggio iniziano o cessano di funzionare Tasti massaggio aria destra Attivazione e disattivazione del massaggio con aria Gli ugelli delicati presenti...

Page 37: ...er caricare la batteria Collegando la spina alla rete elettrica la spia di indicazione dello stato si accende emettendo una luce verde fissa Stato di pronto all uso A questo punto è possibile selezionare la funzione richiesta Se non viene selezionata nessuna funzione la spia di stato di carica comincia a lampeggiare con luce rossa dopo 60 secondi la batteria è sotto carica p 2 4 2 Il processo di ca...

Page 38: ... e manutenzione Prima di eseguire la pulizia e la manutenzione della vaschetta estrarre la spina dalla presa elettrica Utilizzare una spugna o un panno morbido Lavare la vaschetta con acqua tiepida e un detergente con pH neutro Svuotare infine la vaschetta utilizzando il tubo di scarico Non utilizzare solventi o detergenti caustici o abrasivi potrebbero danneggiare la superficie della vaschetta e de...

Page 39: ...lla vaschetta idromassaggio circa 18 ml 0 6 once ovvero 4 tappi di Koller disinfettante A questo punto attivare la modalità di disinfezione Modalità di disinfezione Premere contemporaneamente per 3 secondi entrambi i pulsanti dell aria Questa modalità viene segnalata da una luce rossa lampeggiante Per 30 minuti viene eseguito automaticamente ed alternativamente il massaggio ad aria Alla fine della...

Page 40: ...garanzia vale 6 mesi dalla data di acquisto conservare la ricevuta Nell ambito del periodo di garanzia i guasti dell apparecchio e degli accessori causati da difetti dei materiali o di produzione saranno eliminati gratuitamente mediante riparazione o sostituzione secondo il giudizio del produttore La garanzia non offre assistenza per problemi provocati da accessori o componenti usurabili per es ba...

Page 41: ...20 384 370 411 office jhradec cz rkoller com UFFICIO COMMERCIALE BENELUX e FRANCIA KOLLER Benelux Tel 34 660 474 911 Fax 356 21 497 018 office france fr rkoller com office benelux nl rkoller com KOLLER SPAGNA Fine Austrian S L Polig Ind Mediterraneo Calle Mitjera Nº 15 Nave 7 46560 Massalfassar Valencia Spanien Tel 34 96 140 40 49 Fax 34 96 140 40 50 office spain es rkoller com KOLLER EMIRATES FZE P...

Page 42: ...cumulador 2 5 Preparación de un baño 2 6 Panel de control 2 6 1 Tecla de activación e indicación de estado 2 6 2 Teclas de función 2 7 Puesta en funcionamiento de la bañera de hidromasaje 2 7 1 Selección de la zona de la bañera 2 7 2 Funcionamiento sin utilizar el adaptador de red 2 7 3 Funcionamiento utilizando el adaptador de red 2 8 Después del baño 2 9 Limpieza mantenimiento y desinfección 2 9...

Page 43: ...e uso detenidamente Siga sobre todo las indicaciones de seguridad El producto debe utilizarse exclusivamente de la manera descrita en estas instrucciones de uso Conserve estas instrucciones de uso como información de consulta para el futuro En caso de que entregue este producto a otras personas adjunte las instrucciones de uso Las instrucciones de uso forman parte del producto No utilice la bañera...

Page 44: ...Asegurar la capacidad de funcionamiento Siempre antes usarlo verifique que el aparato el adaptador de red y el cable no estén dañados Un aparato dañado no debe ponerse en funcionamiento Para prevenir riesgos no repare el aparato o cable por sí mismo sino diríjase a las direcciones de servicio indicadas en la última página Utilice únicamente accesorios originales 2 3 Instalación segura Elija un luga...

Page 45: ...o no se realiza ninguna carga Después de terminar el proceso de carga la indicación de estado cambia a una luz roja continua ver 2 6 1 Después de terminar el proceso de carga saque el adaptador de red de la toma de corriente Atención tire de la clavija de enchufe no tire del cable Para sacar el cable del aparato tire del cable ya que se trata de una conexión de enchufe especial protegida contra sa...

Page 46: ...tá apagado 2 6 2 Teclas de función Nota Todas las teclas de función pueden usarse simultáneamente o en forma separada Tecla para masaje por aire Izquierda Activación y desactivación del masaje por aire Las toberas suaves en la parte izquierda de la bañera de hidromasaje empiezan a trabajar o dejan de trabajar Tecla para masaje por aire Derecha Activación y desactivación del masaje por aire Las tob...

Page 47: ...irve tanto para el funcionamiento como para cargar el acumulador Al conectar la clavija de red la indicación de estado cambia a luz verde continua Disponibilidad para funcionar Ahora es posible seleccionar las funciones deseadas Si no selecciona ninguna función la indicación de estado cambia a luz roja parpadeante después de 60 segundos El acumulador está cargándose ver 2 4 2 Es posible interrumpi...

Page 48: ...enimiento y desinfección 2 9 1 Limpieza y mantenimiento Antes de limpiar y mantener la bañera debe sacar primeramente la clavija de red del enchufe Use una esponja o un paño suave Limpie la bañera de bebé usando agua tibia y un producto de limpieza con pH neutro Vacíe a continuación la bañera mediante la manguera de desagüe No use disolventes o productos de limpieza corrosivos o abrasivos Podrían ...

Page 49: ...o sea 4 tapas del producto Koller desinfectante en la bañera de hidromasaje A continuación active el modo de desinfección Modo de desinfección Apriete ambas teclas de aire al mismo tiempo por 3 segundos Este modo es señalizado por un parpadeo rojo de la luz de colores Durante 30 minutos será realizado el masaje por aire automáticamente en forma alternada Después de terminar la desinfección la luz ...

Page 50: ...ís 6 Garantía La garantía es vigente durante 6 meses a partir de la fecha de compra conserve el recibo de compra Durante el periodo de garantía los defectos del aparato y accesorios causados por materiales defec tuosos o de fabricación serán eliminados gratuitamente por medio de reparación o cambio según la estimación del fabricante La garantía no cubre defectos en accesorios consumibles o bien en...

Page 51: ... Tel 420 384 370 410 Fax 420 384 370 411 office jhradec cz rkoller com OFICINA DE VENTAS BENELUX y FRANCIA KOLLER Benelux Tel 34 660 474 911 Fax 356 21 497 018 office france fr rkoller com office benelux nl rkoller com KOLLER ESPAÑA Fine Austrian S L Polig Ind Mediterraneo Calle Mitjera Nº 15 Nave 7 46560 Massalfassar Valencia Spanien Tel 34 96 140 40 49 Fax 34 96 140 40 50 office spain es rkoller c...

Page 52: ...4 2 Opladen van de accu 2 5 Voorbereiding van het bad 2 6 Het bedieningspaneel 2 6 1 Activeringsknop en statusindicator 2 6 2 Functieknoppen 2 7 Ingebruikneming van het bubbelbadje 2 7 1 Bepaling van lig of zitgebied van het badje 2 7 2 Werking zonder gebruik van de netstroomadapter 2 7 3 Werking met gebruik van de netstroomadapter 2 8 Na het bad 2 9 Reiniging onderhoud en desinfectie 2 9 1 Reinig...

Page 53: ...r de eerste ingebruikname deze gebruiksaanwijzing aandachtig door Neem altijd de veiligheidsinstructies in acht Het product mag alleen bediend worden zoals in deze gebruiksaanwijzing wordt beschreven Bewaar deze gebruiksaanwijzing voor latere raadpleging In het geval u het product doorgeeft voegt u dan deze gebruiksaanwijzing bij De gebruiksaanwijzing is een onderdeel van het product Gebruik het b...

Page 54: ...raken 2 2 Vrijwaren van de functionaliteit Controleer telkens vóór gebruik apparaat netstroomadapter en kabel op beschadigingen Een beschadigd apparaat mag niet gebruikt worden Om ongevallen te vermijden mag u het apparaat en de kabel niet zelf repareren Richt u tot de service adressen die vermeld zijn op de laatste bladzijde Gebruik alleen originele toebehoren 2 3 Sicheres Aufstellen Kies een vei...

Page 55: ...fsmodus Tijdens de werking volgt ergeen oplading Na beëindiging van het laadproces gaat de statusindicator over naar rood ononderbroken licht s 2 6 1 Na beëindiging van het laadproces de netstroomadapter uit de stekkerdoos trekken attentie trek aan de stekker niet aan de kabel Om de kabel uit het apparaat te trekken trekt u aan de kabel omdat het hier om een speciale tegen spatwater beschermde ste...

Page 56: ...raat is uitgeschakeld 2 6 2 Functieknoppen Opmerking alle functieknoppen kunnen gelijktijdig of afzonderlijk gebruikt worden Bubbelmassageknop links In en uitschakelen van de luchtbellen De fijne luchtjets aan de linkerzijde van het bubbelbadje beginnen te resp stoppen met functioneren Bubbelmassageknop rechts In en uitschakelen van de luchtbellen De fijne luchtjets aan de rechterzijde van het bubbe...

Page 57: ... zowel voor de werking als voor het opladen van de accu Wordt de netstroomstekker ingestoken dan gaat de statusindicator over naar groen ononderbroken licht Gebruiksgereedheid Nu kunt u de gewenste functies kiezen Volgt er geen functiekeuze dan gaat de statusindicator na 60 seconden over naar rood knipperlicht Accu wordt opgeladen zie 2 4 2 Dit laadproces kan te allen tijde voortijdig beëindigd wo...

Page 58: ...netstroomstekker uit de stekkerdoos te trekken Gebruik een spons of een zachte doek Maak het badje schoon met lauw water en een reinigingsmiddel met een neutrale pH waarde Ledig het badje vervolgens met behulp van de afvoerslang Gebruik geen oplosmiddelen of bijtende en schurende reinigingsmiddelen Die zouden het oppervlak van het badje en de luchtjets kunnen beschadigen Sluit daarna de netstrooma...

Page 59: ...aan het bubbelbadje toe Activeer vervolgens het desinfectieprogramma Desinfectiemodus Druk tegelijkertijd 3 seconden lang op de beide drukknoppen voor de lucht Dit programma wordt gesignaleerd door het rode geknipper van het gekleurde licht 30 minuten lang wordt er automatisch afwisselend een bubbelmassage toegepast Na beëindiging van de desinfectieschakelt het gekleurde licht over naar blauw cons...

Page 60: ... kader van de garantieperiode zullen gebreken aan het apparaat en de toebehoren veroorzaakt door materiaalgebreken of de productie gratis worden verholpen door reparatie of vervanging en dit al naargelang de beoordeling van de fabrikant Gebreken aan verbruikstoebehoren resp aan onderdelen die aan slijtage onderhevig zijn bijv de accu evenals reiniging onderhoud of vervanging van aan slijtage onder...

Page 61: ... 384 370 410 Fax 420 384 370 411 office jhradec cz rkoller com VERKOOPKANTOOR BENELUX en FRANKRIJK KOLLER Benelux Tel 34 660 474 911 Fax 356 21 497 018 office france fr rkoller com office benelux nl rkoller com KOLLER SPANJE Fine Austrian S L Polig Ind Mediterraneo Calle Mitjera Nº 15 Nave 7 46560 Massalfassar Valencia Spanien Tel 34 96 140 40 49 Fax 34 96 140 40 50 office spain es rkoller com KOLLE...

Page 62: ...62 63 64 64 64 64 64 64 65 65 65 65 66 66 66 67 67 67 67 68 68 68 69 70 70 70 70 71 82 ...

Page 63: ...63 ...

Page 64: ...64 ...

Page 65: ...65 ﺒﺘﻤﺮﻴﺮ ...

Page 66: ...66 ...

Page 67: ...67 ...

Page 68: ...68 ...

Page 69: ...69 ...

Page 70: ...70 ﺍﻟﻤﺨﺘﺼﺔ ﻮﺍﻟﺒﻠﺪﻴﺎﺖ ﺒﺎﻟﻬﻴﺌﺎﺖ ...

Page 71: ...uan Koller Sanitary Co Ltd Qinxiyang Industrial Zone Fuan Fujian China P C 355000 ﺍﻟﻬﺎﺗﻒ 86 593 6398423 ﺍﻟﻔﺎﻛﺲ 86 593 6396633 ﺍﻻﺗﺼﺎﻝ ﺟﻬﺔ ﺑﻴﻨﻎ ﺷﻴﺎﻭ ﻫﻮﺍﻧﻎ ﺍﻟﺴﻴﺪ ﺍﻟﺠﻮﺍﻝ ﺭﻗﻢ 86 134 59307091 ﺟﻴﺎﻤﻧﻦﻴ ﻱﻝ ﺍﻟﺠﻮﺍﻝ ﺭﻗﻢ 86 138 60320157 ...

Page 72: ... 2 1 2 消毒 74 2 2 防止误操作 74 2 3 安全安装 74 2 4 电子元器件的操作 75 2 4 1 电气连接 75 2 4 2 电池充电 75 2 5 浴缸开机前准备工作 75 2 6 控制面板 76 2 6 1 启动按钮和工作状态显示 76 2 6 2 功能键 76 2 7 浴缸的调试 77 2 7 1 浴缸安放位置的选择 77 2 7 2 未使用电源适配器时相应的操作方法 77 2 7 3 使用电源适配器时相应的操作方法 77 2 8 沐浴后 78 2 9 清洁 护理和消毒 78 2 9 1 清洁和护理 78 2 9 2 消毒 79 3 技术参数 80 4 存储与存放 80 5 废弃处理 80 6 保修 80 7 CE 一致性声明和检验证书 81 8 服务地址 82 ...

Page 73: ...不能无人看管 如果您需要离开房间 请和您的孩子一起 离开 烫伤危险 沐浴前必须检查水温是否合适 最高 37 C 让孩子远离出水口 沐浴前 应先检查产品是否安全 功能是否完好 如果产品存在缺陷 零件缺失或松动 则切勿使用 有受伤危险 仅可使用由 Rotho Babydesign 生产的原装备件 身体 感官或精神伤残人士或缺乏相关知识的人 如儿童 切勿使用或操作本产品 若产品配备了带锁定装置的脚轮 轮子 在使用过程中必须将其锁定 本系列宝宝水疗按摩浴缸仅可与浴缸架 产品号 20306 0001 01 和产品号 20097 0022 一起使用 仅当您孩子能独立坐立时 才能使用本系列宝宝水疗按摩浴缸 每次注水时 请注满至最高水位线 安全警告 产品首次使用前 请先仔细阅读本手册 必须遵守安全须知 仅可按照本用户手册中的说明操作本产品 请保管好本手册以备不时之需 当您将本系列产品交给他人使用时 请同时...

Page 74: ...进行消毒和清洁 在消毒过程中 切勿让孩子沐浴 在消毒过程中必须让孩子远离水疗浴缸 为避免喷嘴堵塞 不得使用沐浴添加剂 2 2 防止误操作 每次使用前必须检查设备 电源适配器和电缆是否发生损坏 损坏的设备切勿使用 为了规避风险 如有故障 必须联系尾页所列服务地址进行维修 切勿擅自维修设备和电缆 仅可使用原装配件 2 3 安全安装 选择安全位置 将设备放置于水平 平整 稳定的表面上 切勿将水疗浴缸置于倾斜的表面上 仅可将按摩浴缸置于配套的浴缸架 产品号 20097 0022 上 确保支架的滚轮已锁定 浴缸应远离家用配电箱 并与电源插座保持至少 60cm 24 英寸 的距离 浴缸必须远离热源 本系列浴缸是电气设备 为防止对家中其他孩子构成危险 必须确保设备电缆不会低垂 并且必 须置于儿童无法触碰到的位置 ...

Page 75: ...6 小时后充电完成 按下相应的功能键可随时中止充电 然后水疗浴缸处于运行模式 浴缸运行时不会充电 充电完成后 状态指示灯变为红色长亮 参见第 2 6 1 节 充电后 将电源适配器从插座上拔下 注意 拔出时请握住插头本身 切勿握住电缆线 从设备上拔出电缆时 由于本设备采用专用防喷溅插入式连接 因此必须小心地拔出电缆 2 5 浴缸开机前准备工作 请遵守本手册所述所有警告 检查浴缸内部底面和外部底面是否干净且防滑 如有必要 可使用 PH 值为中性的清洁剂或水来清除浴缸里的残留物 然后用清水冲洗 参见第 2 9 1 节 每当第 3 次沐浴前 应进行一次消毒 如果浴缸超过 3 周没有使用 应 先进行消毒 然后才可再次投入使用 参见第 2 9 2 节 沐浴前请调节 到舒适的室温 并在手头准备好您所需的各种器具物品 沐浴环境应安 静 休闲 例如避免手机 电话 门铃等干扰 在宝宝浴缸中加入温水至浴缸侧面标...

Page 76: ...并会指示出操作步骤 指示灯红色闪烁 充电中 参见第 2 4 2 节 指示灯红色长亮 充电完毕 电池充满电 无显示 设备已关闭 2 6 控制面板 空气按摩按钮 左 右 状态显示 颜色选择按钮 启动 按钮 2 6 2 功能键 注 所有功能键可同时使用或单独使用 空气按摩按钮 左 开启 关闭空气按摩功能 水疗浴缸左侧的软喷嘴启动 停止 空气按摩按钮 右 开启 关闭空气按摩功能 水疗浴缸右侧的软喷嘴启动 停止 颜色选择按钮 开启 快速按下 开始 7 种颜色的交替循环 颜色选择 通过长按颜色选择按钮 可以选择 7 种颜色中的一种 然后长亮显示 关闭 快速按下该按钮 ...

Page 77: ...备已关闭 状态指示灯关闭 则通过短按激活按钮激活本设备 状态指示灯变为绿色长 亮 现在您可以选择所需的功能 2 7 3 使用电源适配器时相应的操作方法 电池工作及充电时均需使用电源适配器 如果插入电源插头 状态指示灯将变为绿色长亮准备就绪 现在您可以选择所需的功能 如果未选择任何功能 状态指示灯在 60 秒后变为红色闪烁 电池正在充电 参见第 2 4 2 节 按下相应的功能键可随时中止充电 提示 安全型浴缸把手 本系列水疗浴缸所采用的浴缸把手是助产士推荐的理想之选 当您给宝宝沐 浴时 请用右手托住宝宝后脑勺 同时托住宝宝右腋下方 右手大拇指放在 宝宝的肩膀上 使宝宝的头部枕靠在您前臂上 这样就易于使宝宝的头部与 浴缸边缘保持少许距离 另一只手从宝宝的脚上方抓住 然后轻轻地将宝宝 滑入浴缸 如果您喜欢用左手握住 您仅需左右反过来即可 ...

Page 78: ...第 2 9 1 节 沐浴后 请给您的宝宝水疗按摩浴缸充满电 参见第 2 4 2 节 每当用浴缸进行两次沐浴后 都要进行消毒 参见第 2 9 2 节 2 9 清洁 护理和消毒 2 9 1 清洁和护理 清洁和保养浴缸时 请先拔出电源插头 使用海绵或软布进行清洁 使用温水和 PH 值呈中性的洗涤剂清洁宝宝浴缸 然后使用排水软管排干浴缸中的水 切勿使用溶剂或腐蚀性及研磨性清洁剂 因为其会损坏浴缸和喷嘴表面 然后插入电源适配器 浴缸中注入少量水并冲洗 排空浴缸 并使用两个空气按摩按钮吹干几分 钟 直至清洁完成 如果钙质水导致水疗浴缸中心钙化 请将水疗浴缸注水至 MAX 最高水位 刻度 然后按规 定剂量添加家用石灰除垢剂并启动消毒程序进行操作 参见第 2 9 2 节 然后清空 并执行正常 清洁步骤 ...

Page 79: ...消毒 如果浴缸超过 3 周没有使 用 应先进行消毒 然后才可再次投入使用 在宝宝浴缸中注水 直至水位高出 MAX 最高水位 刻度 5cm 2 英寸 然后在水疗浴缸中加入约 18ml 0 6 盎司或 4 瓶 盖 Koller 消毒剂 然后激活消毒模式 消毒模式 同时按下两个供气按钮 3 秒钟 在该模式下 指示灯为红色闪烁 空气按摩功能即会自动交替操作 持续 30 分钟 消毒完成后 指示灯变为蓝色长亮 按下指示灯按钮 确认消毒完成并关闭指示灯 消毒模式不可取消 完成消毒模式相应操作后 可将浴缸中的水通过浴室排水管排空 在此 请使用排水软管 接着必须进行清洁 参见第 2 9 1 节 以清除消毒剂的任何残留物 ...

Page 80: ...10 至 40 C 50 104 F 4 存储与存放 将设备存放于水平位置 环境温度不得低于 0 C 32 F 或高于 50 C 122 F 5 废弃处理 本设备中包含电子元件和蓄电池 废弃处理时 切勿将其与生活垃圾一起进行废弃处理 而应使用 专用的废弃处理设备 如有疑问 请咨询当地有关部门和政府机关 6 保修 本产品自购买之日起提供 6 个月保修期 请保留购买收据 在保修期内 因为材料或制造不良导致 的设备和附件的缺陷 可由本公司维修部门免费维修 或由制造商自行决定免费更换 耗件或易损件 如电池 的缺陷以及清洁 保养或易损件的更换不包含在保修范围内 因此需要收 费 保修后保修期仍保持不变 也不会因此而增加新的保修项 保修单即是购买凭证 未提供此凭证时无法申请免费保修 如果保修被受理 请将原包装中的完整设备与收据一起寄送经销商 对设备的任何擅自改动即表示保修期过期 配件损坏不足以成为免费更...

Page 81: ...KOLLER 比荷卢经济联盟 与法国销售办事处 KOLLER Benelux 电话 34 660 474 911 传真 356 21 497 018 office france fr rkoller com office benelux nl rkoller com KOLLER 西班牙分公司 Fine Austrian S L Polig Ind Mediterraneo Calle Mitjera N 15 Nave 7 46560 Massalfassar 西班牙 瓦伦西亚 电话 34 96 140 40 49 传真 34 96 140 40 50 office spain es rkoller com KOLLER EMIRATES FZE P O BOX 329930 RAK FREE TRADE ZONE RAS AL KHAIMAH 阿联酋 电话 971 7 204 15 6...

Page 82: ...82 ...

Page 83: ...83 ...

Page 84: ...rotho babydesign com whirl rkoller com ...

Reviews: