background image

4. User’s 

manual  

Note

If any part is missing, please contact your dealer for a replacement 

immediately. 


BEFORE YOU BEGIN 


y

  Keep this installation guide for future reference! It contains Important 

Troubleshooting Information. 

y

  Keep your old PS/2 mouse as a back-up device. 


PRODUCT INSTALLATION 

Step 1. Hardware Installation (Connecting the USB cradle receive) 

1. Turn off your computer 

2. Disconnect the current mouse 

3. Plug the adapter into the receiver 

4. Plug the USB connector (receiver) into USB port (computer). 

5. Turn the computer on   


a.

  USB is a PnP device; you can plug the device no matter the computer is 

on or off. Of course, you can remove USB device in the same way.   

b.

  If the device is HD or pen drive or any device which can store files, stop 

the device than remove is the best way to protect the files. 

c.

  The suggestion Is turn off the computer first. 


Step 2. Waiting for software install

1. If your system is Windows ME/ 2000/ XP, windows will find a new device 

and install standard driver automatically. 

2. The standard software only support standard functions and will not 

support special functions of the mouse. 


Summary of Contents for DL-2090H

Page 1: ...ve to reach y Adjust your chair and keyboard so your upper arms and wrists are straight y Avoid resting your wrists on sharp edges SYSTEM REQUIREMENT y Mouse is compatible with standard Microsoft mode...

Page 2: ...R can be increased to 1 200 easily The accuracy is also much better than LED mouse Build in Li polymer battery By well power management makes the long standby time Charging in short time can provide t...

Page 3: ...g the USB connector receiver into USB port computer 5 Turn the computer on a USB is a PnP device you can plug the device no matter the computer is on or off Of course you can remove USB device in the...

Page 4: ...e wireless mouse you must ensure that the same channel ID are set for the mouse and its receiver Please follow the steps as below to set up 1 Establish communication between the receiver and the mouse...

Page 5: ...ut the mouse on the receiver charger to re chargeable batteries as soon as possible Operations on power saving mode In order to conserve battery power the mouse is designed to reduce power consumption...

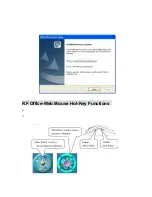
Page 6: ...e to press any button to wake up the mouse for normal operation Installing the Software To install the software please follow the steps below to finish 1 Insert the Auto Run CD ROM onto CD ROM driver...

Page 7: ...hot keys and wheel scrolling functions RF Office Web Mouse Hot Key Functions When you install the driver the hot keys will be enable with driver default The Office Wheel Function is attached on the mo...

Page 8: ...erties display go to the button assignments area and choose from the available options to set up your mouse y lick the down arrow to view the list of functions Use the scroll bar to see other function...

Page 9: ...ttons y Multimedia Office Web function keys design y Multi channel with 256 ID selections per channel for your mouse options to prevent interruption y 7 buttons design with scrolling wheel y Ergonomic...

Page 10: ...ucing Interference with Other Wireless Devices y Reducing Interference with Other Wireless Devices All 27MHz radio based devices are subject to interference from other 27MHz radio based devices such a...

Page 11: ...operly after installation Make sure you have connected the receiver correctly For optimal performance place the receiver at least 8 inches or 20 centimeters away from other electrical devices such as...

Page 12: ...generates uses and can radiate radio frequency energy and if not installed and used in accordance with the instructions may cause harmful interference to radio communications However there is no guara...

Page 13: ...equipment complies with FCC RF radiation exposure limits set forth for an uncontrolled environment To maintain compliance with FCC RF exposure compliance requirements please avoid direct contact to th...

Reviews: