background image

NAIL GUN

8

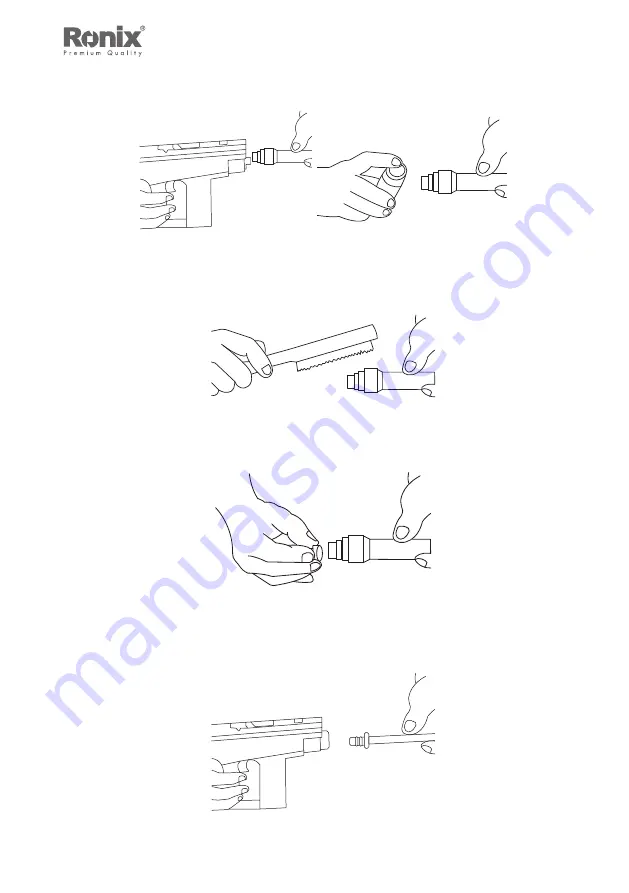
5- Disassemble the Guide Assy.

Clean the outside of the Guide Assy With the brush and spray.

6- Check the Stop Ring for breakage, dents or cracks and replace it if 
necessary. You can pull out the Stop Ring for replacing it.

- If the Stop Ring is intact just clean it.
7- Pull out the piston from cylinder.

Summary of Contents for RH-0450

Page 1: ...NAIL GUN RH 0450...

Page 2: ...ener Length Range 12 72 mm Fastener Types NK ENK TB Max Plate Thickness 4 mm Weight 3 2 Kg Accessories Safety Glasses WD 40 Lubricating Spray Cleansing Cloth Big Round Brush Flat Brush Rod 5 stop ring...

Page 3: ...for assistance 2 Alwaysusethetoolstrictlyinaccordancewiththeoperating instructions 3 Never point the tool at yourself or any other bystander 4 Never press the muzzle of the tool against your hand or...

Page 4: ...s transported to the next cartridge Use up the remaining cartridges on the strip Remove the used cartridge strip and dispose of it in such a way that it can be neither reused nor misused 15 Never atte...

Page 5: ...itions fastener correctly in guide Return grip pivot cocking lever back to original position 4 Insert cartridge magazine in base of grip CAUTION Do not insert magazine until fastener has been loaded I...

Page 6: ...be released 2 Put your thumb behind the cocking lever and push forward Mean while separate the end of the lever from the grip 3 Then rotate the lever clock counter wise to make it open and released 4...

Page 7: ...tside of the Guide Assy With the brush and spray 6 Check the Stop Ring for breakage dents or cracks and replace it if necessary You can pull out the Stop Ring for replacing it If the Stop Ring is inta...

Page 8: ...USER MANUAL 9 Clean the piston with spray and the flat brush 8 Now disassemble the cylinder from its own place Clean the outside of cylinder carefully with the spray and brushes...

Page 9: ...d spray carefully 10 Follow the upper mentioned steps from end to beginning in order to assemble the gun again Please don t forget that all sprayed and brushed parts must be cleaned with a soft cloth...

Page 10: ......

Page 11: ......

Reviews: