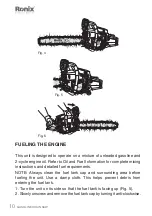


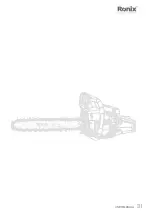


GASOLINE CHAIN SAW
24
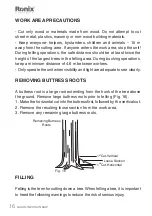
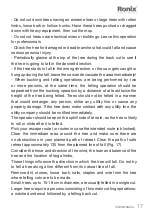
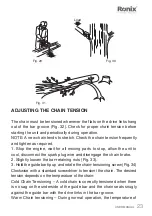
the chain will increase. The drive links of a correctly tensioned warm
chain will hang approximately 1.3 mm out of the bar groove (Fig. 35).
4. Once adjusted, lift the tip of the guide bar up to check for proper
tension (Fig. 36). If the chain is still too loose, release the tip of the guide
bar and turn the chain- tensioning screw ½ turn clockwise. Repeat this
process until the desired tension is achieved.
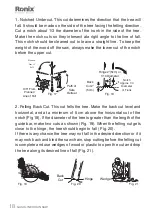
NOTE: if the chain is too tight, it will not rotate. To loosen the chain,
turn the chain-tensioning screw ¼ turn counterclockwise. Ensure that
the chain can be turned by hand without binding (Fig. 37). Also note the
chain will not rotate if the chain brake is engaged.
5. Hold the tip of the guide bar up and securely tighten the bar- retaining nuts.
REMOVING/REPLACING THE GUIDE BAR AND CHAIN
Use only a low- kickback saw chian that has met kickback performance
per ANSI B 175.1 for this saw. This fast-cutting chain provides kickback
reduction when properly maintained.
NOTE: When replacing the guide bar and chain, use only manufacturer
suggested replacement parts. The use of any other parts may create a
hazard or cause product damage and will VOID the warrenty.
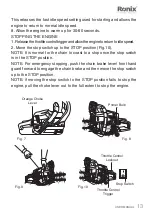
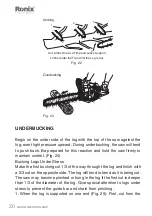
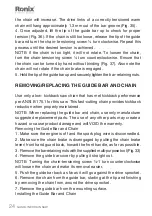
Removing the Guide Bar and Chain
1. Make sure the engine is off and the spark plug wire is disconnedted.
2. Make sure the chain brake is disengaged by pulling the chain brake
lever/ front hand guard back, toward the front handle, as far as possible.
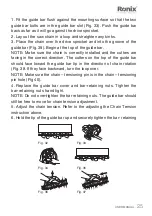
3. Remove the bar-retaining nuts with the supplied multi-purpose tool (Fig. 33)
4. Remove the guide bar cover by pulling it straight out.
NOTE: Turning the chain-tensioning screw ½-1 turn counterclockwise
will loosen the chain and make its removal easier.
5. Push the guide bar back as far as it will go against the drive sprocket.
6. Remove the chain from the guide bar, starting at the tip and finishing
by removing the chain from around the drive sprocket.
7. Remove the guide bar from the mounting surface.
Installing the Guide Bar and Chain


