background image

6

Using the SH-101 Model Expansion

Selecting a Tone

1 . 

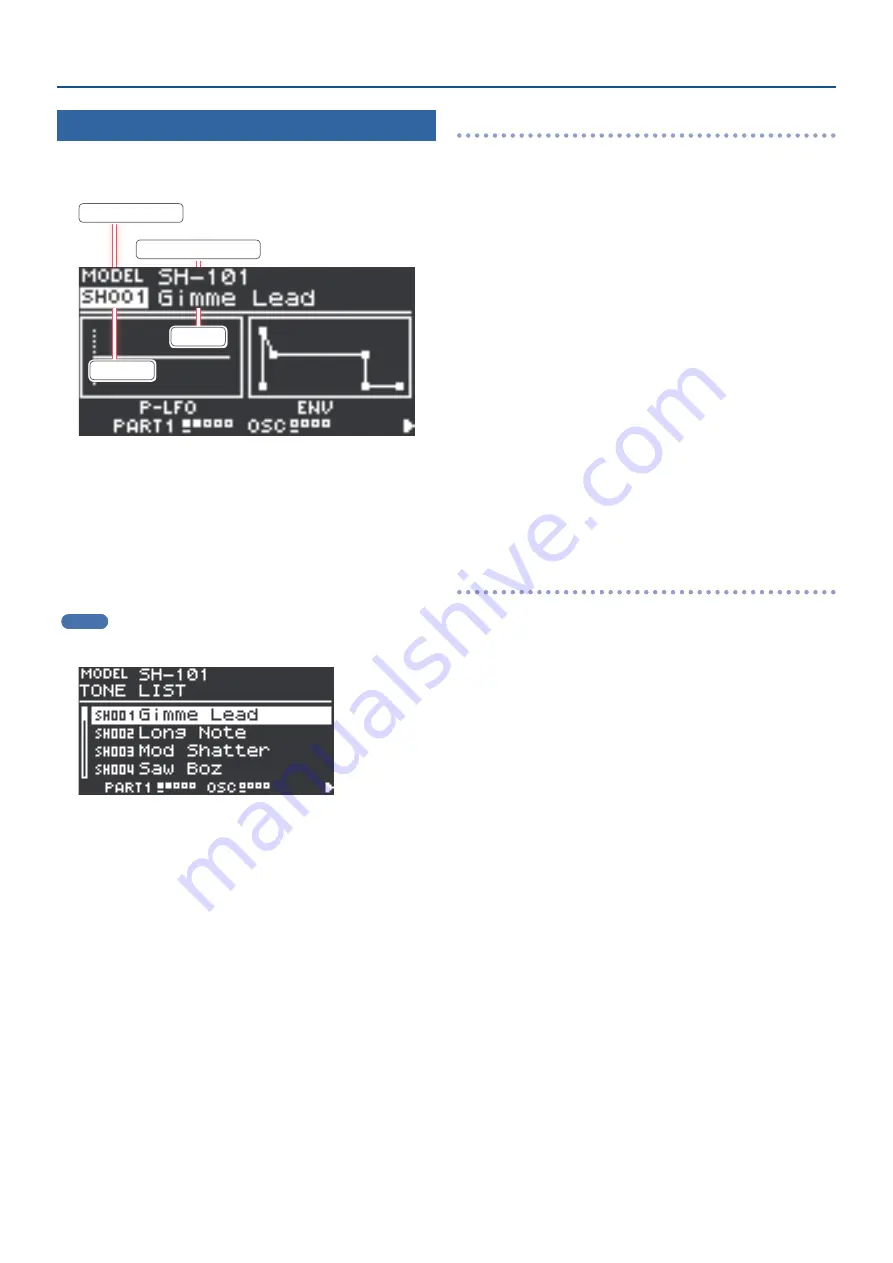
Press the [MODEL BANK] button.

The MODEL BANK top screen appears.

Model/category

Model name/category name

Tone number

Tone name

2 . 

Use the [

Ç

SELECT

É

] knob to move the cursor to the 

model name/category name.

3 . 

Use the [- VALUE +] knob to select “SH-101”.

4 . 

Use the [

Ç

SELECT

É

] knob to move the cursor to the 

tone number.

5 . 

Use the [- VALUE +] knob to select the tone.

MEMO

Move the cursor to the model name/category name or the tone 

number and press the [ENTER] (INIT) button. The tone list appears.

6 . 

Press the [ENTER] (INIT) button to select the tone.

Registering the SH-101 to a model bank

1 . 

Hold down the [MODEL BANK] button and press a 

model bank button ([1]–[16]).

2 . 

Use the [

Ç

SELECT

É

] knob to move the cursor to 

“Attr”.

3 . 

Use the [- VALUE +] knob to select “MODEL”.

4 . 

Use the [

Ç

SELECT

É

] knob to select where to 

register the SH-101.

5 . 

Use the [- VALUE +] knob to select “SH-101”.

6 . 

If you want to save the setting, execute the System 

Write operation.

6-1 . 

Hold down the [SHIFT] button and press the [MENU] (WRITE) 

button.

The WRITE MENU screen appears.

6-2 . 

Use the [

Ç

SELECT

É

] knob to select “SYSTEM”, and then press 

the [ENTER] (INIT) button.

6-3 . 

To execute, press the [ENTER] (INIT) button.

Selecting a SH-101 tone using the model bank

1 . 

Press the [MODEL BANK] button.

The MODEL BANK top screen appears.
Use the [1]–[16] buttons to switch to tone select mode.

2 . 

Select the model bank where you registered the 

SH-101 by pressing one of the [1]–[16] buttons.

The tones for the SH-101 are shown.
You can use the [- VALUE +] knob to select a tone on this screen as 

well.

3 . 

Press the [ENTER] (INIT) button.

A list of tones is shown.

4 . 

Use the [- VALUE +] knob to select the tone.

You can use the [

Ç

SELECT

É

] knob to select the tone quickly.

5 . 

Press the [ENTER] button.

The tone is now selected.

Summary of Contents for SH-101

Page 1: ...Roland Cloud SH 101 Model Expansion User s Guide 01 2022 Roland Corporation ...

Page 2: ...oland Cloud Manager 3 Ä Ä Installing the SH 101 Model Expansion 4 Uninstalling a Model Expansion 4 Ä Ä User License 5 Initializing Your User License 5 Ä Ä Error Messages 5 Ä Ä Selecting a Tone 6 Parameter Guide 7 Ä Ä Controls on the JUNO X and Their Associated Parameters 7 Ä Ä TONE Parameters 8 Sound List 9 Ä Ä Tone 9 MIDI Parameter Address Map 10 ...

Page 3: ...installed and register your account Follow the onscreen instructions to register Downloading the SH 101 Model Expansion 1 Start Roland Cloud Manager 2 Click Hardware on the Menu tab A list of hardware appears 3 Click JUNO X A list of contents appears 4 Click SH 101 Model Expansion The SH 101 Model Expansion download page appears 5 Click Get Lifetime Key to purchase a Lifetime Key 6 Once you ve mad...

Page 4: ...appears if you re installing for the first time To continue installing use the Ë button to select OK and then press the ENTER INIT button 5 To execute use the VALUE knob to select OK and then press the ENTER INIT button 6 Turn the power off then on again This allows you to use the SH 101 Model Expansion Error Messages Indication Action Expansion Memory Full There is not enough memory available for...

Page 5: ...tializes all of the corresponding data See Returning to the Factory Settings Factory Reset in the JUNO X Startup Guide for details 5 Press the Ë button A confirmation message appears If you decide to cancel press the EXIT button 6 To execute use the VALUE knob to select OK and then press the ENTER INIT button Completed Turn off power is shown on the display 7 Turn the JUNO X off This initializes t...

Page 6: ...elect MODEL 4 Use the ÇSELECTÉ knob to select where to register the SH 101 5 Use the VALUE knob to select SH 101 6 If you want to save the setting execute the System Write operation 6 1 Hold down the SHIFT button and press the MENU WRITE button The WRITE MENU screen appears 6 2 Use the ÇSELECTÉ knob to select SYSTEM and then press the ENTER INIT button 6 3 To execute press the ENTER INIT button Se...

Page 7: ...L 11 SUB SUB OSC LEVEL SH 101 TONE EDIT SUB OSC LEVEL 12 NOISE NOISE LEVEL SH 101 TONE EDIT NOISE LEVEL 13 PITCH OSC RANGE SH 101 TONE EDIT OSC RANGE FILTER 14 R Select FILTER TYPE SH 101 TONE EDIT VINTAGE FLT TYPE 15 M 16 S 17 FREQ CUTOFF SH 101 TONE EDIT CUTOFF 18 RES RESONANCE SH 101 TONE EDIT RESONANCE 19 KYBD FLT KEY FOLLOW SH 101 TONE EDIT FLT KEY FOLLOW AMP 20 GATE Select G AMP SH 101 TONE ...

Page 8: ...Specifies what causes the envelope to attack GATE TRIG Attack each time a key is pressed GATE Attack when a key is pressed anew No attack when playing legato LFO Attack repeatedly at each cycle of the LFO as long as the key is held ENV ATTACK 0 1023 Specifies the ENV Attack time 89 ENV DECAY 0 1023 Specifies the ENV Decay time 90 ENV SUSTAIN 0 1023 Specifies the ENV Sustain level 102 Parameter Val...

Page 9: ...7 70 49 SH050 Reso Seq Bs 21 Synth Bass 97 70 50 SH051 Flanger Seq Bs 21 Synth Bass 97 70 51 SH052 Phaser Seq Bs 21 Synth Bass 97 70 52 SH053 Heady Flange 40 Synth Seq Pop 97 70 53 SH054 Tape 101 40 Synth Seq Pop 97 70 54 SH055 Moon Worm 42 Pulsating 97 70 55 SH056 Disto Shorty 40 Synth Seq Pop 97 70 56 SH057 True Pluck 40 Synth Seq Pop 97 70 57 SH058 Sqr Seq SH 40 Synth Seq Pop 97 70 58 SH059 Res...

Page 10: ...10 For details refer to 3 Parameter Address Map in the JUNO X MIDI Implementation MIDI Parameter Address Map ...

Reviews: