


11
Advanced Operation
Recording Audio
Here’s how to record your performance on the unit as audio. The
recorded song can be used on your computer.
* The acoustic projection effect (p. 10) is not reproduced for an
audio-recorded song.
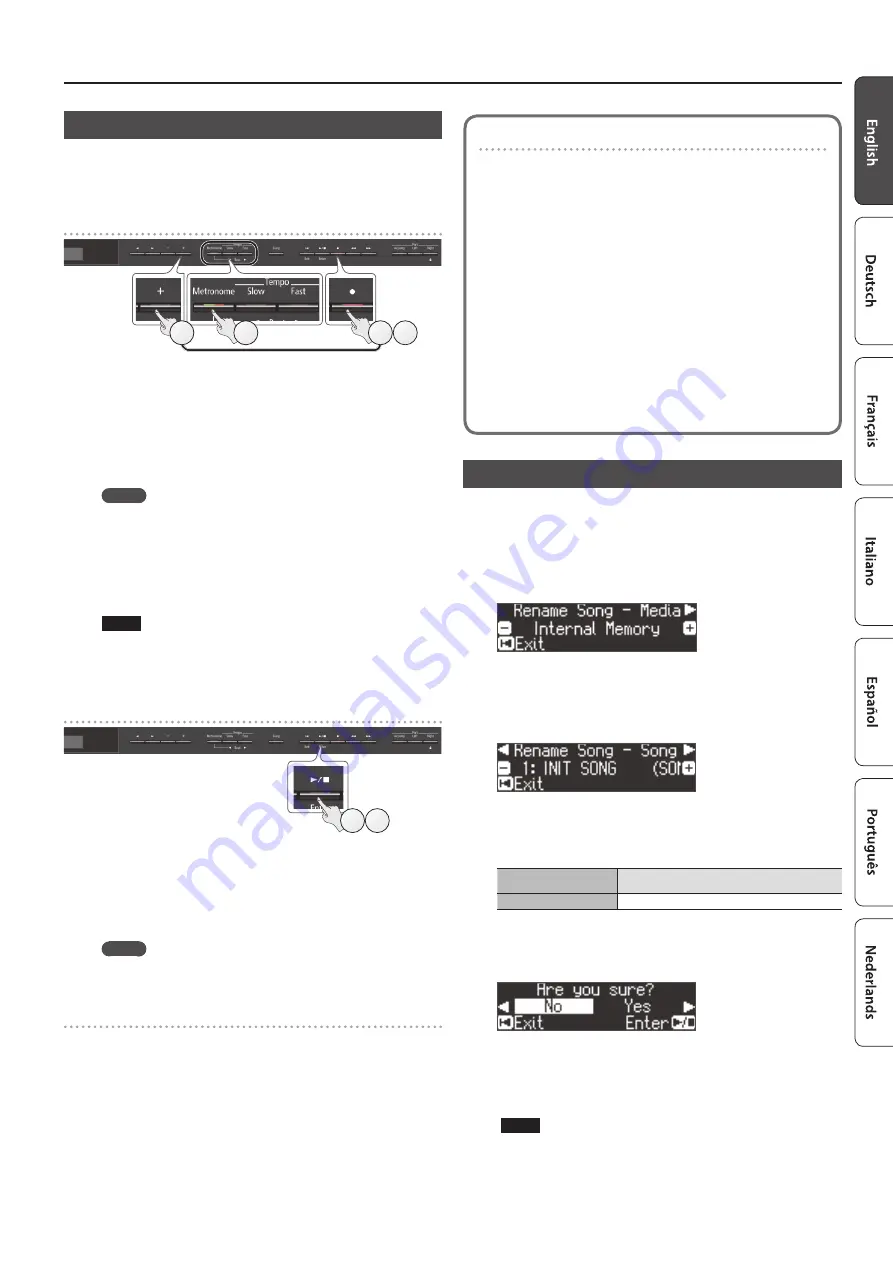
Getting ready to record
3
5
3
4
1.
Connect your USB flash drive to the USB Memory port
* Audio data can’t be stored in internal memory.
2.
Select the tone that you want to play (p. 6).
3.
Hold down the [
t
] button and press the [+] button to
select “Audio.”
MEMO
You can also specify this via the Function mode “Recording Mode”
4.
Press the [
t
] button.
The [
t
] button lights, the [
s
] button blinks, and the unit enters
record-standby mode.
If you decide to cancel recording, press the [
t
] button once again.
NOTE
Never turn off the power or disconnect the USB flash drive during
recording.
5.
You can sound the metronome if you like (p. 8).
Starting your recording and saving it
1 2
1.
Press the [
s
] button.
Recording starts.
When recording starts, the [
t
] button and [
s
] button light.
2.
Press the [
s
] button.
Recording stops, and your performance is automatically saved.
MEMO
5
You can change the name of the song (p. 11).
5
You can delete the song (p. 12).
Listening to the recorded performance
After you record, the newly recorded song is selected.
1.
Press the [
s
] button.
Playback starts from the beginning of your recorded performance.
Converting an SMF-recorded song to audio
A song recorded as SMF can be re-recorded as audio so that you
can play it back on your computer.
1.
Select the song that you want to convert to audio (p. 9).
2.
Getting ready for audio recording (“Getting ready to record”
1. Connect your USB flash drive.
2. Hold down the [
t
] button and use the [+] button to select
“Audio.”
3. Press the [
t
] button.
3.
Press the cursor [
J
] button to select the song of step 1.
4.
Press the [
s
] button to start audio recording (“Starting your
recording and saving it” (p. 11)).
* During recording, any sounds that you produce by playing the keyboard or
that are input to the unit via the USB port, the Input jack, or Bluetooth audio
are included in the audio that is recorded during this conversion. Muted
parts are not recorded.
* Depending on the SMF, it might not be possible to convert it into the
identical audio as when the song was recorded.
Renaming a Song (Rename Song)
Here’s how to rename a previously-saved song.
1.
Press the [Ambience] button and [Brilliance] button
simultaneously.
2.
Use the [
K
] [
J
] buttons to select “Rename Song,” and then
press the [
s
] (Enter) button.
The Rename Song screen appears.
3.
Use the [–] [+] buttons to select the media (internal
memory or USB flash drive) that contains the song that you
want to rename.
4.
Press the [
J
] button.
5.
Use the [–] [+] buttons to select the song that you want to
rename, and then press the [
J
] button.
6.
Rename the song.
[
K
] [
J
] buttons
Select the position at which you want to change
the character.
[–] [+] buttons
Change the character.
If you decide to cancel, press the [
u
] (Exit) button.
7.
Press the [
s
] (Enter) button.
A confirmation message appears.
If you decide to cancel, press the [
u
] (Exit) button.
8.
Use the [
J
] button to select “Yes,” and then press the [
s
]
(Enter) button.
The song is renamed.
NOTE
Never turn off the power or disconnect the USB flash drive while
the screen indicates “Executing...”
9.
Simultaneously press the [Ambience] button and
[Brilliance] button to exit Function mode.
Summary of Contents for LX-17
Page 30: ...5 1 0 0 0 4 6 7 7 3 0 1...


