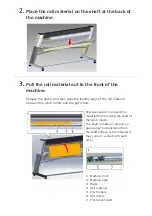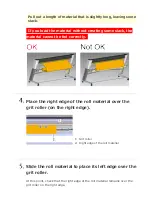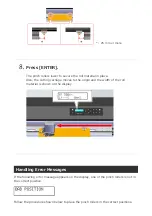
Accurately Feeding Roll Material
Be sure to perform material feed if it is required. If you start cutting without checking
the material feed, correct cutting results may not be obtained if the material is not fed
correctly. In the worst case, this problem may cause an error or malfunction or damage
to the material.
Materials That Require Feeding
Roll material and long, flat material that is longer than 1.6 m (63 in.)
Procedure
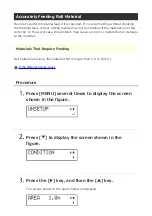
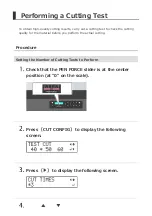
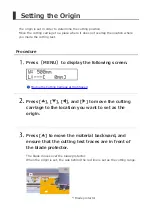
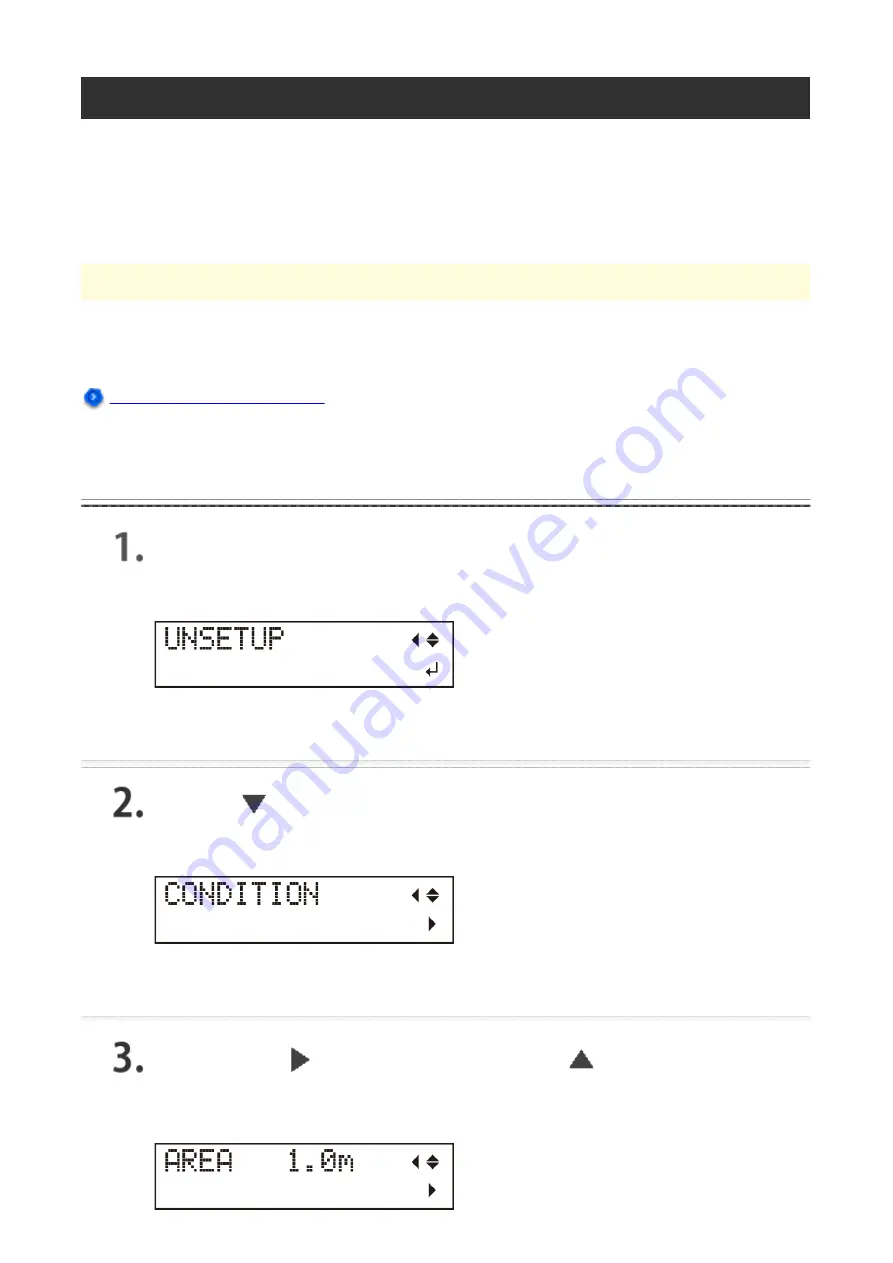
Press [MENU] several times to display the screen
shown in the figure.
Press [ ] to display the screen shown in the
figure.
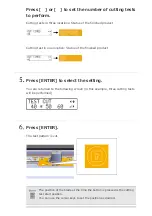
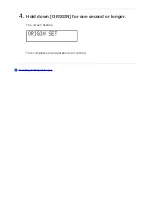
Press the [ ] key, and then the [ ] key.
The screen shown in the figure below is displayed.
Summary of Contents for GR-420
Page 47: ...loaded the cutting area must be set again from the Cut Setting menu Performing Cutting...
Page 54: ...Select the Auto Update check box in the palette With SALE selected click An outline is created...
Page 55: ...Use Illustrator s rectangle tool to draw a frame around SALE Save the data Performing Cutting...
Page 61: ...Removing the Material...
Page 64: ...After the material is cut the cutting carriage returns to the new origin...
Page 72: ...Improving the Finish...
Page 80: ...Improving the Finish...
Page 82: ...1 Grit pattern 2 Pinch roller Improving the Finish...
Page 89: ...CAUTION Never touch the tip of the blade Doing so may result in injury Remove the old blade...
Page 92: ......
Page 100: ...Click OK...
Page 103: ...Click the View tab Select the Hidden items check box...
Page 105: ...Click the View tab and then select the Show hidden files folders and drives option...
Page 106: ...Click OK...
Page 119: ...http startup rolanddg com...
Page 127: ...Installation Procedure...
Page 133: ...Installation Procedure...
Page 139: ......
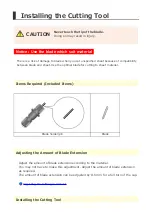
Page 146: ...Installing the Cutting Tool...
Page 147: ...Menu Flow Chart...
Page 148: ......
Page 149: ......
Page 160: ...Viewing Help Illustrator Procedure On the Roland CutStudio palette click and then click Help...
Page 166: ...Viewing Help CorelDRAW Procedure On the Roland CutStudio palette click and then click Help...
Page 176: ...Click Printer Setup...
Page 191: ...Step 7 Perform Cutting Sensor Mode...
Page 198: ...On the palette click Crop marks are inserted in the artboard...
Page 211: ...Step 7 Perform Cutting Sensor Mode...
Page 213: ...Click CutStudio starts and the cutting data is sent to CutStudio...
Page 220: ...On the palette click Crop marks are inserted in the document...
Page 233: ...Step 7 Perform Cutting Sensor Mode...
Page 235: ...Click CutStudio starts and the cutting data is sent to CutStudio...
Page 256: ...From the Layout Points list select 3...
Page 257: ...Click OK After setting the values check that the crop marks are within the printing area...
Page 259: ...CorelDRAW Procedure Click and then click Crop marks From the Point list select 3 Click OK...
Page 260: ...Setting the Margins and the Distance between Crop Marks...
Page 267: ...Cutting in Tool Mode 2...
Page 276: ...Step 3 Set Perforated Cutting Conditions...
Page 284: ...Click Select Output Perforated Cut Lines...
Page 286: ...Perform cutting Performing Cutting...
Page 289: ...Click Select Output Perforated Cut Lines...
Page 291: ...Perform cutting Performing Cutting...
Page 295: ...Check the size of the material to be used Step 2 Load the Material...
Page 299: ...The segment size is updated...
Page 300: ...Select the Tiled Output check box and then enter the number of tiles...
Page 305: ...Step 6 Perform Cutting...
Page 317: ...Press ENTER Operation is normal if the figure shown below is cut Other Things That You Can Do...
Page 322: ...Press ENTER Other Things That You Can Do...
Page 325: ...Press ENTER Press MENU to return to the top screen Other Things That You Can Do...
Page 329: ...Press ENTER Press MENU to return to the top screen Other Things That You Can Do...
Page 335: ...Press ENTER Press MENU to return to the top screen Other Things That You Can Do...
Page 340: ...Other Things That You Can Do...
Page 351: ...Press ENTER Press MENU to return to the top screen Other Things That You Can Do...
Page 358: ...Select the Fine adjustment check box and then click Adjust...
Page 359: ...The Crop Mark Adjustment dialog box appears...
Page 363: ...Back to Adjusting the Cutting Position...
Page 376: ...Click OK...
Page 379: ...Click the View tab Select the Hidden items check box...
Page 381: ...Click the View tab and then select the Show hidden files folders and drives option...
Page 382: ...Click OK...
Page 397: ...Select the model name of the machine on hand and then click Cut The cutting data is output...
Page 398: ...Viewing Help Illustrator Procedure On the Roland CutStudio palette click and then click Help...
Page 418: ...Step 7 Perform Cutting Sensor Mode...
Page 422: ...Removing the Material...
Page 429: ...Select the object that you want to apply perforated lines to Click...
Page 430: ...Select Output Perforated Cut Lines On the Roland CutStudio palette click Update...
Page 445: ...Press ENTER Operation is normal if the figure shown below is cut Other Things That You Can Do...
Page 450: ...Press ENTER Other Things That You Can Do...
Page 453: ...Press ENTER Press MENU to return to the top screen Other Things That You Can Do...
Page 457: ...Press ENTER Press MENU to return to the top screen Other Things That You Can Do...
Page 463: ...Press ENTER Press MENU to return to the top screen Other Things That You Can Do...
Page 468: ...Other Things That You Can Do...
Page 479: ...Press ENTER Press MENU to return to the top screen Other Things That You Can Do...

