


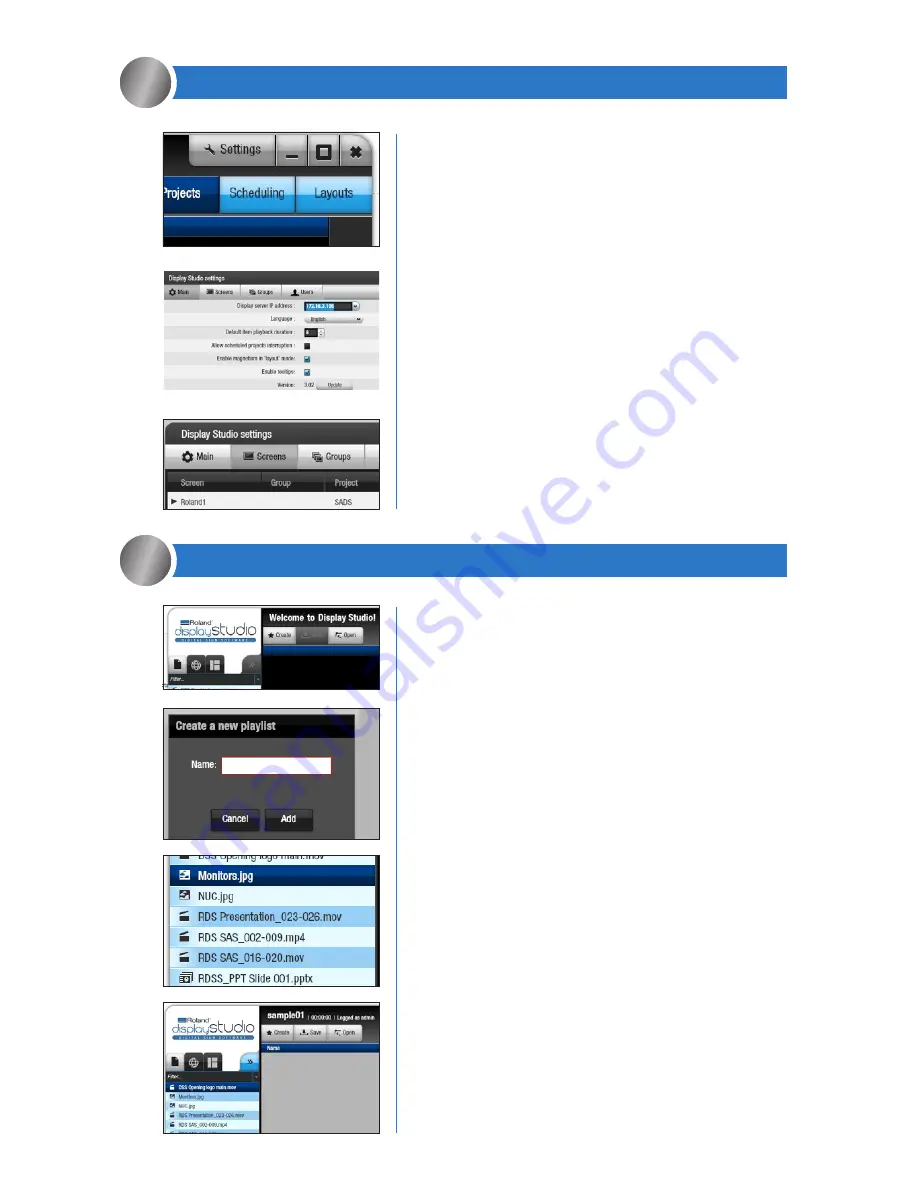
a. In the Playlist screen, select “Create”.
b. Name your playlist and click “Add”.
c. Bring files into your file library by dragging
and dropping or by clicking “Add” to browse and
locate files.
d. Add files from your file library to your playlist by
dragging and dropping files or selecting files and
clicking the >> icon to bring them to the playlist.
e. Click “Save”.
f. To send a finished playlist to a media player, go to
the “Target” dropdown menu, located in the bottom
right, and select your target media player (screen).
g. Click “Send”.
h. At this time the signage screen attached to the
media player should reset and the playlist should
begin playing and repeat until changes are made
and sent to the player.
a. Open DisplayStudio software.
b. You will be prompted to log in. Use the following
user ID and password and select “Remember My
Credentials”.
User ID:
admin
Password:
password
c. Click on “Settings” in the upper right hand corner.
d. In the field “Display Server IP Address”, enter the
IP address obtained in step 2c.
e. Click “Apply”. It may take up to a minute to connect.
f. To check if the media player is connected properly,
click the “Screens” tab. You should see the media
player named in step 2f. If you do not see the
media player, click “Refresh” and then “Ok”.
CONFIGURING DISPLAYSTUDIO SOFTWARE
3
CREATING AND DISPLAYING A DYNAMIC PLAYLIST
4
3c.
3d.
3f.
4a.
4b.
4c.
4d.
Summary of Contents for DisplayStudio
Page 1: ...QUICK START GUIDE...


