


53
Tap Delay
The Artist's Tap Delay feature allows for the current delay time settings to be set on-
the-fly (while playing). When activated, tapping the dedicated
TAP DELAY
switch changes
the current delay time settings based on the length of time between two taps. The Artist
detects the length of time between any two taps that are less than one second apart (if
more than one second passes after the first tap, two more taps—less than one second
apart—are required to change the delay time again).
After the Artist detects the length of time between taps, it then multiplies or divides
that time based on the type of note stored in the DELAY 1 and DELAY 2 parameters of
the TAP DELAY function. The resulting delay time can be any of the following:
• one-fourth of the time between taps (SIXTEEN)
• one-half of the time between taps (EIGHTH)
• two-thirds of the time between taps (TRIPLET)
• equal to the time between taps (QUARTER)
• two times the amount of time between taps (HALF), or
• four times the amount of time between taps (WHOLE)
The maximum delay time the Artist provides is 1000ms, therefore the Tap Delay
function will default to a lower parameter value when the time between taps requires a
delay time of over 1000ms. For example, if the WHOLE setting is stored for the Delay 1
parameter and the time between taps is 300ms, a delay time of 1200ms would be calcu-
lated (300ms x 4). However, because the maximum delay time available is 1000ms, the
Artist will default to the next lower multiplier (HALF) and provide a delay time that is 2x
the delay time detected (600ms). If the delay time was over 1000ms again, the unit would
then provide the QUARTER note equivalent.
NONE can be selected for the Delay 1 and Delay 2 parameters to disable the Tap
Delay feature.
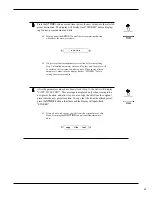
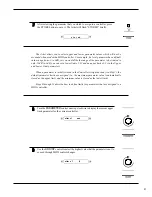
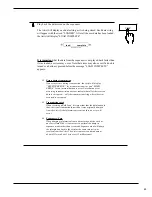
Turn the
FUNCTION
control until the Artist displays “TAP DELAY”.
11111
**TAP DELAY**
Summary of Contents for Taboo ARTIST
Page 7: ...3 2 Quick Reference ...
Page 8: ...4 3 Top Panel ...
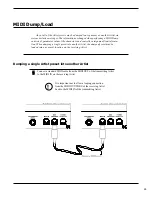
Page 13: ...9 5 Connections Used with a stereo power amp and stereo cabinet ...
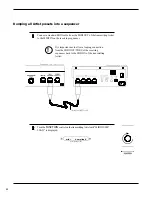
Page 14: ...10 Using direct into a mixing console ...
Page 15: ...11 Using headphones with the Artist ...
Page 17: ...13 B C Securing the plate Securing the pedal parallel to the Artist option 1 ...
Page 18: ...14 E Connecting the pedal to the Artist D Securing the pedal at an angle option 2 ...