background image


22 


Teaching Modes 


Single Key Course: 

 
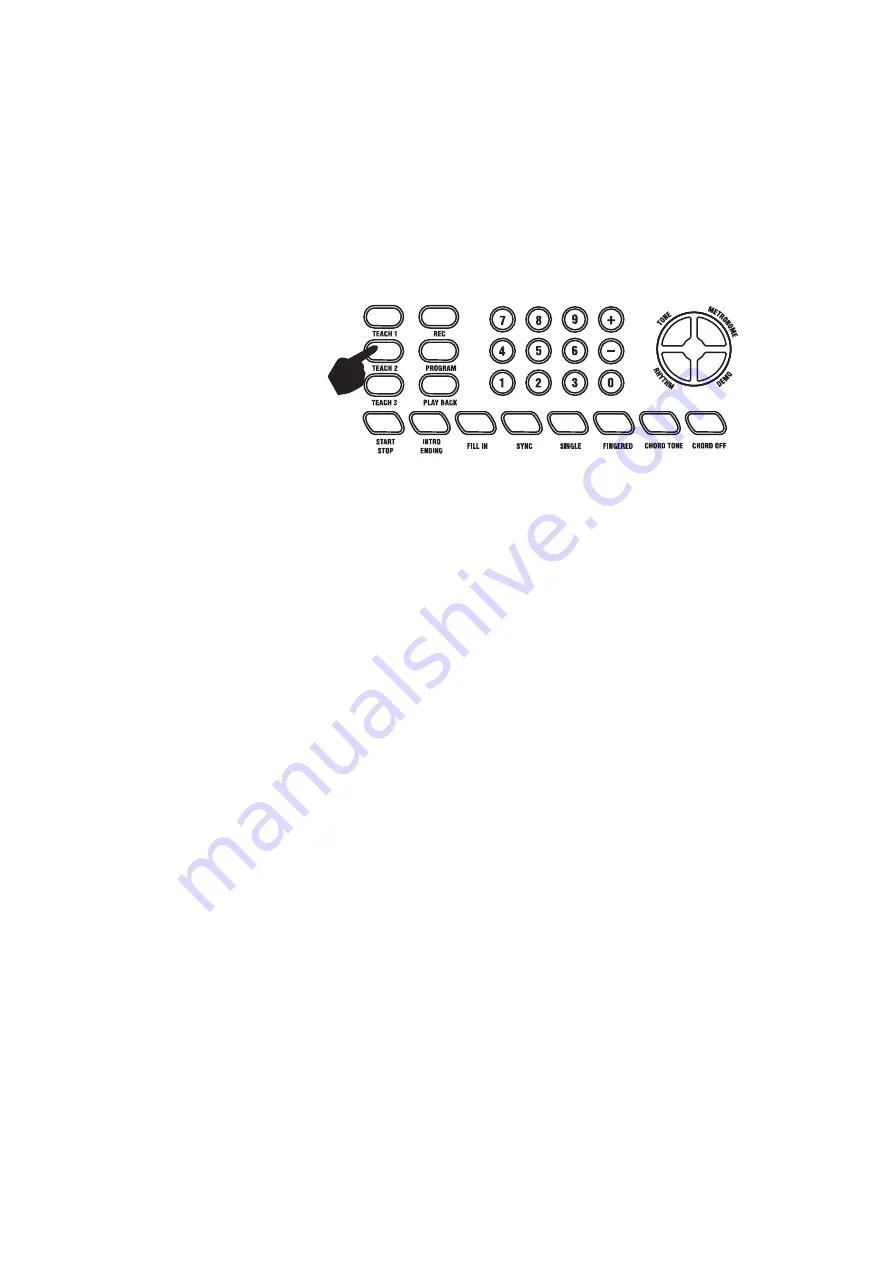
Touch the [TEACH 1] button to enter the Single Key teaching mode. The LCD screen will flag Teach 1 on the 
right of the display area. This mode is suitable for beginners to familiarise themselves with the rhythm and 
tempo of a song. The LCD will show [SONG XXX Demo] where xxx is the number of the demo song 
selected.  Select a different song using the [+/-] buttons or number keys. The beat point will flash on the LCD 
display to indicate the tempo. The keyboard will play the main melody in time with any key presses, even 
incorrect ones. 


Synchronised Course:


Touch the [TEACH 2] to enter the Synchronised teaching mode. The LCD screen will flag Teach 2 on the 
right of the display area. This mode is suitable for more advanced users. The LCD will show [SONG XXX 
Demo] where xxx is the number of the demo song selected. Select a different song using the [+/-] buttons or 
number keys. The beat point will flash on the LCD display to indicate the tempo. The correct key to press 
next is displayed on the LCD display. Play along in time making sure to press and hold the correct keys in 
time as indicated. The song will not progress unless the correct key presses are made. 


Concert Course: 

 
Touch the [TEACH 3] to enter the Concert course teaching mode. The LCD screen will flag Teach 3 on the 
right of the display area. This mode is suitable for highly advanced users. The LCD will show [SONG XXX 
Demo] where xxx is the number of the demo song selected. Select a different song using the [+/-] buttons or 
number keys. The beat point will flash on the LCD display to indicate the tempo. The correct key to press is 
displayed on the LCD display. Play along in time with correct key presses. 

 
Progressive Learning: 


In general, follow the sequence below to master any of the included songs. 


Listen to the song in DEMO mode to get an idea of the note timings and beat. When confident 
move on to the next stage. 


Access the same song in SINGLE KEY COURSE mode and duplicate the note timings using a 
single key. When mastered move onto the next stage. 

Summary of Contents for RJ461

Page 1: ...RJ461 61 Key Full Size Musical Keyboard User Guide...

Page 2: ...tronic keyboard To avoid damaging the appearance of the electronic keyboard or damaging the internal parts please do not place the electronic keyboard in a dusty environment in direct sunlight or in p...

Page 3: ...quipment 8 Connecting a phone or audio device to the AUX Input to play music through the keyboard 8 Connecting a Microphone 9 Connecting a USB Flash drive or MicroSD card 9 Keyboard Operation 10 Power...

Page 4: ...iano Key 21 Teaching Modes 22 Single Key Course 22 Synchronised Course 22 Concert Course 22 Progressive Learning 22 Appendix I Percussion Instruments 23 Appendix II Rhythm Table 24 Appendix III Tone T...

Page 5: ...28 30 4 5 6 7 8 9 10 12 13 1 47 48 49 1 11 45 46 50 17 Music Volume 18 Music Volume 19 EQ 20 Memory 21 Memory Storage 1 22 Memory Storage 2 23 Memory Storage 3 24 Memory Storage 4 25 Piano Key 26 Tea...

Page 6: ...g rhythm and tone number 5 Tempo value of rhythm and song bpm 6 Metronome for rhythm and song 7 Mode Indicator 1 8 Key Indicator 9 Mode Indicator 2 USB AUX PHONES DCIN 1 2 3 4 MIC MicroSD 5 6 1 4 3 5...

Page 7: ...he mains power socket Battery operation Open the battery lid on the underneath of the electronic keyboard and insert 6 x 1 5V Size AA alkaline batteries Ensure the batteries are inserted with the corr...

Page 8: ...nto the PHONES jack on the rear of the electronic keyboard Connecting a phone or audio device to the AUX Input to play music through the keyboard This keyboard has a built in speaker system that can b...

Page 9: ...sh drive or MicroSD card Insert the card or USB drive into the input slot at the rear of the Keyboard The first song will play automatically Touch the button to Play or Pause playback Touch the or but...

Page 10: ...nd Volume Power control Press the POWER button to turn the power on and again to turn the power off The LCD screen will light up to indicate power on Adjustment of the Master Volume To change the volu...

Page 11: ...NE is 00 Grand Piano To change the tone touch the TONE button first and then punch in a number code on the keypad by pressing the corresponding digits 0 9 Tones can also be changed by using the button...

Page 12: ...sed The second tone can be freely selected by pressing the corresponding digits on the numerical keypad or pressing or Press the DUAL TONE button again to exit Dual Tone mode Split Keyboard To switch...

Page 13: ...ERE2 MONO or NORMAL Sustain Touch the SUSTAIN button to enter Sustain mode The LCD display will display a flag to show that SUSTAIN is on Once this mode is selected the sound of each note played is pr...

Page 14: ...same time will reset the level to 000 Off The Vibrato level is reset to 000 Off after power off and on Transpose Touching the TRANSPOSE buttons alters the musical scale of the note being played You c...

Page 15: ...atterns The LCD display will indicate the beat you have chosen The metronome effect is added to the music once you start playing To exit this mode touch the START STOP or METRONOME button again Panel...

Page 16: ...hythm you require by pressing the corresponding digits on the numerical keypad or by pressing the buttons Start Stop With a rhythm selected press the Start Stop button to start or stop playing the cho...

Page 17: ...ying as normal Tempo Adjustment Touch the TEMPO buttons to adjust the tempo of the rhythm metronome or demo songs up or down Press and hold to adjust the tempo quickly The adjustment range is 30 240 b...

Page 18: ...P button to start or stop the chord accompaniment Multi Finger Chords Touch the FINGERED button to activate the multi finger chord function The LCD screen will flag which function is activated Chords...

Page 19: ...tones To stop the chord accompaniment touch the CHORD OFF button Intro Ending With a rhythm selected touch the Intro Ending button to initiate an intro section When the intro finishes playing accompa...

Page 20: ...reached Touch the PLAY BACK button to play back the recorded notes Touch the REC button again to exit recording mode Rhythm Programming Press the PROGRAM button to activate the Rhythm program mode The...

Page 21: ...of the available Demo songs Setting Memories M1 to M4 The keyboard has four built in memories for saving specific volume levels rhythm tones and tempos Before performing select the VOLUME TONE RHYTHM...

Page 22: ...flash on the LCD display to indicate the tempo The correct key to press next is displayed on the LCD display Play along in time making sure to press and hold the correct keys in time as indicated The...

Page 23: ...5 G 4 Agogo L 6 F1 Snare Roll 26 C 3 Crash Cymbal 1 46 A4 Cabasa 7 F 1 Castanet 27 D3 High Tom 47 A 4 Maracas 8 G1 Snare H Soft 28 D 3 Ride Cymbal 1 48 B4 Samba Whistle H 9 G 1 Sticks 29 E3 Chinese Cy...

Page 24: ...empo 020 Funky Soul 6 120 Waltz 2 220 Electric Bachata 1 021 West Coast 121 Waltz 3 221 Electric Bachata 2 022 Euro Soul 122 Waltz 4 222 Electric Bachata 3 023 16 AOR 1 123 Jazz Waltz 1 223 Folk Samba...

Page 25: ...5 Jazz Rock 1 265 Classical Soul 2 066 Bossanova 2 166 Jazz Rock 2 266 Classical Soul 3 067 Bossanova 3 167 Traditional Pop 267 Classical Soul 4 068 Bossanova 4 168 Country Blues 268 Classical Soul 5...

Page 26: ...le Bell 212 French Horn Ensemble 013 Xylophone 113 Agogo 213 Electronic French Horn 014 Tubular Bells 114 Steel Drums 214 Synth French Horn 015 Dulcimer 115 Woodblock 215 Psychedelic Synth Brass 016 H...

Page 27: ...Koto 056 Trumpet 156 For The keyboard 256 Koto Lead 057 Trombone 157 Bagpipes 257 Diplophonia Koto 058 Tuba 158 Suona 258 Baritone Koto 059 Muted Trumpet 159 Pipa 259 Synth Koto 060 French Horn 160 C...

Page 28: ...el Drums 098 FX 3 Crystal 198 Harp Ensemble 298 Orchestra Steel Drums 099 FX 4 Atmosphere 199 Synth Harp 299 Synth Steel Drums Appendix IV Demo Song Table No Name of Song No Name of Song 00 Canon 20 B...

Page 29: ...supplied or the batteries may need replacing There is a slight difference in timbre of some notes This is normal and is caused by the many different voice sampling ranges of the keyboard When using t...

Page 30: ...30 Appendix VI Chord Tables Single Finger Chords C D D E E F F G G A B B m m7 M 7...

Page 31: ...31 Fingered Chords...

Page 32: ...yback 32 Beat rhythm programming Percussion 61 different instruments Accompaniment Control Start Stop Sync Fill in Tempo Intro Ending Intelligent Teaching Metronome 3 teaching modes External Jacks Pow...

Page 33: ...can be determined by turning the equipment off and on the user is encouraged to try to correct the interference by one or more of the following measures Reorient or relocate the receiving antenna Inc...

Reviews: