background image


http://www.robokits.co.in


http://www.robokitsworld.com


Page 4 


2.4Ghz RF Multi Channel Remote for 4 DC Motors [RKI-1547] 

Usage Steps


1.


Connect 4X AAA cells to the transmitter and keep transmitter in power off state. 

2.


Make sure the control board and receiver (Black coloured small box) are properly 
connected as per the photo. 

3.


Connect power supply to the control board with proper polarity. Check GND(-) and 
VDD(+) terminals. (Do not connect the power supply in reverse or else the circuit will be 
damaged.) 

4.


Check LED status on receiver. Power LED should be on and rx LED should start blinking. 

5.


Turn on power on the transmitter and check status on the receiver RX LED. Once the 
transmitter and receivers are linked the RX LED will stop blinking and stay in ON state 
continuously. 

6.


In any case the receiver is not connected retry using power switch on the transmitter. 
Also the same procedure can be used to link delinked receiver and transmitter when the 
receiver goes out of range. 

7.


If there are multiple transmitters and receivers on at the same time please make sure 
you power them in correct sequence. Once a pair is linked it will work at the same 
frequency and frequency will only change if there is only one delinked receiver which is 
powered and on another frequency. 


Summary of Contents for RKI-1547

Page 1: ... in http www robokitsworld com Page 1 2 4Ghz RF Multi Channel Remote for 4 DC Motors RKI 1547 2 4Ghz RF Multi Channel Remote for 4 DC Motors RKI 1547 Users Manual Robokits India http www robokits co in info robokits co in ...

Page 2: ...rive 2 robot driving motors Connect two motors in parallel for 4 wheeled robot in skid steer control with analog speed control and 2 motors without speed control This Package Includes RF 2 4GHz Receiver and motor control Circuit RF 2 4GHz Play Station 2 remote Control with receiver Features Control 2 DC motors with Skid Steer Control with 1Amp capacity each See Remote Functions below Analog speed ...

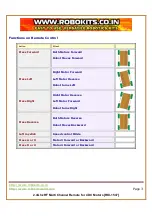
Page 3: ...Press Forward Both Motors Forward Robot Moves Forward Press Left Right Motor Forward Left Motor Reverse Robot turns Left Press Right Right Motor Reverse Left Motor Forward Robot turns Right Press Reverse Both Motors Reverse Robot Moves Backward Left Joystick Speed control MOde Press A or X Motor3 Forward or Backward Press D or O Motor4 Forward or Backward ...

Page 4: ...ED should be on and rx LED should start blinking 5 Turn on power on the transmitter and check status on the receiver RX LED Once the transmitter and receivers are linked the RX LED will stop blinking and stay in ON state continuously 6 In any case the receiver is not connected retry using power switch on the transmitter Also the same procedure can be used to link delinked receiver and transmitter ...

Page 5: ...e whatsoever is at the users own risk Robokits sole guarantee is that the software and hardware perform in compliance with this document at the time it was shipped to the best of our ability given reasonable care in manufacture and testing All products are tested for their best performance before shipping and no warranty or guarantee is provided on any of them Of course the support is available on...

Reviews: