60
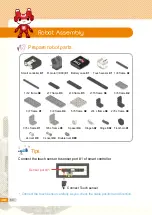
Smart controller X1
1×12 frame X4
3×7 frame X1
3×5 L frame X1
2s rivet X8
3s rivet X4 Double rivet X80
3×6 L frame X3
Spacer X4
Hinge A X2
Hinge B X2 Front horn X1
3×9 frame X4
5×5 frame X2
2×4 L frame X4
2×5 L frame X4
2×7 frame X3
2×9 frame X3
2×15 frame X4
3×5 frame X2
R. motor (ID30) X1
Battery case X1
Touch sensor X1
1×8 frame X2
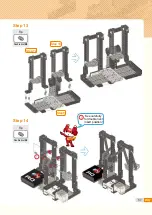
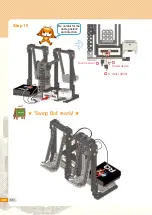
Connect the touch sensor to sensor port #1 of smart controller.
*
Connect the touch sensor carefully as you check the cable position and direction.
Sensor port #1
Connect Touch sensor
Robot Assembly
Prepare robot parts.
Tips.
Summary of Contents for RQ PLUS 110
Page 1: ......
Page 2: ...List BASICS Punching Bot Cultivator Swing Bot Fish Bot Rolling Bot 06 20 40 58 74 90 ...
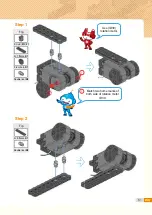
Page 25: ...27 Step7 Step8 Step 9 Step 10 Tip Tip Double rivet X2 Double rivet X8 ...
Page 31: ...33 Punching Bot ready completion ...
Page 37: ...39 0 02 ...
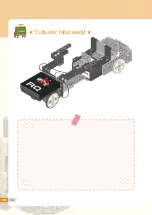
Page 50: ...52 Cultivator robot ready completion ...
Page 72: ...74 Living under water fish 4 Fish Bot ...
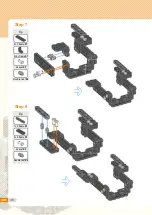
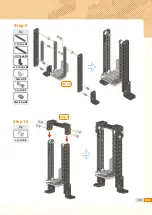
Page 94: ...96 Tip 5 5 frame X1 Double rivet X8 Step 7 X2 Tip 2s rivet X4 Step 8 X2 ...
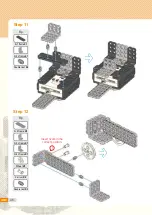
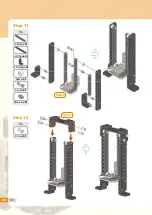
Page 96: ...98 Tip Tip Double rivet X4 Double rivet X4 Step 11 Step 12 Step8 Step8 ...
Page 103: ...105 0 02 ...
Page 107: ...109 0 02 ...
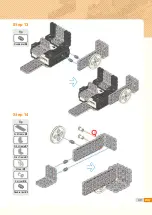
Page 116: ...118 Step8 Tip Double rivet X2 Step 11 Tip Battery case X1 Double rivet X4 Step 12 ...
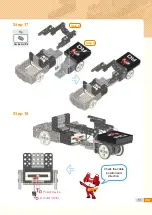
Page 118: ...120 Cable connection status Bumper car ready Tip Double rivet X4 Step 15 completion ...
Page 152: ...154 Puppy Bot ready completion ...
Page 175: ...177 0 02 ...

