background image

7

8

play will end, and normal disc play will resume from that point.
When the selected track has finished playing, the CD play will Stop.

For repeat disc play of all the tracks on the CD

Press the Repeat button (4) twice. The REPEAT  indicator  will flash continuously.
Press the Play/Pause button (29).
The disc will then begin playing through to the end of the last track. At which point it will
automatically return to the beginning of the first track. This will continue until the Stop button
(28)  is pressed.
If the Repeat button (4) is pressed once more, the repeat indicator will be cancelled, repeat
play will end, and normal disc play will resume from that point.
When the last track has finished playing, the CD player will then Stop.
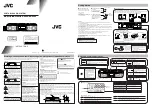
CASSETTE OPERATION

INSERTION AND REMOVAL OF CASSETTES

1. Press the Stop/Eject Button (9) to open the Cassette Door .
2. Slip  your cassette tape into the holder with the exposed side facing up (the side for

playing faces you).

3 Close the Cassette Doors securely before starting.
4 When finished playback, press the S top / Eject Keys to open the Cassette Door , and

retrieve your cassette tape.

PLAYBACK

1. Set the Function Selector (5) to the TAPE position.
2. Insert your cassette tape with the exposed side facing up.
3. Press the Play Key (12) to activate playback.
4. Set the Volume to the desired level.
5 Press the Pause Key (8) wherever you want to suspend playback. Press Pause key

again to continue play back.

6 Press the Stop / Eject Key (9) when finished.
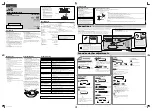
02

Select the next track to be programmed using the Forward and Reverse Skip Track

buttons  (21).

Press the Program button (22) to store this track.
Continue entering tracks in this way until all the desired tracks are stored (up to a limit of
16). When the Program button is pressed to store the 20th track, the display will return to
the 1st program location. Press the Program button to step through the program
locations.

If  you wish to add a track to the program, press the Program button (22) until the last
programmed  track is displayed. Press the Program button again. Press the Forward or
Reverse Skip Track buttons (21) until the desired track is displayed, then press the Program
button. The added track will be entered as the last track in the program memory.

Notes:

If the Play/Pause button (29) is pressed before the Program button  is pressed to store
a track, that track will not be programmed, and the disc will start playing from the first
selected track.  Any track can be programmed to play more than once.

Listening to Programmed Tracks

Press the Play Pause button (29).  Disc play will start at  the beginning of the first programmed track .

To Clear The Program Memory

If the disc is playing, press the Stop button (28) to stop the disc.
Switch the Function  selector (5) to a different position to clear the Program.

REPEAT  DISC PLAY

Use the Repeat button (4)  to listen to one track,  an entire disc or a programmed sequence
repetitively.

For repeat play of one track

Press the Repeat button (4) once. The  REPEAT indicator (24)  will light up.
Select the desired track by pressing the Forward or Reverse Skip Track buttons (21). The
selected track will be shown on the CD display.
Press the Play/Pause button (29).
The selected track will then begin playing through to its end. At  which point it will automatically
return to the beginning of that track. This will continue until the Stop button (28) is pressed.
If the Repeat  button (4) is pressed twice more, the Repeat  indicator is cancelled, Repeat

Summary of Contents for RCR-4625CD

Page 1: ...sanleitung Manuel d instructions Manuale d istruzioni Manual de instrucciones Manual de instruções R AUDIO VIDEO is a registered Trademark of Roadstar S A Switzerland All rights reserved STEREO PORTABLE RADIO CASSETTE PLAYER WITH CD RCR 4625CD ...

Page 2: ...our new unit was manufactured and assembled un der strict ROADSTAR quality control Thank you for purchasing our product for your music enjoyment Before operating the unit please read this instruction manual carefully Keep it also handy for further future references Votre nouvel appareil a été fabriqué et monté en étant soumis aux nombreaux tests ROADST AR Nous espérons que cet appareil vous donner...

Page 3: ...ot be exposed to moisture or rain The power switch in this unit is mounted on the secondary circuit and does not disconnect the whole unit from the mains in OFF position Ensure all connections are properly made before operating the unit This unit should be positioned so that it is properly ventilated Avoid placing it for example close to curtains on the carpet or in a built in installation such as...

Page 4: ... inside to the outside of the disc Small dust particles and light stains will have absolutely no ef fect on reproduction quality CONNECTING TO POWER Before switching on make sure that the voltage of your electricity supply is the same as that indicated on the rating plate For your own safety read the following instructions carefully before attempting to connect this unit to the mains MAINS AC OPER...

Page 5: ... These chemicals can irreparably damage the disc s surface Discs should be returned to their cases after use This avoids serious scratches that could cause the Laser pickup to skip Do not expose discs to direct sunlight high humidity or high temperatures for extended periods Long exposure to high temperatures can warp the disc Do not stick paper or write anything with a ballpoint pen on the label ...

Page 6: ...entering tracks in this way until all the desired tracks are stored up to a limit of 16 When the Program button is pressed to store the 20th track the display will return to the 1st program location Press the Program button to step through the program locations If you wish to add a track to the program press the Program button 22 until the last programmed track is displayed Press the Program butto...

Page 7: ...ecifications and the design are subject to possible modifications without notice due to improvement Correct Disposal of This Product Waste Electrical Electronic Equipment This marking shown on the product or its literature indicates that it should not be disposed with other household wastes at the end of it s working life To prevent possible harm to the environment or human health from uncontrolle...

Page 8: ...benutzung des Geräts ziehen Sie den S tecker aus der Steckdose Setzen Sie das Gerät weder Feuchtigkeit noch Regen aus Der EIN Schalter dieses Geräts ist an den Sekundärschaltkreis ange schlossen Seine Abschaltung unterbricht die Hauptstromzufuhr des Geräts nichts Schalten Sie das System erst dann ein wenn Sie alle V erbindungen genau geprüft haben Stellen Sie das Gerät so auf dass immer eine unges...

Page 9: ...Compact Discs keine Rillen in denen sich S taub und feinste Schmutzteilchen 32 NETZANSCHLUSS Bevor Sie das Gerät einschalten vergewissern Sie sich daß Ihre örtliche Netzspannung mit der auf dem Typenschild angegebenen Spannung übereinstimmt Zu Ihrer eigenen Sicherheit lesen Sie sorgfältig die folgende Bedienungsanleitung bevor Sie das Gerät ans Netz anschließen NETZBETRIEB AC Dieses Gerät funktion...

Page 10: ...ie PROGRAMM Taste 22 Die folgende Information wird auf dem CD Display angezeigt 01 ansammeln können Somit werden durch das Abwischen mit einem weichen Tuch die meisten Teilchen entfernt Wischen Sie in geraden Bewegungen von der Mitte der Disc zum Außenrand Kleine Staubteilchen oder leichte Streifen beeinflussen keinesfalls die Wiedergabequalität Verwenden sie niemals chemische Produkte wie Platten...

Page 11: ...ogrammwahl befindet sich nun im Programmspeicher Die Programm Anzeige 27 blinkt und erscheint 02 Wählen Sie mit den Titelsprungtasten Vorwärts und Rückwärts 21 den nächsten Titel der programmiert werden soll Drücken Sie die PROGRAMM Taste 22 um diesen Titel zu speichern Auf diese Weise können Sie alle gewünschten Titel bis zu 16 speichern Wenn Sie die PROGRAMM Taste 22 drücken um den 20 Titel zu s...

Page 12: ... dieser Bedienungsanleitung aufgeführt sind könnten Sie einer gefährlichen Strahlung aussetzen Bezüglich der Compact Discs Nur Compact Discs mit dieser Marke dürfen mit diesem CD Spieler wiedergegeben werden Korrekte Entsorgung dieses Produkts Elektromüll Die Kennzeichnung auf dem Produkt bzw auf der dazugehörigen Literatur gibt an dass es nach seiner Lebensdauer nicht zusammen mit dem normalen Ha...

Page 13: ...il pendant un certain temps L unité ne doit pas être exposée à l humidité ou à la pluie L interrupteur d allumage de cet app areil est monté sur des circuit s secondaires et il ne débranche pas l appareil tout entier lorsqu on l éteint Mettez l appareil sous tension seulement après avoir vérifié que tous les raccordements soient corrects L appareil doit être gardé dans un endroit suf fisamment ven...

Page 14: ...vées Ne pas coller de papier ni écrire avec un stylo à bille sur l étiquette ou sur la surface du disque BRANCHEMENT ALASOURCE D ALIMENTATION Avant l utilisation vérifier que la tension électrique de votre source d alimentation corresponde à celle indiquée sur la plaque des caractéristiques techniques de l appareil Avant de brancher l appareil au réseau il faut lire attentivement les instructions ...

Page 15: ...rtiment CD 14 pour ouvrir le réceptacle 3 Une fois le couvercle ouvert sortir un disque de son coffret et le mettre en place avec attention dans le compartiment avec l étiquette vers le haut Les disques de 3 doivent être placés au centre sur l axe du compartiment 4 Fermer le couvercle du compartiment des disques en appuyant sur son angle ECOUTE DU DISQUE 1 Soulever le réceptacle du CD pour ouvrir ...

Page 16: ...ée app araît sur l afficheur du lecteur CD 3 Appuyer sur la Touche de Lecture Attente 29 et la lecture de la piste sélectionnée sera répétée en continu 4 Pour annuler la lecture répétée d une seule piste appuyer deux fois sur la touche de REPETITION 4 5 Pour arrêter la lecture appuyer sur la touche d ARRET 28 Répétition du disque entier 1 Appuyer deux fois sur la touche de Répétition 4 L indicateu...

Page 17: ...es d Audibilité Fréquences Radio FM 88 108 MHz AM 520 1620 MHz Lecteur CD Pickup 3 Faisceaux Laser à semiconducteur Encoding 16 Bit linéaire Les spécifications et le design peuvent changer sans avis préalable Comment éliminer ce produit déchets d équipements électriques et électroniques Ce symbole sur le produit ou sa documentation indique qu il ne doit pas être éliminé en fin de vie avec les autr...

Page 18: ...io è montato sul circuito secondario e non disconnette completamente l apparecchio quando viene spento Utilizzare l apparecchio solo dopo aver verificato che tutte le connessioni siano state eseguite correttamente Posizionare l apparecchio in un luogo suf ficientemente ventilato Evitare di sistemarlo vicino a tende sul tappeto o all interno di un mobile quale ad esempio una libreria Non esporre l ...

Page 19: ...te la superficie del disco Riporre i dischi nella loro custodia dopo l utilizzo Questo evita seri graffi che potrebbero causare che il fonorivelatore laser salti COLLEGAMENTOALLA FONTE DIALIMENTAZIONE Prima di accendere l apparecchio assicurarsi che il voltaggio locale sia lo stesso di quello indicato sulla targhetta dei dati di funzionamento Per la vostra propria sicurezza leggere le seguenti ist...

Page 20: ...taccare etichette o scrivere sul lato dell etichetta del disco con una penna a sfera UTILIZZO CD Caricamento e Rimozione dei Compact Discs 1 Regolare il Selettore Funzione 5 sulla posizione CD 2 Premere il tasto di apertura CD 14 per aprire il compartimento CD 3 Quando il compartimento sarà aperto rimuovere un disco dalla custodia e posizionarlo accuratamente nel compartimento con il lato dell eti...

Page 21: ...ura Pausa 29 dunque il brano selezionato verrà letto ripetut amente 4 Per cancellare il singolo brano in lettura ripetuta premere il tasto RIPETIZIONE 22 due volte 5 Per fermare la lettura premere il tasto ARRESTO 28 Ripetizione di tutto il disco 1 Premere il Tasto Ripetizione 4 due volte L indicatore RIPETIZIONE 24 lampeggerà 2 Premere il Tasto Lettura Pausa 29 3 Dunque inizierà la lettura del di...

Page 22: ...rdo i Compact Discs Solo i compact discs che portano questo marchio possono essere utilizzati con questo lettore CD Corretto smaltimento del prodotto rifiuti elettrici ed elettronici II marchio riportato sul prodotto e sulla sua documentazione indica che il prodotto non deve essere smaltito con altri rifiuti domestici al termine del ciclo di vita Per evitare eventuali danni all ambiente o alla sal...

Page 23: ...encendido del aparato está montado en el circuito secundario y al apagarlo no desconecta de la alimentación todo el aparato No conecte la unidad hasta que no se hayan efectuado todas las otras conexiones La unidad se debe instalar de forma que su posición no le impida tener ventilación adecuada Por ejemplo el equipo no se debe colocar cerca de cortinas o sobre el tapete ni en una instalación como ...

Page 24: ...on el Selector Banda 16 3 Sintonizar la estación radio deseada girando el control Sintonización 18 43 44 4 Regular el control Volumen 2 al nivel deseado 5 Para apagar la radio colocar el Selector Función 5 en la posición Casete Antena Para la recepción en FM se encuentra incorporada una antena telescópica FM 31 en la parte posterior del aparato Extender la antena y girarla hasta alcanzar la mejor ...

Page 25: ...arlo cuidadosamente en el compartimento con el lado de la etiqueta dirigido hacia arriba Colocar los discos de 3 sobre el eje central del compartimento 4 Volver a cerrar el comp artimento bajando el ángulo del comp artimento CD LECTURA DEL DISCO 1 Levantar la tapa del CD para abrir el compartimento CD e introducir un disco Volver a cerrar el compartimento CD 2 Pulsar el botón Lectura Pausa La lect...

Page 26: ... Repetición 4 una vez El indicador REPETICIÓN 24 se iluminará 2 Seleccionar la melodía deseada pulsando el botón Salto Hacia Adelante o Salto Hacia Atrás 21 La melodía seleccionada se visualizará sobre la pantalla CD 3 Pulsar el Botón Lectura Pausa 29 luego la melodía seleccionada será leída repetidamente 4 Para borrar la melodía singular en lectura repetida pulsar el botón REPETICIÓN 4 dos veces ...

Page 27: ...r Láser Codifica 16 Bit Lineares Nota Especificaciones y diseño sujetos a posibles modificaciones sin previo aviso Eliminación correcta de este producto material electrico y electrónico de descarte La presencia de esta marca en el producto o en el materiál informativo que lo acompaña indica que al finalizar su vida útil no deberá eliminarse junto con otros residuos domésticos Para evitar los posib...

Page 28: ...aparelho a chuva ou a umidade O interruptor de alimentação deste aparelho foi montado sobre o circuito secundário e não desconecta completamente o aparelho quando este for desligado Utilizar o aparelho somente depois de verificar se as conexões foram seguidas corretamente Colocar o aparelho em um local suficientemente ventilado Evitar de colocá lo vizinho a cortinas sobre tapetes ou dentro de um m...

Page 29: ...AREDE ELÉTRICA Antes de ligar o seu novo aparelho verifique se a rede elétrica local é a mesma indicada na plaqueta da unidade Para a sua própria segurança leia as instruções abaixo antes de ligar o aparelho OPERAÇÃOCOM CORRENTEALTERNADA Este aparelho foi desenhado para trabalhar somente em corrente de AC 230V e a 50Hz Cuidado Para se prevenir de choques elétricos retire a tomada da rede antes de ...

Page 30: ...var a função teclar duas vezes REPETIÇÃO 5 Para interromper a música teclar S top estáticas benzina Thinners ou outros solventes Estes produtos químicos podem causar um dano irreparável à superfície do CD Os CDs devem ser guardados em suas caixas após o uso Isto evita arranhões que podem atrapalhar a leitura do laser e salt ar músicas não exponha os CDs à luz solar umidade e temperaturas altas por...

Page 31: ... através das localidades programadas Para Repetir a Música na Sequência Programada Teclar REPETIÇÃO duas vezes Entrar no programa como descrito anteriormente Teclar Play Pause O CD irá tocar na ordem programada no final retorna automaticamente ao início do primeiro trecho programado Isto irá continuar até que a tecla Stop seja ativada Se a tecla REPETIÇÃO é acionada novamente o indicador será canc...

Page 32: ...é aviso Eliminaçao Correcta Deste Produto Resíduo de Equipamentas Eléctricos e Electrónicos Esta marca apresentada no produto ou na sua literatura indica que ele não deverá ser eliminado juntamente com os residuos domésticos indiferenciados no final do seu periodo de vida útil Para impedir danos ao ambiente e á saúde humana causados pela eliminação incontrolada de resíduos deverá separar este equi...

Reviews: