RoadScan Canada DH22 User Instruction Manual Download Page 8


Figure 2 


Page 5 

From the selected tab, to select which file to view you can tab over the files using the 
Browse-up button 

to scroll left and the 

Browse-down button 

to scroll right and press 

the 

OK button 

to select file. Pressing the

 OK button 

on a video or audio file

 will 

automatically start playing the file.

 – Use the 

OK button

 to pause and play the file. 

Use the 

Browse-down button

 to 

fast forward 

and use the 

Browse-up button 

to 

rewind 

videos

You can increase the speed of fast forward and rewind by tapping the 

browse buttons

 more than once. Video mode 

has X2, X4, X8, X16, X32, X64, and X128 

speed (both forward and reverse). 

Menu Access 

Press the 

Menu button

, otherwise known as the 

browse-down button

, (located to the right 

of the 

OK button

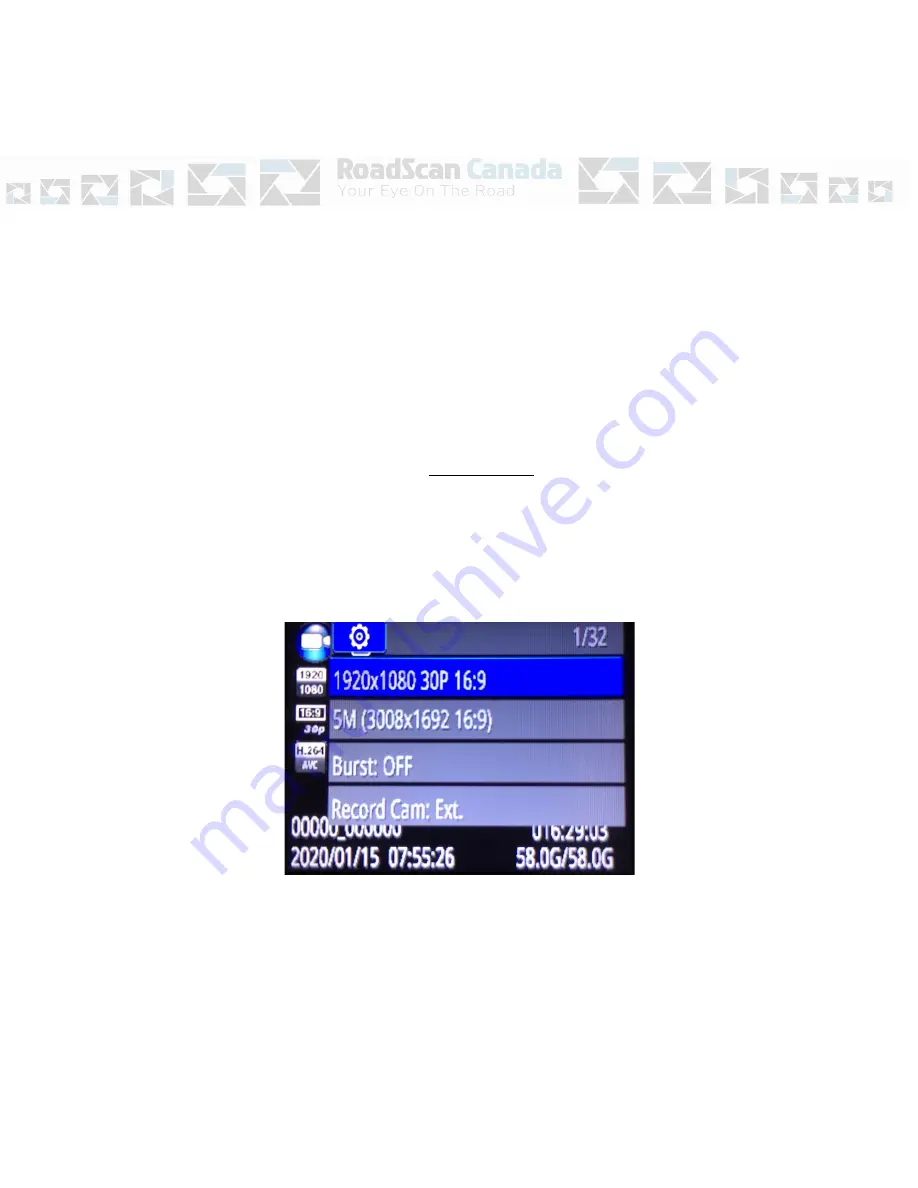
) while on the main LCD view screen and camera is in standby mode. You will 

be prompted to enter a password (see Playback for password entry instructions).  

After password is entered, the following screen should pop up: 


Figure 3 

Use the 

Browse-down button

 to scroll down and 

Browse-up


button

 to scroll up through 

menu items and 

OK button

 to select a menu item and enter its sub menu. Finally, in the sub 

menus, use the 

Browse-up


button

 to scroll left, the 

Browse-down button

 to scroll right, and 

the 

OK button

 to select option.  

 
Press the 

Power button 

to


back out of sub menus without making changes to the settings. 


Summary of Contents for DH22

Page 1: ...RoadScan Canada DH22 User Instruction Manual...

Page 2: ...CAMERA LAYOUT Page 1...

Page 3: ...between video photo and audio in playback mode 10 Audio Recording mute a Press to record audio only when in standby mode b Press to enable disable video mute when the camera is in record mode 11 LCD S...

Page 4: ...the camera and start the video function 16 Fn button a Press to turn IR LED on off when IR is in manual mode b Hold to turn on off the flashlight 17 Power button a Hold for 3 seconds to power on off...

Page 5: ...io Record When the camera is powered off hold the audio button for 3 seconds and the camera will power on and begin recording audio Video To start a recording while the camera is on and not recording...

Page 6: ...key resolution switch is activated during recording recording will temporarily stop and a new recording segment will start Note If any other resolution is chosen prior to using the onekey resolution s...

Page 7: ...password use the Browse up and Browse down buttons to scroll through other password entry options and Press OK button to select password entries Figure 1 If you make a mistake when entering password...

Page 8: ...X16 X32 X64 and X128 speed both forward and reverse Menu Access Press the Menu button otherwise known as the browse down button located to the right of the OK button while on the main LCD view screen...

Page 9: ...files tab photos will automatically be scrolled through 14 33 Infrared Manual or Automatic While under dark circumstances infrared LED will help record clear image or video in HD Auto In low light si...

Page 10: ...n the IR on manually when IR is on two red lights will appear on the front of the camera Flashlight White LED Hold the infrared button for 2 seconds for the flashlight to turn on hold again for 2 seco...

Page 11: ...ed under warranty Please ensure to use and charge your camera often Page 9 Opening Files On Computer 1 Plug the camera into the computer via the USB cable 2 On the camera screen you will be prompted t...

Page 12: ...at drive on the computer and open it Page 10 Figure 6 6 Once opened there should be two folders DCIM and GPS Player and one file OPERATIONDIARY txt which is a log of the date and time of the camera op...

Page 13: ...in order to clear up space on the camera prior to its next use Failure to do so will result in no data being recorded A card full message will appear and an alarm will sound if there is no storage ava...

Page 14: ...ontact Lee for the gps exe file at lee roadscancanada ca as the website currently has limitations associated with it 3 Any gps player will work with the software however 4 The GPS component will open...

Page 15: ...lace the camera in the docking station the camera is connected to your vehicle via the cigar lighter Hit the video record button when required or as wanted Note the camera is being charged while in th...

Page 16: ...a will not turn off If the camera freezes hit the reset button covered in Reset the Camera This will occur when too many buttons are pushed simultaneously Reasons for the camera to stop functioning ar...

Page 17: ...ce due to system and firmware upgrades Please read all the information carefully prior to using the product for the best performance and to prevent any damage injuries or misuse of the device s Custom...

Page 18: ...atutes DO NOT disassemble this product Opening or removing covers may expose you to dangerous voltages or other risks Incorrect reassembly can cause electric shock during subsequent use DO NOT use thi...

Page 19: ...ndition other than what can be considered normal use Warranty Disclaimer RoadScan Canada Inc makes no other warranties express implied or otherwise regarding this product and specifically disclaims an...

Page 20: ...Page 18...

Reviews: