RIOTEC iDC9272A Quick Manual Download Page 3


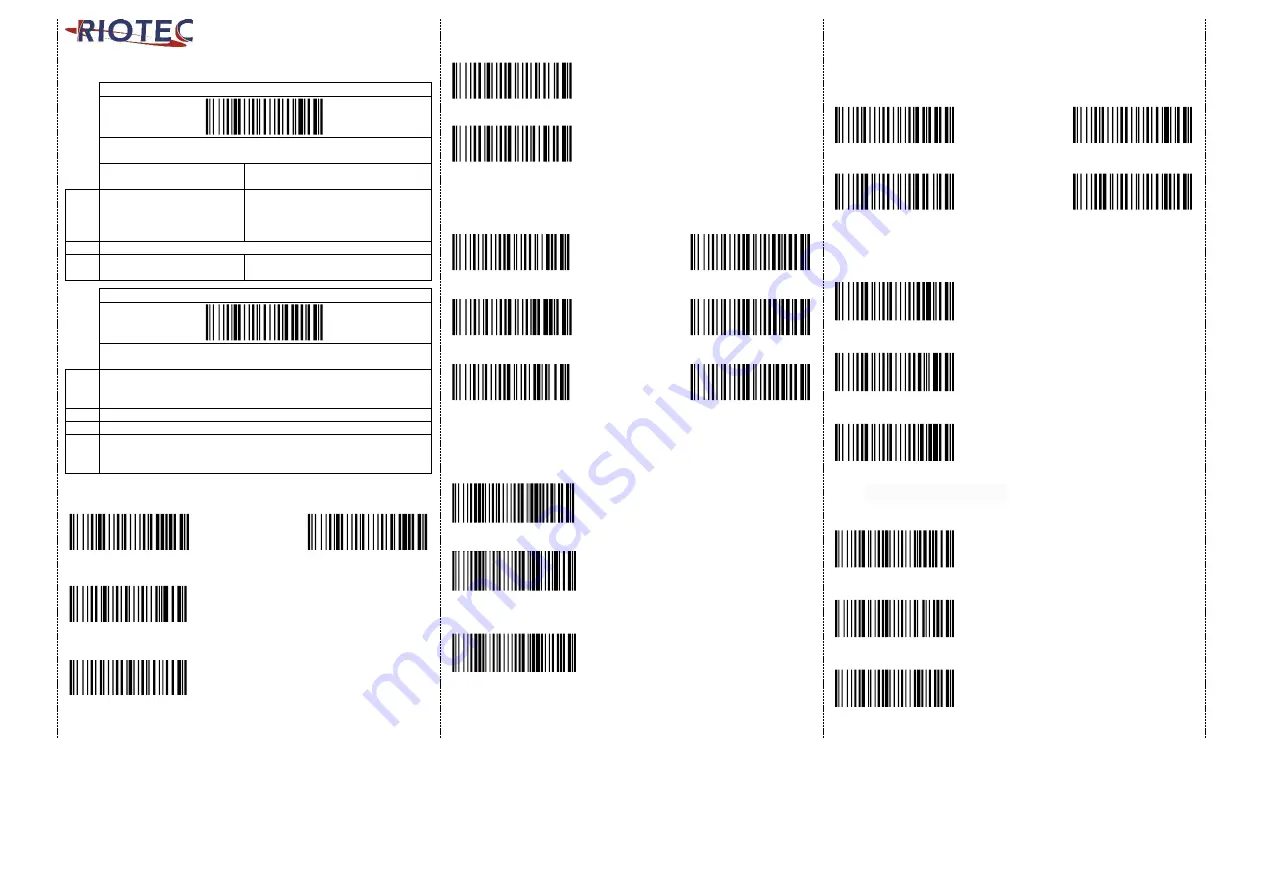
There are two operating modes on the scanner


1.Data Transmission mode (Default) 


It is a necessary to scan “clean memory data" when 

switching between these two modes. 


Within Bluetooth radio 

range 

Beyond  Bluetooth radio  range 

Data 

read 

Transmit data to 
PC/terminal directly 

Save data into scanner’s memory, 

scanner will transmit data to PC/ 
terminal automatically when back to 

Bluetooth radio range. 


Enter Data Storage mode 

LED  Green/ Orange LED flashes 

followed by 3 beeps. 


2.Data Storage mode (Batch Mode) 


It is a necessary to scan “clean memory data" when switching 

between these two modes.


Data 

read 

Save data directly to scanner’s memory, It will transmit the data to 

PC/ terminal after you scan the Transmit memory data code. To 
delete data please scan the Clean memory data code.


Enter Data Transmission mode


LED  Green/Orange LED flashes followed by 3 beeps. 


Always Clean memory data before switching to Data Transmission 

Mode. Otherwise Red/ Orange LED will flash with one long beep and 
will not switch modes. 


Under Data storage Mode 

The data can be keep or delete by option after transmit 


Keep the data 

(Default) 


Delete the data 


Transmit memory data   

Green/Orange LED Flashes followed by 3 beeps 


Clean memory data 


Green/Orange LED flashes followed by 3 beeps 

The barcode data which is stored in the memory will be deleted. 


Trigger Mode 


Trigger always 
(Trigger available at any time) 


Trigger standard (Default) 

(Trigger available, after data sent to the device) 


Transmission Speed 

Transmission speed is dependent on your device. In order not to lose 

data, please choose the correct speed. Middle-speed is the Default. 


High-speed 


Ultra Slow-speed 

transmission 


1 transmission 


Middle-speed 


Ultra Slow-speed 

transmission 


2 transmission 


Slow-speed 


Ultra Slow-speed 

transmission 

(Default) 


3 transmission 

 
Power-saving Mode 


Power-saving mode OFF 


Power-saving mode ON (Default):   

Enter power-saving mode after 5-minute 

inactivity. This function converses battery 

power. When you press "SCAN/Power ON" 

button, it will wake up and begin to scan. 


Power-saving mode ON:   

Enter power-saving mode after 10-minute 

inactivity. This function converses battery 
power. When you press "SCAN/Power ON" 

button, it will wake up and begin to scan. 


*


When charging, the scanner will not enter power-saving mode 

automatically.


RTC (Real-time clock), 

please set the punctuation mark at the same time 

You must scan the below configuration barcode to set the date & 

time stamp on the scanner. 


Date information: 

ENABLE 


Date information: 

DISABLE (default) 


Time information: 

ENABLE 


Time information: 

DISABLE (default) 

 
The format of Date setting 


Date format 1: mm/dd/20yy (default) 

For example: 01/23/2011 


Date format 2: dd/mm/20yy 

For example: 23/01/2011 


Date format 3: 20yy/mm/dd 

For example: 2011/01/23 


The punctuation marks for the intervals among 

barcode data, date, time 


  , comma (default) – FOR Android/iOS use 

For example: 

ABCD,01/23/2011,12:34:56 


Tab – FOR iOS use 

For example: 

ABCD 01/23/2011 12:34:56 


; semicolon – FOR Android/iOS use 

For example: 

ABCD;01/23/2011;12:34:56 


Demo 

%M%A%F


Demo 

%M%A%N


Demo 

%M%D%K


Demo 

%M%D%E


Demo 

%R%E%C


Demo 

%E%R%A


Demo 

%R%T%E


Demo 

%R%T%D


Demo 

%B%T%H


Demo 

.


Demo 

.


Demo 

.


Demo 

%B%T%L


Demo 

.


Demo 

%P%D%T00


Demo 

%P%D%T05


Demo 

%P%D%T10


Demo 

%D%I%N


Demo 

%D%I%F


Demo 

%T%I%N


Demo 

%T%I%F


Demo 

.


Demo 

.


Demo 

.


Demo 

%T%S%C,


Demo 

%T%S%C


Demo 

%T%S%C;

Summary of Contents for iDC9272A

Page 1: ...ease press Left button Right button Touch trigger for 8 9 seconds to activate iDC9272A The touch sensor area is around the central area Please check the above drawing for your reference LED Indicator Information Orange LED ON Full charged Orange and Red LED Flashing Charging Orange LED Flashing Low battery Red LED ON Off line out of service Green LED ON Good read Orange LED ON Good read Batch mode...

Page 2: ...to raise lower soft keyboard please read the above setting code first Then press left button refer to drawing 5 on page 1 to raise keyboard LED is RED Bluetooth is offline press it again to lower keyboard LED is off Bluetooth is online It will take 5 10 seconds to make BT online offline Please be noted that when BT is offline scanning function is stopped Or switch C to O to make BT online Drawing ...

Page 3: ...der not to lose data please choose the correct speed Middle speed is the Default High speed Ultra Slow speed transmission 1 transmission Middle speed Ultra Slow speed transmission 2 transmission Slow speed Ultra Slow speed transmission Default 3 transmission Power saving Mode Power saving mode OFF Power saving mode ON Default Enter power saving mode after 5 minute inactivity This function converse...

Page 4: ...rom Prefix Suffix TABLE below page 3 then end by scanning Code X below right The max of special characters is 5 When you append 1 4 required values for Prefix or Suffix it must end with Code X It doesn t need Code X if you append 5 values to barcode data How to delete Prefix or Suffix 1 scan above configuration code for Prefix or Suffix 2 enter the 0 0 above left 3 then end by scanning Code X belo...

Page 5: ...SABLE ENABLE CODE 93 DISABLE ENABLE CODE 11 DISABLE ENABLE Interleaved 25 DISABLE ENABLE Discrete 25 DISABLE ENABLE CODABAR DISABLE ENABLE MSI DISABLE 1D Symbologies 3 ENABLE Matrix 25 DISABLE ENABLE GS1 DataBar DISABLE ENABLE GS1 DataBar Limited DISABLE ENABLE GS1 DataBar Expanded DISABLE ENABLE Composite CC C DISABLE ENABLE Composite CC A B DISABLE ENABLE Composite TLC 39 DISABLE ENABLE Code 39 ...

Reviews: