HCM705B
-
High Accuracy Gyro Compass
HCM705B
Calibration methods:
Calibration lemmas:
1) The accuracy of testing compass can not reach the requirements;
2) compass installation environment have magnetic interference, the interference is fixed, and
the interference magnetic field and compass installation will not happen again in distance
changes (example: compass to be installed above an iron material, because the iron will have
magnetic interference, at this time then need to rotate and calibrate the iron and compass, and
the iron and compass will not be separated when using , once they are separated then need to
recalibrate. If the iron size is not fixed, or compass distance change is not fixed, the
interference can not be calibrated,only can install it in a very far away , safe distance control in
over 30cm).
1
)
Correctly connect the HCM compass to the RS232 communication port , turn on the power.Correctly
2)
Select automatic calibration mode or manual calibration mode; Automatic calibration MODE:
send commands "6804 004448" (or click on the software A - MODE)
Manual calibration MODE: send commands ", 6804, 004347 "(or click on the software M - MODE)
using hexadecimal format send
calibration START command
:
" 68 00 04 08 0C
"
(or click RION’ s
3D debugging software" CALI - START ")
3)
HCM compass will return the response command, at the same time the compass take each point will
return a response, please refer to the communication protocol.
4
)
With the following rotation rules after minimum taking the 12 calibration points, then send
the stop
calibration command: 68 04 00 09 0D (or click the RION 3D debugging software "CALI-STOP"
button
)
, the compass will pause about 2 seconds, the internal CPU automatically calculate just
sampling data, after the calculation will return a set of data, is the percentage value of the data just gain.
5)
Then send the
save calibration command: 68 04 00 0A 0E "(or click RION 3D debugging
software" CALI-SAVE "Save button)
, the compass will return the answer reply command, you can work
properly if successfully saved, if return unsuccessful information, the user can repeat the above
calibration steps also can return to the compass factory default calibration data work.
6) Following 2)
Send a calibration start command to begin calibration, keep the stability of the module
posture, waiting for the first point is sampled.
7)
after the first point sampling, rotate module around 90 degrees horizontally,to keep the module stability,
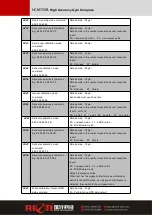
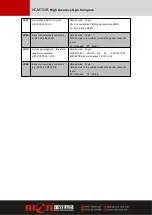
wait for the next point is sampled. (Refer to the below diagram calibration steps)
8)
Repeat the above steps until the sample to 18 points, and then send the calibration stop button.
9)
Send calibration save command to end the calibration .
When calibrate, if the distance of the magnetic interference source with the compass occur
change , the percentage of the calibration will be lower, the precision will be weaker.
Note
: When you start the calibration and take points, move the compass to the following location, please
note that these points are not absolute heading orientation, but with reference to the first point sampling
heading orientation relative orientation change value. That is, you do not need to know which position the
real North Pole is in.Further for example, the 90degree rotation and 15 degrees pitch only one reference
value, to allow a certain sampling angle value error, unnecessarily strictly require very precise. Take at
least below12 points calibration, it is recommended that 24 points ,the user can sample more points in


