background image

EX08DT and EX11DT Installation and Operation Manual   


    37 

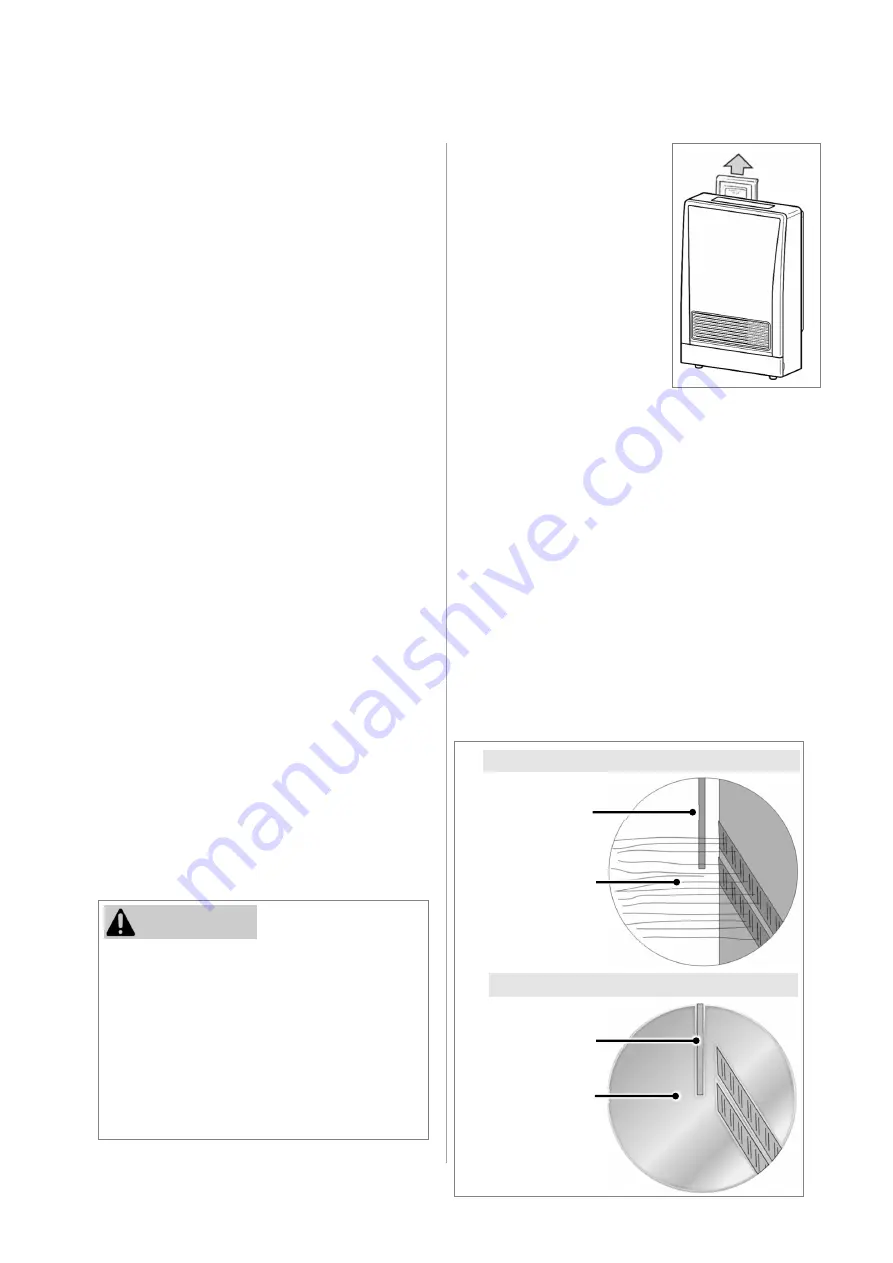
Filters


Dirty filters reduce the air flow 

and the furnace’s ability to 

produce heat. The filters 

should be cleaned frequently 

during the heating season.  

If the filters become blocked, 

the filter indicator lamp will 

flash red and a beep will 

sound five times. This 

beeping will repeat every five 

minutes. Eventually the 

furnace will turn off and 

display fault code 14 on the 

control panel display. 



This direct vent furnace must be inspected 

annually by a trained and qualified 

professional. Repairs and maintenance must 

be performed by a trained and qualified 

professional. The trained and qualified 

professional must verify proper operation 

after servicing. 



More frequent cleaning may be required due 

to excessive lint from carpeting, bedding 

material, etc. It is imperative that control 

compartments, burners, and circulating air 

passage ways of the furnace be kept clean. 



Any screen or guard removed for servicing 

the furnace must be replaced prior to 

operating the furnace. Clean as follows: 
1.  Turn heat off. Allow to cool for one hour. 
2.  Remove the front panel by removing the 

five screws.  

3.  Use pressurized air to remove dust from 

the main burner, heat exchanger, and 

fan blades. 

4.  Use a soft, dry cloth to wipe the cabinet. 



Do not use wet cloth or spray cleaners on 

the burner. 



The flue should be inspected annually for 

blockages or damage. 



Motors are permanently lubricated and do 

not need periodic lubrication. Keep fan and 

motor free of dust and dirt by cleaning 

annually. 



Verify proper operation after servicing. 



When attaching the front panel, do not clip 

or pinch any electric cords to prevent electric 

shock. 

Exterior Care




Dampen soft cloth with warm water. Wring 

water out well and wipe the unit. 



Do not use volatile substances such as 

benzene or thinners as they may cause 

fading of the paint and deformation of the 

resin. 



Prevent dust from accumulating on the 

power cord, side covers, and parts 

behind the furnace. 



Keep the area around flue terminal free of 

snow and ice. The furnace will not 

function properly if the intake air or 

exhaust is impeded by obstructions.  



Refer to “Flue Terminal Clearances” in 

section “4.3.2 Clearances.” The 

clearance in Ref. A should be maintained 

from any snow accumulation.  


CAUTION


To clean the filters, the furnace should be OFF and cool. 

Remove the filter and clean it using a soft dry cloth or vacuum. 

If the filter is greasy, wash with warm soapy water, rinse, and 

dry completely.  
Do not use the furnace without the filter installed. 
Install the air filter properly so that the filter is flush against the 

back surface of the furnace, with the top angle of the frame 

pointing outward (away from the furnace). There should be no 

spacing or air gaps between the air filter and furnace.     

Visual Inspection of Flame 

Check that the burner flames are operating normally. The 

flame can be seen through the circular window through the 

louvers. 
When operating normally, the burner flame should appear as 

long, clear, blue, stable streaks. Yellow flames or an orange 

color is abnormal and maintenance is required. 

6. Maintenance 

Air Filter


Figure 51 

NORMAL 

Flame Rod 

Long, clear, blue, 

stable flames 

Yellow flames or 

orange color  

ABNORMAL 

Flame Rod 

Figure 52 

Summary of Contents for EX08DT

Page 1: ...MODELS EX08DT EX1 1 DT RHFE 203FTA RHFE 266FTA RHF310 1750 02 Direct Vent Wall Furnace Installation and Operation Manual ...

Page 2: ... s instruc ons If you cannot reach your gas supplier call the fire department Installa on and service must be performed by a licensed professional WARNING Copyright 2022 Rinnai America Corporation Rinnai is a registered trademark of Rinnai Corporation used under license by Rinnai America Corporation Rinnai America Corporation continually updates materials and as such content is subject to change w...

Page 3: ...s 10 4 2 What You Will Need 11 4 3 Choose an Installation Location 12 4 4 Installation Steps 16 4 5 Post Installation Checklist 27 5 Operation 28 5 1 Safety Precautions 28 5 2 Operating Instructions 29 5 3 Control Panel 30 5 4 Basic Operation Settings 30 5 5 Add Water to the Humidifier 35 5 6 Adjust Air Flow Direction 35 5 7 Restart Function 35 5 8 Diagnostic Codes 36 6 Maintenance 37 7 Troublesho...

Page 4: ...llation The warranty may be voided due to any improper installation A trained and qualified professional should have skills such as Gas sizing Connecting gas lines valves and electricity Knowledge of applicable national state and local codes Installing venting through a wall Training in installation of direct vent furnaces Training on Rinnai Direct Vent Furnaces is accessible at rinnaipro myabsorb...

Page 5: ...trained and qualified professional Keep the area around the furnace clear and free from combustible materials gasoline and other flammable vapors and liquids Never store liquid propane containers indoors Do not use this furnace if any part has been under water Immediately call a trained and qualified professional to inspect the furnace and to replace any part of the control system and any gas cont...

Page 6: ...ously 7 Test for spillage from draft hood equipped appliances at the draft hood relief opening after 5 minutes of main burner operation Use the flame of a match or candle 8 If improper venting is observed during any of the above tests the venting system must be corrected in accordance with the National Fuel Gas Code ANSI Z223 1 NFPA 54 and or Natural Gas and Propane Installation Code CSA B149 1 9 ...

Page 7: ...r to remove hold both sides and pull toward you Rating plate includes model number serial number gas type etc English is on the right side French is on the left side Humidifier to access remove bottom cover and pull out Air Filter Gas Connection 1 2 in 13 mm Male NPT Room Temperature Sensor Thermistor Power Cord and Plug Combustion Air Intake Hose Exhaust Pipe Flue Manifold Combustion Exhaust Figu...

Page 8: ...ction Flued Gas Furnace Operation Push Button Electronic Gas Connection 1 2 in 13 mm Male NPT Gas Control Electronic Burners Stainless Steel Bunsen Burner Temperature Control Electronic Thermostat Low 60 80ºF 16 26 C in 2ºF 1 C Increments High Ignition System Electronic Spark Ignition Flue System The flue must be terminated to atmosphere with only flue components listed with the furnace s certific...

Page 9: ...l size wall template is provided on the furnace carton box Do not discard until installation is complete IMPORTANT Figure 3 Front View Figure 4 Side View Side View Flue Elbow Center of Furnace Front View Including Sample Wall Template Located on Furnace Carton Box Wall Bracket Wall Opening Position ...

Page 10: ...ss of 1 2 psi 3 5 kPa The furnace must be isolated from the gas supply piping system by closing its equipment shutoff valve during any pressure testing of the gas supply piping system at test pressures equal to or less than 1 2 psi 3 5 kPa If the flooring is carpet or other combustible material other than wood then the furnace must be installed on a metal or wood panel extending the full width and...

Page 11: ...t 1 Wall Bracket 1 Rinnai Direct Vent Wall Furnace Installation and Operation Manual 1 Image not shown Screw M4 For Air Intake Clip Spacer Bracket 4 For Weatherboard Installation Table 3 Items Included Name Kit No Fits Walls S Vent Kit FOT 150 3 4 1 2 in 75 115 mm A Vent Kit FOT 151 4 1 2 9 1 2 in 115 240 mm B Vent Kit FOT 152 9 1 2 15 3 4 in 240 400 mm C Vent Kit FOT 153 15 3 4 23 5 8 in 400 600 ...

Page 12: ...ugh these vents when air is not being brought in through them Chemicals that are corrosive in nature should not be stored or used near the furnace or vent termination Damage and repair due to corrosive compounds in the air is not covered by warranty Pipe Wrenches x2 Adjustable Pliers Screwdrivers x2 Wire Cutters Gloves Safety Glasses Level Soap or Gas Leak Detector Solution Approved Venting Teflon...

Page 13: ...ermanently closed window D Vertical clearance to ventilated soffit located above the terminal within a horizontal distance of 2 feet 61 cm from the center line of the terminal E Clearance to unventilated soffit F Clearance to outside corner G Clearance to inside corner H Clearance to each side of center line extended above meter regulator assembly 3 feet 91 cm within a height 15 feet 4 5 m above t...

Page 14: ...gure to the left Rinnai recommends 10 in 254 mm clearance from the top and on both sides for servicing Location Clearances to Combustibles Top 0 in 0 mm Bottom Ground 0 in 0 mm Front Panel 40 in 1 m Does not include flooring material or carpeting less than 1 2 in 30 mm in height Back Including Back Spacer 0 in 0 mm Sides Left and Right 2 in 50 mm Front Top Bottom If clearances are not met damage t...

Page 15: ...or air is not being used for combustion A standard 3 prong 120 VAC 60 Hz properly grounded wall outlet is available The installation must conform with local codes or in the absence of local codes with the National Fuel Gas Code ANSI Z223 1 NFPA 54 or the Natural Gas and Propane Installation Code CSA B149 1 If installed in a manufactured home the installation must conform with the Manufactured Home...

Page 16: ...xhaust to the outside Do not exhaust into other rooms The flue manifold is not designed to be positioned under floors or below the furnace The termination cannot be vertical This furnace can only be used with one of the five types of Rinnai flue kits The flue kits and their dimensions are listed in section 4 2 1 Items Included Refer to Flue Terminal Clearances in section 4 3 2 Clearances 4 4 2 Ins...

Page 17: ...ter 4 Install the Terminal Check that the terminal seal is in place For weatherboard walls add the second seal next to the terminal seal to compensate for weather board angle Adjust the second seal to make sure Top marking of the second seal is located at the top or Ʌ marking is aligned with V marking on the terminal From the outside insert the terminal into the sleeve with the marking TOP at the ...

Page 18: ...Bend the ties back into the sleeve and parallel to the wall 6 Insert Inside Connection Assembly Push the assembly into the terminal tube ensuring that the seal is in place on the inner tube Attach the inside connection with 3 screws The inner connection can still be turned to install the screws Locking ties Sleeve 3 screws Figure 13 Figure 14 Top Sleeve Clip the ties over the inside sleeve and cut...

Page 19: ... 25 m 1 3 Air Intake Hose 90 6 in 2 3 m 1 4 Bent Elbow 1 5 Long Bent Elbow 1 1 6 Hose Joint 1 5 in 38 mm inner dia 1 1 1 1 6 Hose Joint 2 0 in 50 mm inner dia 1 7 Pipe Stopper A 1 1 1 2 1 1 8 Pipe Stopper B 1 1 1 9 Pipe Clamp 2 Sets 3 Sets 4 Sets 10 Wall Fixture 2 3 4 11 Nut 2 3 4 12 Screw A 2 3 4 13 Screw B 4 6 8 Item Extension kits are available to extend the exhaust line and air intake hose bet...

Page 20: ...e extensions exceeding this length should drain to the outside and sloped 3 downward 4 Do not allow any low points or sagging in the exhaust line Otherwise condensate may block the exhaust and affect combustion 5 Vent extensions installed in unconditioned air space must be insulated with high temperature insulation and must be accessible 6 Vent extensions must not be concealed per NFPA 54 and must...

Page 21: ...y bends limit is 3 Air intake hose is above exhaust pipe Incorrect Configurations EX11DT Model Only NOT CORRECT CORRECT NOT CORRECT 90 Elbow Up Configuration Figure 18 Figure 17 Slope horizontal sections 3 downward 3 EX11DT Model Only Intake Exhaust Intake Exhaust ...

Page 22: ...ort on the flue manifold To connect exhaust pipes with other straight pipes or bends fit the male end into the female end Use pipe stopper A to clamp the connection Use pipe stopper B to fix the length on the adjustable exhaust pipes Do not extend these pipes beyond the red line Do not cut the exhaust pipe Use the adjustable pipes if necessary To bend the elbow insert exhaust pipes into both ends ...

Page 23: ... Engage the hook and rotate it until it snaps against the body of the clamp 4 Slide the insulation sleeve up to the flue manifold and slip the securing clip over the sleeve as shown 5 Install the bracket on the rear of the top spacer by tightening 2 screws 6 Install the wall bracket with two screws Install the top spacer by clipping the spacer into the wall brackets and attaching it to the furnace...

Page 24: ...limits shown in section 3 2 Specifications Refer to an approved pipe sizing chart if in doubt about the size of the gas line Complete these instructions for altitude and vent length Default altitude 0 2 000 ft 0 610 m Default vent length EX11DT 0 7 ft 0 2 m 1 Elbow EX08DT 0 ft 0 m For altitudes greater than 2 000 ft 610 m or installations with vent lengths longer than 7 ft 2 m refer to Table 8 Gas...

Page 25: ...0 80 in 20 mm 1 06 in 27 mm 1 16 in 29 mm 1 28 in 33 mm 1 41 in 36 mm Manifold test pressure W C High 2 2 in 56 mm 1 9 in 49 mm 1 7 in 44 mm 1 6 in 40 mm 3 8 in 95 mm 3 3 in 84 mm 3 0 in 75 mm 2 7 in 69 mm EX08DT Code A1 A5 A2 A6 A3 A7 A4 A8 L1 L5 L2 L6 L3 L7 L4 L8 1 Turn off the gas and the power supply 2 Remove the 5 screws that hold the louver assembly and front panel Lift the panel straight up...

Page 26: ...e and buttons 14 Press the ON OFF button again The LED display turns blank and the furnace returns to the normal OFF mode 15 Remove manometer and two barb fittings and install Allen head screws Operate the unit and follow steps A B and C below A Check for Gas Leaks at the Test Points B Check the Normal Operating Sequence When you press the ON OFF button the LED display will illuminate the combusti...

Page 27: ...below that listed on the rating plate ELECTRICITY YES NO Did you confirm that the electricity is supplied from a 120 VAC 60 Hz power source is in a properly grounded circuit and turned on Have you confirmed that an extension cord or an adapter plug has NOT been used with the furnace FINAL ITEMS YES NO Did you install the front panel Have you explained to the customer the importance of not blocking...

Page 28: ... discharge Do not allow anyone to sleep directly in front of the furnace Children and adults should be alerted to the hazards of high surface temperature and should stay away to avoid burns or clothing ignition Young children should be carefully supervised when they are in the same room as the furnace Clothing or other flammable material should not be placed on or near the furnace Any safety scree...

Page 29: ...nder water OPERATING INSTRUCTIONS TO TURN OFF GAS TO APPLIANCE 1 STOP Read the safety information above 2 Set the thermostat to lowest setting 3 Turn off all electric power to the appliance using the ON OFF button on the control panel 4 This appliance does not have a pilot It is equipped with an ignition device which automatically lights the burner Do not try to light the burner by hand 5 Turn Man...

Page 30: ...isplay will dim The display will turn off when the furnace is turned off While programming the timers the display will turn off several sec onds after a button is last pushed Display Note The factory default is F 1 The furnace must be turned off 2 Press the Timer 1 and Timer 2 button at the same time for about 5 seconds The display will show ºC or ºF 3 Use the arrow keys to select the temperature ...

Page 31: ...ck is deactivated Deactivating the lock releases the control buttons 1 Press the Program button 2 The light next to Clock should be flashing Press the up and down arrows to set the time Holding down either of the arrow keys will change the time more quickly 3 Press the Program button until none of the time options are flashing 1 Turn the furnace on by pressing the ON OFF button 2 Press the up or d...

Page 32: ...ature is turned OFF 3 Press and hold the Economy Up Program buttons for 2 5 seconds and then release 00 appears in the display 4 Press the UP button 01 appears in the display 5 Press the ON OFF button the display will go blank The furnace is now in Remote Thermostat mode Do not unplug the furnace within two hours of entering Remote Thermostat mode This will cause the furnace to revert back to the ...

Page 33: ...t the start time Holding down either of the arrow keys will change the time more quickly Operating the timers To operate the furnace using a Timer press the ON OFF button and the appropriate Timer button The furnace will operate from the start to end times you have entered for that Timer It will operate at the temperature setting that has been set for the furnace The timer can be set while the fur...

Page 34: ...will always prevent the room temperature from falling below the pre set minimum temperature as long as electric power and gas is supplied To turn this feature off press the Set back button The unit will retain its ON or OFF setting after a power failure Default setting at the factory is on 5 4 9 Set Back 5 4 8 Economy Energy Saving Mode IMPORTANT Figure 45 Economy Mode Figure 48 Figure 46 Figure 4...

Page 35: ...gnition fails or the flame is extinguished during forced combustion then the furnace will attempt to restart after 1 hour If the flame is extinguished after this period then the furnace will immediately attempt ignition The vertical louvers may be adjusted to move the air flow more to the right or to the left Use a screw driver or similar object to bend each louver to the desired position Do not b...

Page 36: ...t Circuit 33 Overheat Thermistor 1 Disconnection Open Circuit 34 Overheat Thermistor 1 Short Circuit 40 Pressure Sensor Sensing Tube Failure 49 Pressure Sensor Breakdown 53 Abnormal Spark Sensed 61 Combustion Fan 62 Convection Fan 70 ON OFF Switch or Set back Switch 71 Solenoid Valve Failure 72 Flame Rod Failure 73 Communication Error 99 Flue Block Check around the flue terminal for blockage 3 Ser...

Page 37: ...leaning annually Verify proper operation after servicing When attaching the front panel do not clip or pinch any electric cords to prevent electric shock Exterior Care Dampen soft cloth with warm water Wring water out well and wipe the unit Do not use volatile substances such as benzene or thinners as they may cause fading of the paint and deformation of the resin Prevent dust from accumulating on...

Page 38: ... Low rumbling noise when the thermostat operates This is the sound of the solenoid gas valves opening and closing Unit is not heating room Is the air filter blocked Is the set temperature high enough Is the warm air outlet blocked by anything Are the doors and windows of the room closed Was the appliance correctly sized for the space Air filter is blocked or the louvers are blocked or obstructed A...

Page 39: ...l Installation Air in Gas Pipe Purge Air Installer Gas Filter Blocked Service Call Missed Ignition Service Call Flue Terminal Obstructed Clear Obstruction Flue Manifold Not Connected Service Call Louver Obstructed Clear Obstruction Air Filter Blocked Clean Filter Gas Escape Service Call Lock Set Cancel Lock Gas Off at Meter Tank or Valve Turn Gas On ON Timer is set Cancel ON Timer Additional Troub...

Page 40: ...40 EX08DT and EX11DT Installation and Operation Manual 8 Parts Cut Away Diagram Figure 53 ...

Page 41: ...EX08DT and EX11DT Installation and Operation Manual 41 Figure 54 Exploded View of Service Parts ...

Page 42: ...42 EX08DT and EX11DT Installation and Operation Manual Exploded View of Service Parts Figure 55 ...

Page 43: ...EX08DT and EX11DT Installation and Operation Manual 43 Figure 56 Exploded View of Service Parts ...

Page 44: ...44 EX08DT and EX11DT Installation and Operation Manual Exploded View of Service Parts Figure 57 ...

Page 45: ...EX08DT and EX11DT Installation and Operation Manual 45 Figure 58 Exploded View of Service Parts ...

Page 46: ...1 1 1 015 SIDE PANEL L B 209000063 1 1 016 SIDE PANEL R B 209000064 1 1 017 FRONT LEG 554F 422 2 2 018 LEG 554F 417 2 2 019 AIR FILTER ASSY 308F 462 3 1 1 020 COVER 209000065 1 1 021 TOP PLATE SUPPORTER 209000066 1 1 022 TOP PLATE B 209000067 1 1 023 LOCK BRACKET 209000083 2 2 024 BACK SPACER TOP B 209000068 1 1 025 BACK SPACER R B 209000069 1 1 026 BACK SPACER L B 209000070 1 1 027 WALL BRACKET 3...

Page 47: ... AIR DAMPER 206000032 1 116 SECONDARY AIR DAMPER NG 556F 208 3 1 116 SECONDARY AIR DAMPER PROPANE 308F 218 3 1 116 SECONDARY AIR DAMPER NG 308F 218 1 1 117 ELECTRODE MOUNTING PLATE 205000064 1 1 118 ELECTRODE 205000073 1 1 119 ELECTRODE PACKING 205000063 1 1 120 INJECTOR PROPANE 206000034 2 120 INJECTOR NG AU129 211 1 0 2 120 INJECTOR PROPANE AU129 210 0 9 2 120 INJECTOR NG AU129 211 1 3 2 121 MAN...

Page 48: ...0 51 8 1 1 150 AIR INLET ELBOW RHF300 52 1 1 151 EXHAUST ELBOW ASSY 208000035 1 1 152 O RING E RHF300 200 E 1 1 153 COVER 302F 1103 2 1 1 154 RING 302F 1206 1 1 155 PIPE STOPPER ASSEMBLY 305F 0017 1 1 156 CLAMP CP 90378 2 2 157 GAS INLET 431F 1110 1 1 158 GAS FILTER 206000052 1 1 159 PACKING 209000086 1 1 160 HOSE BAND O 209000087 1 1 161 HOSE BAND N 209000088 1 1 400 CONVECTION FAN TOTAL ASSY 208...

Page 49: ...7 1 1 711 HILIMIT THERMISTOR 205000118 1 1 712 ROOM THERMISTOR 205000105 1 1 713 FR HARNESS 205000119 1 1 714 OVERHEAT SWITCH ES 01171 1 1 715 DVF SUB PCB HARNESS A 205000092 1 1 716 SLEEVE 3022 0344 1 1 800 WATER LINE LABEL 550F 1418 1 1 888 OPERATION MANUAL 200000089 1 1 890 OPERATION LABEL 209000234 1 1 952 FRONT PANEL EMBLEM 209000215 1 1 No Name Part Number EX08DT EX11DT Parts List Continued ...

Page 50: ...of the property owner to secure the services of qualified licensed professionals for the installation of hard wired carbon monoxide detectors a In the event that the side wall horizontally vented gas fueled equipment is installed in a crawl space or an attic the hard wired carbon monoxide detector with alarm and battery back up may be installed on the next adjacent floor level b In the event that ...

Page 51: ...Switch R TH Room Thermistor TF Thermal Fuse F Fuse ER Electrode POV Modulating Solenoid Valve W TH Wall Thermostat FR Flame Rod Mark Parts Name OH TH1 2 Over Heat Thermistor 1 2 OHS Over Heat Switch FM Convection Fan Motor SP Sparker SV1 2 Main Solenoid Valve 1 2 BL Combustion Fan Motor PS Pressure Sensor Figure 59 Wiring Diagram Code Color bk black bl blue gr y green yellow gr green r red w white...

Page 52: ...olenoid Valve FR Flame Rod CF Convection Fan FM Convection Fan Motor SP Sparker Mark Parts Name OHS Over Heat Switch OH TH1 2 Over Heater Thermistor 1 2 SV1 2 Solenoid Valve 1 2 MAIN CPU Central Processing Unit SUB CPU Central Processing Unit for Safety MB Main Burner PS Pressure Sensor W TH Wall Thermostat BL Combustion Fan Motor FCC Fan Control Circuit A DC5V B DC12V C DC15V D DC24V E DC170V F A...

Page 53: ... be performed by a qualified professional who is properly trained to do the type of repair Replacement of the product may only be authorized by Rinnai at its sole discretion Rinnai does not authorize any person or company to assume for it any obligation or liability in connection with the replacement of the product If Rinnai determines that repair of a product is not possible Rinnai may replace th...

Page 54: ...herein there are no other warranties expressed or implied including but not limited to warranties of merchantability or fitness for a particular purpose which extend beyond the description of the warranty herein Any implied warranties of merchantability and fitness arising under state law are limited in duration to the period of coverage provided by this Limited Warranty unless the period provided...

Page 55: ...EX08DT and EX11DT Installation and Operation Manual 55 11 Notes ...

Page 56: ...200000083 01 1 2022 103 International Drive Peachtree City GA 30269 Tel 1 800 621 9419 Web rinnai us rinnai ca Rinnai America Corporation RHF310 1750 02 ...

Reviews: