background image

40

CONFIGURING YOUR ROUTER

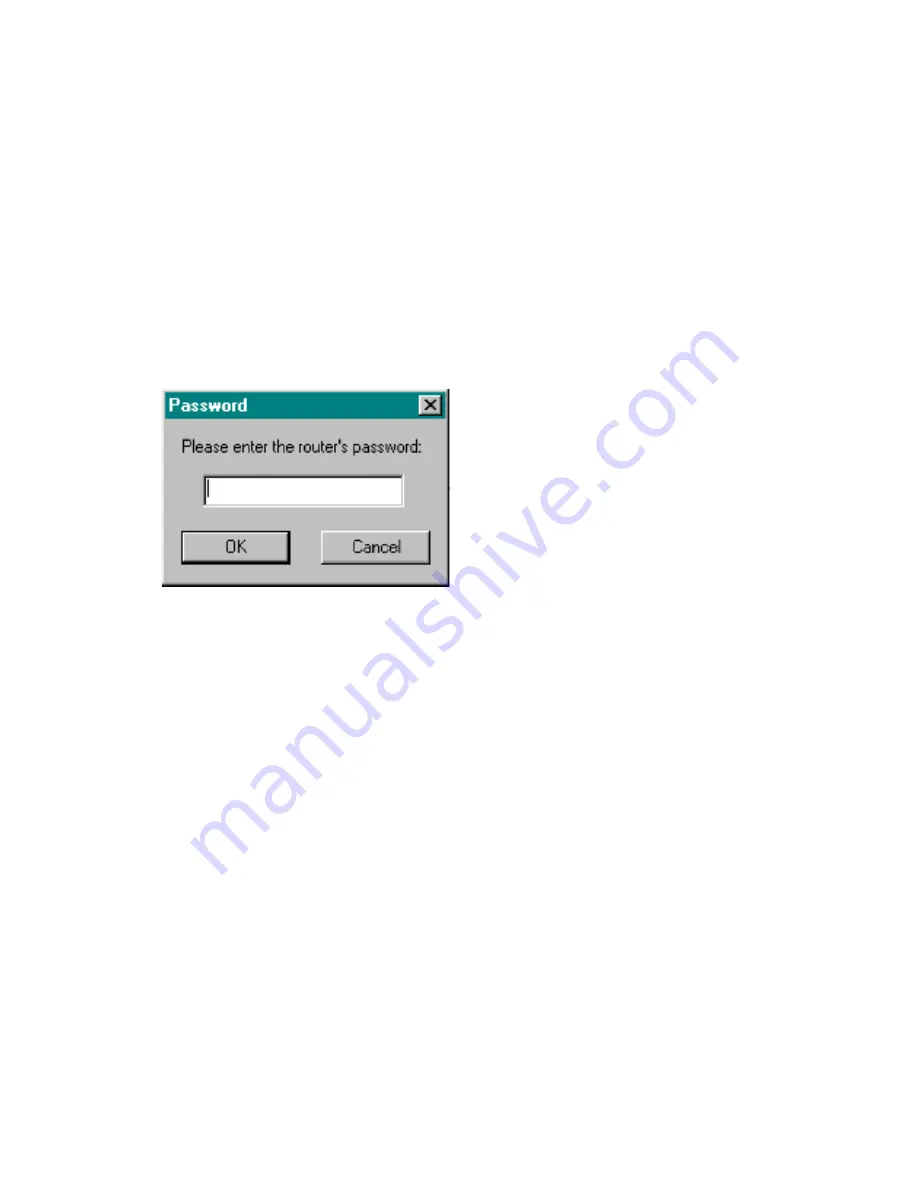
must select the Save Setup button.  There after, anyone attempting
to access the router setup or configuration settings must first
provide a password.  In OverLAN Commander, the following
Password dialog box will appear.  You must type in the password
indicated in the Password field under Router Name/Password.  If
the field was left blank, then just select the OK button to continue.
Note that the password may appear blank if only spaces were typed
in for the password -- in which case you must type in spaces for the
Password dialog box.  The Password dialog box is shown below.

Disable Remote Management: Select this option to prevent
Remote Management.  Remote Management allows the selected
router to be managed from the remote site (the site you are calling
or are called by).  When Remote Management is allowed, the local
site is still able to manage the router.  But, it is recommended that a
router be managed by only one site.  If more than one site must be
used to manage a router, it is recommended that you exit OverLAN
Commander after each session is complete.  Disabling Remote
Management prohibits the remote site from managing the selected
router.

Protocol Options

Protocol Options appears under the Setup Tab > General Tab for
the properties for a router.

Summary of Contents for ISDN Router ISDN

Page 1: ...OverLAN Router Ethernet ISDN Connectivity User Manual VERSION 1 45 http www ringdale com ...

Page 2: ...on of Ringdale UK Ltd DISCLAIMER Ringdale UK Ltd reserves the right to revise this publication and to make changes from time to time to the contents hereof without obligation to notify any person or organization of such revision or changes Ringdale UK Ltd has endeavored to ensure that the information in this publication is correct but will not accept liability for any error or omission TRADEMARKS ...

Page 3: ...5 NT 19 Setup OverLAN Commander 16 IPX Windows 3 xx 73 Configuring from the Local Console Port 97 Operating Your Router 151 Turning the Router On or Off 152 Using the Router Control Panel 152 OverLAN Commander 32 IP Windows 95 NT 154 OverLAN Commander 16 IPX Windows 3 xx 157 Operating with a Local Console Port 159 Troubleshooting Your Router 162 Glossary 163 CONTENTS ...

Page 4: ...ing sections Getting Started A brief overview of the product with an explanation of tools or other components you may need Installing Illustrated instructions and helpful hints to quickly guide you through every step of installing the router Configuring Explanations of setup options for the router Operating Illustrated instructions to quickly guide you through the basic operation of the router Tro...

Page 5: ... setup the router you need the following A fully operating Ethernet using TCP IP and or Novell Netware An NT 1 A shielded RJ45 Ethernet cable An ISDN BRI line you will need to know the ISDN phone number s and SPID only required in the USA number s A 9DB DB25 pin adaptor if you have a computer with a 9 pin serial port A computer running Microsoft Windows version 3 11 or greater or optionally an ASC...

Page 6: ...6 Installing the OverLAN Router Four Easy Tasks INSTALLING the OverLAN ROUTER ...

Page 7: ... 1 Figure 1 Step 2 Connect the other end of the cable into the 10BASE T interface on the hub of the Ethernet see figure 1 Always use a HUB in a 10baseT environment to connect your ISDN Router to the network NOTE Do not use crossover cable This completes Task 1 INSTALLING the OverLAN ROUTER Hub must be installed before the router can be installed Ethernet Hub 10BASE T Interface Back of Router Shiel...

Page 8: ...ee figure 3 If the router is at the termination of the coaxial cable then be sure that the unused end of the T plug has a terminating resistor if not attach a terminating resistor to the unused end of the T plug see figure 3 There should be a minimum thin coaxial cable length of 10m Otherwise both ends of the Terminators will be too close together 802 2 spec This completes Task 1 continuing Ethern...

Page 9: ...inal see figure 4 If you are using the included RJ 11 to DB25 cable a 25 9 pin adaptor may be needed for the 25 pin end of the cable if your computer has only a 9 pin port This completes Task 2 In this task you will configure the router from a local console port However you may skip this task and configure the router using OverLAN Commander from a Windows PC on the Ethernet Back of Router RS 232 c...

Page 10: ...The power light on the front of the router should be on If your router is connected to the Ethernet through a 10BASE T hub with a good link light be sure the light is green flashing or solid indicating that your router is properly connected to the hub Otherwise before going on to Task 4 refer to the section of this manual titled TroubleShooting This completes Task 3 INSTALLING the OverLAN ROUTER P...

Page 11: ... to the 10BASE T port shown in the 10BASE T Method in Task 1 Figure 6 Step 2 Connect the other end of the cable to the S T interface on the NT 1 see figure 6 Task 4 is continued on the next page BRI Port ISDN Line INSTALLING the OverLAN ROUTER Back of Router RJ45 cable connect to S T interface of NT 1 Refer to the instructions included with your NT 1 an ISDN unit you purchase separately Reset 10ba...

Page 12: ...re 7 Step 4 Connect the other end of the cable to the ISDN phone jack on the wall see figure 8 This completes Task 4 INSTALLING the OverLAN ROUTER RJ45 cable NT 1 Connect to U interface of NT 1 ISDN phone jack Rrefer to the instructions included with your NT 1 an ISDN unit you purchase seperately ...

Page 13: ...13 Configuring the OverLAN Router ...

Page 14: ...verLAN Commander 32 IP Application for Windows 95 NT that allows you to setup operate and monitor OverLAN routers Method 3 OverLAN Commander 16 IPX Application for Windows 3 xx and later that allows you to setup operate and monitor OverLAN routers Method 4 OverLAN Operating System Internal Program of the Router that allows you to setup operate and monitor the OverLAN router from the local console ...

Page 15: ...r Insert Disk 1 into floppy drive A of your Windows 95 NT computer Step 2 Exit all applications currently open or running in Windows Step 3 From Windows select Start Run and then run A setup exe Step 4 Follow all of the online instructions for installing OverLAN Commander When the installation of OverLAN Commander is complete you are ready to run the application Run OverLAN Commander From Windows ...

Page 16: ... name or icon for the router you want to setup New routers and routers moved to a different network than originally setup for will automatically display a Router Initialization dialog box when selected Below is an example of the Router Initialization dialog box Router Initialization Dialog Box CONFIGURING YOUR ROUTER ...

Page 17: ... You should type the IP Address in the form of xxx xxx xxx xxx where each xxx is a number ranging from 1 to 255 Type in the Subnet Mask for the router You should type the Subnet Mask in the form of xxx xxx xxx xxx where each xxx is a number ranging from 1 to 255 Once the router has been initialized a properties dialog box will appear similar to the following Properties Dialog Box CONFIGURING YOUR ...

Page 18: ...ard button from the toolbar The Setup Wizard will then start and you should see the following dialog box OverLAN Setup Wizard At this point the Setup Wizard will begin to guide you through each step of setting up the OverLAN router Follow the online instructions in the Setup Wizard to complete setting up your router This completes Method 1 of Configuring the OverLAN Router CONFIGURING YOUR ROUTER ...

Page 19: ...uring and maintaining your router you will need a computer preferably equipped with a mouse running Microsoft Windows 95 or NT Windows must be setup for TCP IP and the computer must be connected to your Ethernet network You should be familiar with using Microsoft Windows If not please refer to the manual for that product The basic layout of OverLAN Commander is shown in the figure below CONFIGURIN...

Page 20: ...ep 3 From Windows select Start Run and then run A setup exe Step 4 Follow all of the online instructions for installing OverLAN Commander When the installation of OverLAN Commander is complete you are ready to run the application Run OverLAN Commander From Windows select Start Programs OverLAN Commander Commander The OverLAN Commander splash screen should appear followed by the OverLAN Commander w...

Page 21: ...n the left side of OverLAN Commander The OverLAN routers can be displayed in one of four views Right click on the right side of OverLAN Commander for a pop up menu of different views The default view is Icon Right clicking on the right side of OverLAN Commander opens the pop up menu below shown enlarged OverLAN Commander Window If you right click on a router icon or name and select Open you can ac...

Page 22: ...re below The name of the router appears in the upper left corner of the router properties dialog box This name corresponds to the name beneath the router icon you select This completes the Introduction to OverLAN Commander for Windows 95 NT The next section of the manual will cover how to configuration an OverLAN router from OverLAN Commander ...

Page 23: ...r Such charges are not the responsibility of Ringdale Step 1 Select a Router Select a router from the Routers part of OverLAN Commander To select a router you must double click on the name or icon of the router When a router has been selected a dialog box of Router Properties will appear Step 2 Initialize the Router If the selected router is a new router or if it has been moved onto a another netw...

Page 24: ...to view and setup options for various router features This manual will now present a detailed overview of the options and information under each tab of router properties General Tab Router Information Router Information appears under the General Tab for the properties for a router CONFIGURING YOUR ROUTER ...

Page 25: ...et location or MAC address of the selected router Firmware Version This is the version of firmware used by the selected router Checksum This is the checksum of the firmware for the selected router The word in parenthesis after the checksum indicates whether the Flash EPROM or Permanent EPROM source of firmware is being used Hardware Version This is the version of hardware for the selected router R...

Page 26: ...en the router is in the normal idle state for its switch type this means that it is in communication with the ISDN phone switch and is ready to make calls ISDN B1 Channel and ISDN B2 Channel represent the physical ISDN lines and the Point to Point Protocol When a B Channel is active then the ISDN line for that B Channel is currently in use For data transfer to be possible on a B channel the channe...

Page 27: ... remote device Ack Sent Accepting remote configuration request Disconnecting State 11 A disconnect command has been received Releasing State 19 Ending the call The B channel states that do not end with a state are part of PPP Point to Point Protocol Status Messages Status Messages appears under the General Tab for the properties for a router This area shows messages about the current operation of ...

Page 28: ...s for a router Based on how the selected router has been setup this area shows the resulting selections of Networking Options IPX TCP IP and or Bridging being used for the current connection PPP Options PPP Options appears under the Connection Tab for the properties for a router Based on how the selected router has been setup this ...

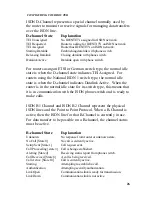
Page 29: ...Based on how the selected router has been setup this indicates the resulting B channel Caller ID states for the current connection Tables Tab NRIP Table NRIP appears under the Table Tab for the properties for a router The NRIP table shows the IPX networks known to the selected router These networks determine how IPX packets will be routed Location This is the location of the network local or remot...

Page 30: ...devices thru which the network can be reached Time This is the internal Novell metric time it takes to get a response from the selected network SAP Table SAP appears under the Table Tab for the properties for a router The SAP table shows the servers and routers known to the selected router that use IPX SAPs This table is used when spoofing occurs and will determine what servers can be seen by the ...

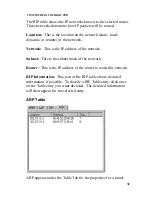
Page 31: ...s is the network address of the selected SAP Name This is the network name of the device advertising the selected SAP SAP Information This part of the SAP table shows decoded information if possible To decode a SAP Table entry click once on the Table entry you want decoded The decoded information will then appear for the selected entry RIP Table RIP appears under the Table Tab for the properties f...

Page 32: ...k This is the IP address of the network Subnet This is the subnet mask of the network Router This is the IP address of the router to reach this network RIP Information This part of the RIP table shows decoded information if possible To decode a RIP Table entry click once on the Table entry you want decoded The decoded information will then appear for the selected entry ARP Table ARP appears under ...

Page 33: ...er when sending IP packets Address This is the IP Address for a device Ethernet This is the Ethernet or MAC address of a device Time This is the time in tens of seconds before the entry is deleted NAT Table NAT appears under the Table Tab for the properties for a router The NAT table shows information on network IP address translation ...

Page 34: ...gnostics for Routers from the Options dialog box see Options from the View Menu Protocol This is the protocol being translated Source Port This is the port of this connection Source IP Address This is the IP Address of the connection Key Port This is the new unique port of the connection Statistics Tab ...

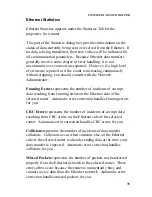
Page 35: ...of corrupt data resulting from framing errors on the Ethernet side of the selected router Automatic error correction handles framing errors for you CRC Errors represents the number of incidents of corrupt data resulting from CRC errors on the Ethernet side of the selected router Automatic error correction handles CRC errors for you Collisions represents the number of incidents of data transfer col...

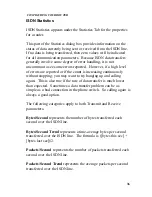
Page 36: ...inuously without stopping you may want to try hanging up and calling again This is also true if the rate of data transfer is much lower than expected Sometimes a data transfer problem can be as simple as a bad connection in the phone switch So calling again is always a good option The following categories apply to both Transmit and Receive parameters Bytes Second represents the number of bytes tra...

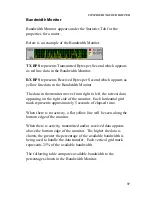
Page 37: ...left the newest data appearing on the right side of the monitor Each horizontal grid mark represents approximately 5 seconds of elapsed time When there is no activity a flat yellow line will be seen along the bottom edge of the monitor When there is activity transmitted and or received data appears above the bottom edge of the monitor The higher the data is shown the greater the percentage of the ...

Page 38: ...38 CONFIGURING YOUR ROUTER Percentage of One B channel Two B channels Bandwidth Used Bytes Second Bytes Second 0 0 0 25 2 000 4 000 50 4 000 8 000 100 8 000 16 000 Setup Tab General Tab ...

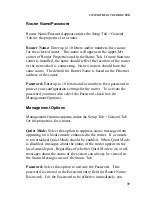
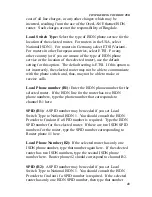
Page 39: ...uration settings for the router To activate the password you must also select the Password check box in Management Options Management Options Management Options appears under the Setup Tab General Tab for the properties for a router Quiet Mode Select this option to suppress status messages from appearing on a local console connected to the router If a console is not attached Quiet Mode should be e...

Page 40: ...e Password dialog box The Password dialog box is shown below Disable Remote Management Select this option to prevent Remote Management Remote Management allows the selected router to be managed from the remote site the site you are calling or are called by When Remote Management is allowed the local site is still able to manage the router But it is recommended that a router be managed by only one ...

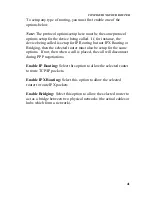
Page 41: ... Bridging then the selected router must also be setup for the same options If not then when a call is placed the call will disconnect during PPP negotiations Enable IP Routing Select this option to allow the selected router to route TCP IP packets Enable IPX Routing Select this option to allow the selected router to route IPX packets Enable Bridging Select this option to allow the selected router ...

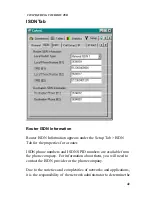
Page 42: ...properties for a router ISDN phone numbers and ISDN SPID numbers are available from the phone company For information about them you will need to contact the ISDN provider or the phone company Due to the varieties and complexities of networks and applications it is the responsibility of the network administrator to determine the ...

Page 43: ...s Local Phone number B1 Enter the ISDN phone number for the selected router If the ISDN line for the router has two ISDN phone numbers type the phone number that corresponds to channel B1 here SPID B1 A SPID number may be needed if you set Local Switch Type to National ISDN 1 You should consult the ISDN Provider to find out if a SPID number is required Type the ISDN SPID number for the selected ro...

Page 44: ...works and applications it is the responsibility of the network administrator to determine the cost of all line charges or any other charges which may be incurred resulting from the use of the OverLAN Ethernet ISDN router Such charges are not the responsibility of Ringdale Phone Number 1 Enter the ISDN phone number for the device you are calling If the ISDN line for the device you are calling has t...

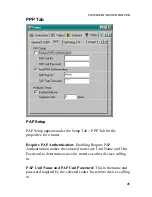
Page 45: ...entication Enabling Require PAP Authentication makes the selected router use Unit Name and Unit Password to determine access for routers or other devices calling in PAP Unit Name and PAP Unit Password This is the name and password required by the selected router for remote devices calling in CONFIGURING YOUR ROUTER ...

Page 46: ...ion Enabling Send PAP Authentication makes the selected router transmit its Peer Name and Peer Password to the remote router or device it is calling If Send PAP Authentication is enabled and the remote device does not support PAP the remote device may hang up the call or only give limited access PAP Peer Name and PAP Peer Password This is the name and password to be supplied to the remote device P...

Page 47: ... the long distance line costs If disabled the router is limited to using only one B channel never both channels simultaneously Minimum Fragment The number in this field sets the minimum size in bytes of data that can be fragmented during multilink operations The default and recommended value for this field is 0 This feature may help in establishing compatibility with routers made by other manufact...

Page 48: ...tempts Type a number representing the maximum number of calls the selected router should make to the remote device when trying to establish a link For reasons such as call collisions when both devices try to call each other simultaneously some devices may not pick up on an initial call but may pick up on a subsequent call CONFIGURING YOUR ROUTER ...

Page 49: ... to have the router place calls automatically when data is received for the remote network When one or both B channels are selected as Permanent Channels then the selected channel s will remain open all of the time If an error causes a disconnection the router will automatically redial the number and raise the line up again On Demand Call Timeout Type a number representing the time in seconds the ...

Page 50: ... Bandwidth on Demand limits the use of both B channels to only when there is sufficient data to require both channels If this feature is disabled and the router is setup to use both B channels then the router will use both channels regardless of the amount of data being transferred Bandwidth Trigger Type a number representing the bytes per second of data going over the ISDN line at which point Ban...

Page 51: ... IP packets For the IP Address and Subnet Mask you should enter numbers in the form of xxx xxx xxx xxx where each xxx is a number ranging from 1 to 255 Router IP Address Type the IP network address of the selected router Also select whether the router will allow a device it is calling to assign it an IP address This option can be set to CONFIGURING YOUR ROUTER ...

Page 52: ... router IP routing allows the selected router to route TCP IP packets For the IP addresses you should enter numbers in the form of xxx xxx xxx xxx where each xxx is a number ranging from 1 to 255 Remote IP Address Assignment Select whether the router will assign the remote address or not This option can be set to Assigned or Fixed If Assigned the Remote Address and Remote Subnet Mask will be assig...

Page 53: ...our Ethernet network that do not have a static routing table or dynamic routing mode Selecting RARP Proxy allows the router to operate using both RARP and Proxy ARP as described above RIP Configuration Select No RIP RIP or RIP Poison RIP Selecting NO RIP does not allow the router to operate using RIP Selecting RIP allows the selected router to use dynamic routing if RIP is available on the Etherne...

Page 54: ...his feature allows the router to be used with a low cost Internet connection supporting dynamic IP address assignment 1 to 1 Static allows one computer on the local network to have permanent access to the router for the Internet for example 1 to 1 Dynamic allows one computer at a time on the local network has access to the router for the Internet for example 1 to Many allows many users on the loca...

Page 55: ...r or device getting access to the router Reset of the router is required when enabling this option WAN IP Assignment This needs to be setup if you selected either 1 to 1 Dynamic or 1 to Many Some ISPs Internet Service Providers use dynamic IP address assignment for which a different IP address can be assigned with each connection If this is the case with your ISP the option Assigned should be sele...

Page 56: ...for the properties for a router When IP Address Translation is used you can still support a Website FTP site or other site on the Internet from your network by setting up an IP Port Assignment Table Supply the IP Address of the Webserver FTP server or other application server and type in a Port number CONFIGURING YOUR ROUTER ...

Page 57: ...p down list Select HTTP 80 for a Webserver and select FTP 21 for an FTP server Select the Add button to add your entry to the IP Port Assignment Table To remove an entry from the IP Port Assignment Table click on the table entry and select the Remove button IP Static Routes Tab CONFIGURING YOUR ROUTER ...

Page 58: ...sition in the Network column of the Static routing Table and the following dialog box will then appear IP addresses of the form xxx xxx xxx xxx go in the first three entries Network Destination Subnet Mask and Gateway A number of the form xxx goes in the fourth entry for Route Metric Each xxx represents a number in the range 1 and 255 Network Destination Type an IP address of a network that is loc...

Page 59: ...ated for Network Destination described above Route Metric Type the number of routers a packet will pass through to arrive at the Network Destination described above IP Filters Tab IP Filter Table IP Filter Table appears under the Setup Tab IP Filters Tab for the properties for a router CONFIGURING YOUR ROUTER ...

Page 60: ... out If the IP Address ends in a zero then the address represents the local host address Subnet Mask This column indicates the Subnet Mask if the Type column indicates a Network For a node specific address this column shows for the Subnet Mask Address Network to Filter Out This section of the dialog box is where you specify IP Addresses to be filtered out Type From the drop down list specify wheth...

Page 61: ...m 1 to 255 For a node specific address this column shows for the Subnet Mask Add Button Select the Add button to add the currently selected address or network to the table of addresses and networks to filter out Remove Button If you click on an item in the Type column of the table described above and then select the Remove button the item will be removed from the table of IP Addresses to filter ou...

Page 62: ...ne the cost of all line charges or any other charges which may be incurred resulting from the use of the OverLAN Ethernet ISDN router Such charges are not the responsibility of Ringdale IPX Address appears under the Setup Tab IPX Tab for the properties for a router IPX routing allows the selected router to route Novell IPX packets CONFIGURING YOUR ROUTER ...

Page 63: ...ns Due to the varieties and complexities of networks and applications it is the responsibility of the network administrator to determine the cost of all line charges or any other charges which may be incurred resulting from the use of the OverLAN Ethernet ISDN router Such charges are not the responsibility of Ringdale IPX Routing Options appears under the Setup Tab IPX Tab for the properties for a...

Page 64: ...vers are encountered This feature can help save on long distance line charges Bridging Tab Ethernet II Filtering Options Ethernet II Filtering Options appears under the Setup Tab Bridging Tab for the properties for a router Select any filters you want the selected router to use while bridging CONFIGURING YOUR ROUTER ...

Page 65: ... crossing the bridge Disable NetBEUI Select this option to prevent NetBEUI packets from crossing the bridge Disable AppleTalk Select this option to prevent AppleTalk packets from crossing the bridge Disable Others Select this option to prevent packets other than IPX IP NetBEUI and AppleTalk from crossing the bridge CONFIGURING YOUR ROUTER ...

Page 66: ...e properties for a router In the Advanced Diagnostics Tab diagnostic information about the ISDN lines is displayed under the heading ISDN Information The Advanced Diagnostics dialog box appears if the option for Show Advanced Diagnostics for Routers is selected from the Options dialog box CONFIGURING YOUR ROUTER ...

Page 67: ...remote devices such as other OverLAN routers that you want to monitor with OverLAN Commander You can force OverLAN Commander to refresh the router list by right clicking on the area for listing routers and then selecting Poll for Routers IP Address In this data field specify the IP Address of the device that is to be monitored Type the IP Address in the form of xxx xxx xxx xxx where each xxx is a ...

Page 68: ... reselected the Router Properties dialog box will include tabs for Advanced Diagnostics and ISDN Trace These features are provided primarily to help Technical Support at Ringdale to determine the operating condition of the router Re transmission Timeout Sec This is the time in seconds that the router will wait for a response from the device it is calling before attempting to re transmitt to the de...

Page 69: ...onds then you would likely not need to set this option to any more than 30 retires beyond which there may be a problem that needs attention as described under Re Transmission Timeout above This option can in fact be set to as high as 99 retires However such a setting is far in excess of what would be considered the norm Consider for instance that with just a 1 second timeout and 30 retries the use...

Page 70: ...router The trace is displayed under the heading Diagnostic Trace The codes shown in the trace are then translated and the translations appear in the Message Decode section of the ISDN Trace Tab Message Decode Message Decode appears under the ISDN Trace Tab for the properties for a router CONFIGURING YOUR ROUTER ...

Page 71: ...r is operating correctly If you suspect that the router is not operating correctly consult with the network administrator or the ISDN provider To redo the router setup go back to Step 1 Be sure to select this router again Step 6 Perform Loopback Test Select the Loopback Test from the Router Menu or from the toolbar If any error messages are reported in the Status Messages area consult with your ne...

Page 72: ... or depending on how you setup the router the router may hang up by itself Step 10 Exiting OverLAN Commander Select Exit from the file menu to quit the current session of OverLAN Commander Remember for any configuration changes to affect the router you must save changes to the router Save Setup Note You can also setup and manage the router from its local console port The router s built in OverLAN ...

Page 73: ...ped with a mouse running Microsoft Windows version 3 11 or greater The computer must be connected to your Ethernet network You should be familiar with using Microsoft Windows If not please refer to the manual for that product There are three dialog buttons you should be familiar with before using OverLAN Commander Common buttons for helpful hints and instructions to quit the current dialog box and...

Page 74: ... Step 1 Select the router for Setup The default name of all routers on your network will appear in the main dialog box It may take a few seconds for the router name to appear Using your computer s mouse click on the name of the router you want to set up The router name should become highlighted meaning the router is selected CONFIGURING YOUR ROUTER ...

Page 75: ...Setup Router The main dialog box will disappear from the video display and the Setup dialog box will appear NOTE If you select Setup Router before selecting a router in Step 1 the following error message will appear Error Message Should you make this mistake simply click on and re follow Step 1 CONFIGURING YOUR ROUTER ...

Page 76: ... Routing Options upper right corner 4 Call Control lower right 5 A series of five buttons the bottom edge From the Setup dialog box you will perform several tasks corresponding to the five above areas The router supports various international protocols therefore enabling data tranmission worldwide This facility is selected by choosing the correct protocol from the Telephone Co box CONFIGURING YOUR...

Page 77: ...location of the router or the networks it is connecting No two routers should have the same name Unit Name should already have a default name If you want to keep this name then you can go to Step 2 Otherwise erase the default Unit Name and type in a new name of up to 10 letters and or numbers You have set the Unit Name Step 2 Select a Console Password Console Password appears under Unit Informatio...

Page 78: ...s a check mark in it like the following Step 3 Select Quiet Mode to be on or off From the Setup dialog box The default for Quiet Mode is on This suppresses status messages from appearing on a local console port connected to the router If a console is not attached leave Quiet Mode enabled When Quiet Mode is off messages about the status of the router appear on a local console port Regardless of whe...

Page 79: ...anaged from the remote site the site you are calling or are called by When remote management is allowed the local site is still able to manage the router If more than one site must be used to manage a router it is recommended that you exit OverLAN Commander after each session is complete To activate Remote Management use the mouse to click on the small gray square next to the words Remote Manageme...

Page 80: ...r of the location of the selected router use the default setting for this option The default setting is ETSI If this option is set incorrectly the selected router may not be able to communicate with the phone switch and thus may not be able to make or receive calls Step 2 Enter Router Phone 1 Type the ISDN phone number of the selected router Some ISDN lines have two phone numbers If this is the ca...

Page 81: ...r has only one phone number then type that number again here But if the remote router has two phone numbers then type the number corresponding to channel B2 here Step 6 Enter SPID 1 If you selected National ISDN 1 for Telephone Co and the selected router has a SPID provided by the phone company type the SPID number here If you acquired two ISDN SPID numbers for the selected router type the SPID co...

Page 82: ...ine access for routers or other devices calling in PAP Unit Name and PAP Unit Password This is the name and password required by the selected router for remote devices calling in Unit Name and Unit Password should be no more than 10 letters and or numbers If one or both of these fields are left blank then the selected router will expect a blank ID and or password from the remote device If the remo...

Page 83: ...nabled and the remote device does not support PAP the remote device may hang up the call or only give limited access PAP Peer Name and PAP Peer Password This is the name and password to be supplied to the remote device Peer Name and Peer Password should be no more than 10 letters and or numbers If one or both of these fields are left blank and Send PAP Authentication is enabled then the selected r...

Page 84: ...nded value for this field is 0 Step 11 Setup IP Assignment Options For Local IP Assignment the default and recommended value is Negotiable which allows an IP address to be assigned to the selected router by the remote device if necessary Fixed does not allow an IP address to be assigned For Remote IP Address select to enable disable this option If enabled the selected router will assign the IP add...

Page 85: ...e network You can select On Demand for channel B1 or B2 or both channels B1 and B2 Permanent instructs the router to place and maintain the call automatically regardless of whether there is data for the remote network You can select Permanent for channel B1 or B2 or both channels B1 and B2 If Call on Demand is enabled you must also setup Call Timeout Type in the number of seconds the selected rout...

Page 86: ...uter You must decide what this number should be based on the ISDN connect charges and the cost of long distance line charges Enter the BOD Time SEC which is the time in seconds that the selected router will allow the second B channel to remain up when there is insufficient data transferring before bringing the channel down again When setting this feature you should determine the line charges in yo...

Page 87: ...whether the remote device supports Line Idle Detection disable this option You have finished configuring the ISDN PPP parameters Task 4 Set up the Routing Options You should determine the types of packets that will be routed Ask the Network Administrator if you are unsure The options from the Setup dialog box appear below From the Setup dialog box At least one of the three routing options must be ...

Page 88: ...s shown below Bridge Setup dialog box The filters only work for Ethernet II frame types Other frame types such as Ethernet 802 3 cannot use the filters but the router can still act as a bridge It just will not be able to use filters in that situation Choose any of the filters individually or in combination Choices Filter IPX prevents IPX packets from crossing the bridge Filter IP prevents IP packe...

Page 89: ... IP NetBEUI and AppleTalk from crossing the bridge You have finished configuring Bridging Step 2 Select Route IP Traffic to be on or off The default for Route IP Traffic is off Route IP Traffic allows your router to route TCP IP packets To configure IP routing use the mouse and click on The IP Router Setup dialog box is shown below IP Router Setup dialog box CONFIGURING YOUR ROUTER ...

Page 90: ...is a RARP server on the Ethernet network In other words the IP Address and Subnet Mask will automatically be as signed for the router by the RARP server regardless of whether they were already assigned or not for Unit Designation Enable Default Gateway allows the IP address for Default Gateway to be used by the router for handling IP packets with destinations that cannot be determined by static ro...

Page 91: ...ou want the router to advertise that the remote network selected earlier in Task 3 is not available when the ISDN WAN connection is not active Step 3 Setup a Static Routing Table You may want to create a Static Routing Table if IP Routing is enabled Static routing can be used in conjunction with RIP Choose The Static Routing Table is shown below Static Routing Table dialog box CONFIGURING YOUR ROU...

Page 92: ...ng to route through ISDN The column for Subnet Mask is for a subnet mask corresponding to the above network The column for Router is for the first router on the path a packet will take to reach the network described above The column for Hops represents how many routers a packet will pass through to arrive at the network described above Once you ve made a Static Routing Table you are ready to go to...

Page 93: ...combination The defaults for these spoofing options are on Choices Novell RIP Spoofing helps prevent a phone line from being raised when RIP packets from Novell servers advertising networks are encountered This feature can help save on long distance line charges Watchdog Spoofing helps prevent a phone line from being raised when Watchdog packets from Novell servers checking on client connections a...

Page 94: ...determine the cost of all line charges or any other charges which may be incurred resulting from the use of the OverLAN Ethernet ISDN router Such charges are not the responsibility of Ringdale You must also declare the Frame Type which is the type of Ethernet frame used for your Ethernet network If you have a Novell server on your Ethernet network the frame type will be the same frame type as the ...

Page 95: ... your configuration settings in the router Save Setup must be selected for the new parameters to be preserved Otherwise if power is ever removed from the router the parameters will be lost After saving you will automatically be returned to the main dialog box There may be a few seconds delay before the main dialog box appears CONFIGURING YOUR ROUTER ...

Page 96: ...96 Configuring with a Local Console CONFIGURING YOUR ROUTER ...

Page 97: ...ignation 68 Task 3 Configuring the ISDN Manager 72 Task 4 Configuring the PPP Manager 77 Task 5 Configuring the IP Protocol 81 Task 6 Configuring the IPX Protocol 87 Task 7 Configuring BRIDGING 92 Task 8 Configuring a Static Routing Table 95 Task 9 Setting up the Provider Mode 98 CONFIGURING WITH A LOCAL CONSOLE ...

Page 98: ...are shown in Task 2 of Installing Your Router When you plug the router into a power source shown in Task 3 of Installing Your Router the video display of the computer or ASCII terminal should show the following message for a few moments OverLAN System Initializing please wait The above message is temporary and will be replaced with the message shown in figure 8 ...

Page 99: ...command prompt Figure 8 Command prompt The spaces indicated before the colon represent the router name By typing and pressing the Enter key a list will appear on the video display of the commands you can use Type and press the Enter key to see the commands The list of commands are shown in figure 9 on the next page O v e r L A N Operating System 1 47 Enter for list of options ...

Page 100: ...following Type SETUP or SU from the menu above and press the Enter key The SETUP menu is shown in figure 10 O v e r L A N Operating System 1 47 unit designation Command Options CALL x Cx Call ISDN Channel x CLOSE CL Disconnect ISDN Channel RESET RE Restart the OverLAN Unit SETUP SU Enter OverLAN Setup Menu SYSOP SY Enter OverLAN System Options Menu HELP Displays this message Router Status Commands...

Page 101: ... to the Setup menu whenever you want Selection 1 represents features for the operating system Whenever you are setting up features an asterick means the unit must be reset for changes to take effect Turn the page for instructions on configuring the operating system CONFIGURING WITH A LOCAL CONSOLE O v e r L A N Setup menu 1 Operating System 2 ISDN Manager 3 PPP Manager 4 IP Protocol 5 IPX Protocol...

Page 102: ... Unit Designation is a unique name based on the router s unique Ethernet network address This will be a series of numbers or letters appearing after the colon above Choices Type a new name for your router of up to ten letters and or numbers This name will appear in the Command Prompt and as the router name in OverLAN Commander Leave the current setting unchanged by not typing anything Press the En...

Page 103: ... the Console Password option to Required for the password to be activated Do one of the following Leave this feature unchanged even if it is blank by not typing anything Erase the current password with the back space key and leave the feature blank or type a new password Leaving this feature blank effectively turns the feature off Press the Enter key when you are ready to continue CONFIGURING WITH...

Page 104: ...orth Choices Disabled prohibits the remote site from managing the router Enabled allows the router to be managed from the remote site the site being called or that is calling When enabled the local site is still able to manage the router But it is recommended that a router be managed by only one site If more than one site must be used to manage a router it is recommended that if you are using Over...

Page 105: ...o forth Choices Verbose Mode causes the router to display messages about the status of the system This mode is recommended as an aid to troubleshooting Quiet Mode causes the router to suppress the messages about the status of the system Once the router is configured and you are satisfied with the settings it is recommended to have System Messages set to the Quiet Mode Press the Enter key when you ...

Page 106: ... switches between Not Required and Required Choices Not Required makes the password you selected for Unit Password inactive or not required Required makes the password you selected for Unit Password active or required This feature is useful when you want a password but also on occasion may want to disable it Press the Enter key when you are ready to continue ...

Page 107: ...pacebar or if you have already pressed the spacebar reselecting the original baud rate again Change the setting by pressing the spacebar Press the Enter key when you are ready to continue The following message will appear Is the above setup information correct y n Type n to start over with this section Type y to use the current settings While the settings will be used by the router they are not ac...

Page 108: ...DN phone service used in locations other than the USA and Germany NI 1 is the type of ISDN phone service used in the USA ETSI Variant is the type of ISDN phone service used in Germany If you are unsure of the type of ISDN phone service use the default setting for this option If this option is set incorrectly the router may not be able to communicate with the phone switch and may not be able to mak...

Page 109: ... On Demand is selected Bandwidth on Demand is automatically enabled if PPP Multilink is enabled When one or both B channels are selected as Permanent Channels then the selected channel s will remain open all of the time If an error causes a disconnection the router will automatically redial the number and raise the line up again When only B1 or B2is a permanent channel unless you also have PPP Mul...

Page 110: ...prompt This prompt appears only if any ON DEMAND is selected Choices Enabled allows network broadcasts to raise the ISDN line Disabled prevents network broadcasts from raising the ISDN line Press the Enter key when you are ready to continue CONFIGURING WITH A LOCAL CONSOLE ...

Page 111: ...numer of seconds the router will keep a line up when there is no activity A value of 0 will be interpreted as infinity which means a call will nevern timeout You should determine the line charges in order to optimize Call Timeout Leave this feature unchanged by not typing anything Press the Enter key when you are ready to continue CONFIGURING WITH A LOCAL CONSOLE ...

Page 112: ...data flows If this feature is disabled and the router is setup to use both B channels then the router will use both channels regardless of the amount of data being transferred Enabled allows the router to automatically open a second B channel when there is sufficient data to require both channels Press the Enter key when you are ready to continue NOTE Due to the varieties and complexities of netwo...

Page 113: ...e remote device when trying to establish a link For reasons such as call collisions when both devices try to call each other simultaneously some devices may not pick up on an initial call but may pick up on a subsequent call Leave this feature unchanged by not typing anything Press the Enter key when you are ready to continue CONFIGURING WITH A LOCAL CONSOLE ...

Page 114: ...e ISDN phone number of your router Some ISDN lines have two phone numbers If this is the case type the ISDN phone number corresponding to channel B1 here Type nothing if you do not wish to use the B1 channel Press the Enter key when you are ready to continue CONFIGURING WITH A LOCAL CONSOLE ...

Page 115: ...er here The second number should correspond to channel B2 Type nothing if you do not wish to use the B2 channel Even hough there are two B channels and even if the phone numbers are two different numbers only one remote device at any given time should be allowed to call your router or have an active communications link with your router Press the Enter key when you are ready to continue CONFIGURING...

Page 116: ...ne number of the remote router you are calling Some ISDN lines have two phone numbers If this is the case type the ISDN phone number corresponding to channel B1 here Type nothing if you do not wish to use the B1 channel Press the Enter key when you are ready to continue CONFIGURING WITH A LOCAL CONSOLE ...

Page 117: ...N phone numbers type the second number here The second number should correspond to channel B2 Type nothing if you do not wish to use the B2 channel Though the numbers can be different the ISDN phone number supplied the B2 channel must call the same remote device as the ISDN phone number supplied for the B1 channel Press the Enter key when you are ready to continue CONFIGURING WITH A LOCAL CONSOLE ...

Page 118: ...r to find out if a SPID number is required Choices Type your router s ISDN SPID number provided by the phone company If you acquired two ISDN SPID numbers for your router type the one corresponding to channel B1 here Type nothing if SPIDs are not required in your area Press the Enter key when you are ready to continue CONFIGURING WITH A LOCAL CONSOLE ...

Page 119: ... only one ISDN SPID number type that same number here again If your router has two ISDN SPID numbers type the number corresponding to channel B2 here Type nothing if SPIDs are not required in your area NOTE ISDN Phone numbers and ISDN SPID numbers are available from the phone company For more information about them you will need to contact your ISDN provider Press the Enter key when you are ready ...

Page 120: ...emote device supports Line Idle Detection disable this option Choices Enable this option Disable this option Press the Enter key when you are ready to continue The following message will appear Is the above setup information correct y n Type n to start over with this section Type y to use the current settings While the settings will be used by the router they are not actually saved To save the set...

Page 121: ...ottom of the video display The default of PPP Multilink is Disabled Pressing the spacebar switches between Disabled and Enabled Choices Enabled allows both B channels to be used simultaneously to increase the speed of the router But this also increases long distance line costs Disabled permits only one B channel to operate at a time Press the Enter key when you are ready to continue ...

Page 122: ... operations This feature may help in compatibility with devices made by other manufacturers In some cases you may need to contact Technical Support at JRL Systems for help in establishing compatibility with certain types of devices The default and recommended value for this field is 0 Leave this feature unchanged by not typing anything Press the Enter key when you are ready to continue CONFIGURING...

Page 123: ...eeking access through your router to have a special identification and password If you select this option you will be prompted for the indentification and password that should be used called the PAP Unit Id and PAP Unit Password Disabled does not require any identification or password for remote routers to have access through your router Press the Enter key when you are ready to continue CONFIGURI...

Page 124: ...lank by not typing anything Erase the current unit Id with the back space key and leave the feature blank or type a new Id Leaving this feature blank does not disable the option It merely sets the unit Id to a blank value Devices calling in must supply a blank value for the unit Id to gain access Press the Enter key when you are ready to continue CONFIGURING WITH A LOCAL CONSOLE ...

Page 125: ...y not typing anything Erase the current unit password with the back space key and leave the feature blank or type a new password Leaving this feature blank does not disable the option It merely sets the unit password to a blank value Devices calling in must supply a blank value for the unit password to gain access Press the Enter key when you are ready to continue CONFIGURING WITH A LOCAL CONSOLE ...

Page 126: ...word if required by a device it is calling If youselect this option you will be prompted for the indentification and password that should be used called the PAP Peer Id and PAP Peer Password Disabled does not allow the router to provide identification or password for routers it is calling If identification or password are required by a remote device the router will hang up Press the Enter key when...

Page 127: ...lank by not typing anything Erase the current peer Id with the back space key and leave the feature blank or type a new Id Leaving this feature blank does not disable the option It merely sets the peer Id to a blank value Devices calling in must supply a blank value for the peer Id to gain access Press the Enter key when you are ready to continue CONFIGURING WITH A LOCAL CONSOLE ...

Page 128: ...y not typing anything Erase the current peer password with the back space key and leave the feature blank or type a new password Leaving this feature blank does not disable the option It merely sets the peer password to a blank value Devices calling in must supply a blank value for the peer password to gain access Press the Enter key when you are ready to continue CONFIGURING WITH A LOCAL CONSOLE ...

Page 129: ...ween Assigned and Disabled Choices Assigned makes the router assign an IP address to devices calling in Devices calling in that won t accept the assigned IP address will not gain access through the router Disabled does not require devices calling in to be assigned an IP address Press the Enter key when you are ready to continue CONFIGURING WITH A LOCAL CONSOLE ...

Page 130: ...he back space key and type a new IP address Note This feature has a default value of 000 000 000 000 which is not a valid IP address If you leave this value unchanged devices calling in will not gain access to the router Press the Enter key when you are ready to continue The following message will appear Is the above setup information correct y n Type n to start over with this section Type y to us...

Page 131: ... appear at the bottom of the video display The default of IP Routing is Disabled Pressing the spacebar switches between Disabled and Enabled Choices Enabled allows your router to route IP packets Disabled prevents your router from routing IP packets Press the Enter key when you are ready to continue CONFIGURING WITH A LOCAL CONSOLE ...

Page 132: ...Translation is Disabled Pressing the spacebar switches between Disabled and Enabled This feature allows the router to be used with a low cost Internet connection supporting dynamic IP address assignment Then the prompt WAN IP Mode Fixed Assigned will appear Some ISPs Internet Service Providers use dynamic IP address assignment for which a different IP address can be assigned with each connection I...

Page 133: ...ess to the router for the Internet for example using a single dynamic IP address NOTE If 1 to 1 Dynamic is selected the router must be locked by the user before Internet access is permitted and released after closing the connection Select lock or release from the toolbar the Router menu or from a pop up menu accessed by right clicking on the router name in the list of routers If 1 to 1 Static IP A...

Page 134: ... a router or device on your Ethernet network to act as a default address for handling IP packets with destinations that cannot be determined by static routing tables or by dynamic routing Disabled allows your router to simply discard packets with destinations that cannot be determined by static routing tables or by dynamic routing Press the Enter key when you are ready to continue CONFIGURING WITH...

Page 135: ...ables or by dynamic routing The prompt Proxy ARP Disabled may appear The default setting for Proxy ARP is Disabled Pressing the spacebar switches between Disabled and Enabled Choices Enabled allows your router to respond to ARP requests for devices on your Ethernet network that do not have a static routing table or dynamic routing mode Disabled assumes that all devices on your Ethernet network are...

Page 136: ...en Disabled and Enabled Choices Disabled is used when RIP is not available on your Ethernet network and you do not want to use dynamic routing Enabled is used when RIP is available on your Ethernet network and you want to use dynamic routing Press the Enter key when you are ready to continue CONFIGURING WITH A LOCAL CONSOLE ...

Page 137: ...between Disabled and Enabled Choices Enabled is used if Call Type is set for By Command If the phone line goes down the router will advertise that other networks are not in reach Disabled is used if Call Type is set for On Demand If the phone line goes down the router will continue to advertise that other networks are still in reach Press the Enter key when you are ready to continue CONFIGURING WI...

Page 138: ...col In other words the local IP address and local IP mask will automatically be assigned for your router by the RARP server regardless of whether they were already assigned or not Press the Enter key when you are ready to continue The following message will appear Is the above setup information correct y n Type n to start over with this section Type y to use the current settings While the settings...

Page 139: ... at the bottom of the video display The default of IPX Routing is Disabled Pressing the spacebar switches between Disabled and Enabled Choices Enabled allows your router to route Novell IPX packets Disabled prevents your router from routing Novell IPX packets Press the Enter key when you are ready to continue CONFIGURING WITH A LOCAL CONSOLE ...

Page 140: ...essing the spacebar switches between Ethernet II 802 2 SNAP and 802 3 If you have a Novell server on your Ethernet network you must choose the same frame type as the Novell server uses Choices Ethernet II is used for an Ethernet network using the Ethernet II frame type Ethernet 802 2 is used for an Ethernet network using the Ethernet 802 2 frame type Ethernet SNAP is used for an Ethernet network u...

Page 141: ...ps prevent a phone line from being raised when RIP packets from Novell servers advertising networks are encountered This feature can help save on long distance line charges Disabled allows a phone line to be raised whenever RIP packets from Novell servers advertising networks are encountered Press the Enter key when you are ready to continue CONFIGURING WITH A LOCAL CONSOLE ...

Page 142: ...ts a phone line from being raised when packets from Novell servers checking on client connections are encountered This feature can help save on long distance line charges Disabled allows a phone line to be raised whenever packets from Novell servers checking on client connections are encountered Press the Enter key when you are ready to continue CONFIGURING WITH A LOCAL CONSOLE ...

Page 143: ... Disabled allows a phone line to be raised whenever packets from Novell servers advertising Novell servers are encountered NOTE Due to the varieties and complexities of networks and applications it is the responsibility of your network administrator and not that of Ringdale to determine the cost of all line charges or any other charges which may be incurred resulting from the use of this Ethernet ...

Page 144: ...start over with this section Type y to use the current settings While the settings will be used by the router they are not actually saved To save the settings you must select SAVE from the command prompt of the OverLAN Operating System You may now go to Task 7 CONFIGURING WITH A LOCAL CONSOLE ...

Page 145: ... as a bridge between two physical Ethernet networks Disabled does not allow your router to act as a bridge between two physical Ethernet networks Press the Enter key when you are ready to continue If you chose Enabled for BRIDGING then the following additional prompts will appear These prompts should only concern you if your Ethernet network uses Ethernet II frames Press the spacebar for each of t...

Page 146: ...ering Disabled AppleTalk Filtering defaults to Disabled Choices Disabled allows AppleTalk packets to cross the bridge Enabled prevents AppleTalk packets from crossing the bridge IPX 802 3 Filter Disabled IPX 802 3 Filter defaults to Disabled Choices Disabled allows IPX packets to cross the bridge Enabled prevents IPX packets from crossing the bridge OTHER Filtering Disabled Other Filtering is show...

Page 147: ...or Enabled After pressing the Enter key for Other Filtering the following message will appear Is the above setup information correct y n Type n to start over with this section Type y to use the current settings While the settings will be used by the router they are not actually saved To save the settings you must select SAVE from the command prompt of the OverLAN Operating System You may now go to...

Page 148: ...isplay will appear as in figure 11 Figure 11 IP addresses of the form _ _ _ _ _ _ _ _ _ _ _ _ go in the first three columns for Network Subnet Mask and Router A number of the form _ _ _ goes in the fourth column for Hops Each _ _ _ is a number between 001 and 255 STATIC ROUTING TABLE Entry Network Subnet Mask Router Hops 0 1 2 3 4 5 6 7 8 9 Command E edit D delete X exit CONFIGURING WITH A LOCAL C...

Page 149: ... that corresponds to the information you wish to delete Press the Enter key The information is deleted If you type E the prompt Entry to Edit will appear Type the number under the column Entry that corresponds to the information you wish to edit Press the Enter key The following prompts will appear Each item depends on your particular network layout IP Network Address This is a network that is rea...

Page 150: ...entioned above After pressing the Enter key for Hops Away the following message will appear Is the above setup information correct y n Type n to start over with this section Type y to use the current settings While the settings will be used by the router they are not actually saved To save the settings you must select SAVE from the command prompt of the OverLAN Operating System CONFIGURING WITH A ...

Page 151: ...151 Operating the Router ...

Page 152: ...rmine if data is transferring or not you should look to see if the indicator lights for Transmit and Receive are currently lit If these indicator lights are lit then data is transferring It is recommended that you wait until no data is transferring before turning off the unit Using the Router Control Panel The following illustration shows the indicator lights and buttons on the front of the router...

Page 153: ...ansmitting data Not transmitting data Sending test packets Status Online Offline Searching for Ethernet D Channel Connection with Phone Switch No connection with Phone Switch N A B1 Channel Data channel open Data channel closed N A B2 Channel Data channel open Data channel closed N A Control Button Explanation Open Channel Raises the ISDN line using whatever channel configuration is currently setu...

Page 154: ...toring the operation of the OverLAN router the Status and Statistics dialog boxes The Status dialog box shown on the next page provides version and network location information about the router the current status of ISDN calls and status messages from the router about errors or other operational issues OPERATING YOUR ROUTER Buttons Explanation Aux Reset Reboot router using firmware from the perman...

Page 155: ...xt page provides information of errors and the rate of data transfer over the Ethernet and ISDN lines for both transmitted and received data There is also a graphic display of bandwidth usage for received and transmitted data OPERATING YOUR ROUTER ...

Page 156: ...rmation about OverLAN Commander for Windows 95 NT you may want to view the online help in OverLAN Commander This completes the section Operating the Router from OverLAN Commander for Windows 95 NT OPERATING YOUR ROUTER ...

Page 157: ...log box You must select a router click on a router name before any OverLAN Coammander options can be accessed For version and network location information for OverLAN Commander select the System Info button To restart the router and end all calls select the Reset button For online help with OverLAN Commander select the Help button To exit the current session of OverLAN Commander select the Exit bu...

Page 158: ...and network location information about the router status information about current ISDN calls statistics about errors and the rate of data transfer for both transmitted and received data status messages from the router about errors and other operational issues and control buttons for starting and ending calls You can also change the version of firmware from RouterMaintenance and save and retreive ...

Page 159: ...e command from the left column of the above list or the abbreviation given in brackets from the middle column When you have completed typing the command press the Enter key OPERATING YOUR ROUTER O v e r L A N Operating System 1 41 unit designation Command Options CALL x Cx Call ISDN Channel x CLOSE CL Disconnect ISDN Channel RESET RE Restart the OverLAN Unit SETUP SU Enter OverLAN Setup Menu SYSOP...

Page 160: ...oses both channels if both channels are open or if only one channel is open closes whichever channel is open Press Enter when you are ready To restart the router and end all calls use the RESET command Type either RESET or RE and press Enter when you are ready To configure the router use the SETUP command Type either SETUP or SU and press Enter when you are ready For more information on configurin...

Page 161: ...o view IP routing information use the RIP command Type either RIP or RP and press Enter when you are ready To view ARP cache information use the ARP command Type either ARP or AR and press Enter when you are ready To view information on current MAC filters use the FILTER command Type either FILTER or FI and press Enter when you are ready For additional general information about routing options you...

Page 162: ... you type in the ISDN phone number Do not use parenthesis or dashes SPID number is wrong Do not use parenthesis or dashes For further assistance please visit the technical support website at http www hbmuk com select Technical Support Center and select ISDN Router Devices Ringdale Inc USA 888 288 9080 FAX 512 288 7210 Ringdale UK Ltd 44 0 1444 871349 Ringdale GmbH 49 0 6196 88 9273 Ringdale Inc 1 ...

Page 163: ...it Interface BRI Basic Rate Interface Provides two 64 kbps B channels and one 16 kbps D channel BRI port S T interface bridge a device that physically connects two networks together DB9 25 a type of communications cable dynamic routing routing by Novell RIP Ethernet network a local area network used for connecting computers printers workstations terminals etc within the same building Filter an ope...

Page 164: ...emote router a router on a remote network RJ45 shielded an RJ45 cable resistant to RF interference RJ45 unshielded an RJ45 cable not resistant to RF interference RS 232 a set of standards specifying various electrical and mechanical characteristics for interfaces between computers terminals and modems server a computer providing a service such as shared access to a file system a printer or electro...

Page 165: ...ting resistor a resistor that caps the end of a coaxial cable thin coax a coaxial cable 0 2 inch RG58A U 50 ohm that uses a smaller diameter than standard thick coax T plug a T shaped adaptor that joins a device to a coaxial cable U interface the ISDN phone jack ...

Reviews: