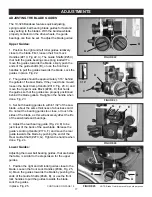
FIGURE 9
ADJUSTMENTS
ASSEMBLY
INSTALL THE GUIDE POST CAP
1. Place Guide Post Cap (#1A) into the square hole
on top of the upper frame. This cap protects the guide
post assembly from falling shop dust or debris. Fig. 10.
INSTALL THE PUSH STICK HOLDER
1. Assemble the Push Stick Hanger Bolt (#6A) to the
column’s left side with a 5mm hex wrench. Handy
storage for the push stick when not in use. FIG. 9.
THE MACHINE MUST NOT BE
PLUGGED IN AND THE POWER SWITCH MUST BE IN THE
OFF POSITION UNTIL ALL ADJUSTMENTS ARE COMPLETE.
13
TILTING THE TABLE
1. At the rear of the saw, loosen the Quick Locking
Handle (#50A) on the table trunnion by pulling it
upward. Fig. 11, A.
2. Turn the table tilting Handwheel (#23B) to adjust
the table to the desired angle. Fig. 11, B. Use the
angle indicator scale on the trunnion bracket (C) to
find the desired angle.
3. Retighten the lock handle to secure the table.
FIGURE 11
B
A
FIGURE 10
C
SETTING THE TABLE SQUARE TO THE SAW
BLADE’S SIDE
The table may be set at 90° to the saw blade sides
by adjusting the table stop Bolt (#8B) under the table.
The table stop bolt rests on the top of the pivoting
Stop Block (#69A).
1. First loosen the bolt’s Locking Nut (#7B) Fig. 12, A.
2. Set a square on the table and against the saw
blade’s flat side. Tilt the table until the table is set ex-
actly 90° to the blade, than lock the table in position.
3. Adjust the bolt (Fig. 12, B), up or down, until it
is
in contact with the pivoting Table Angle Stop Block
(#69A) Fig. 12, C. Retighten the locking nut making
sure that the table angle setting is maintained.
FIGURE 12
4.
The angle indicator on the trunnion, under the
table, can be adjusted by loosening the Phillips head
screw and moving the pointer into position. Fig. 12 D.
C
B
A
D


