www.raproducts.com
Instruction # 53376
Page 4 OF 6
Phone: 800.298.4351
K&A Manufacturing
Fax: 866.882.9475
6703 Zinser Street Schofield, WI 54476
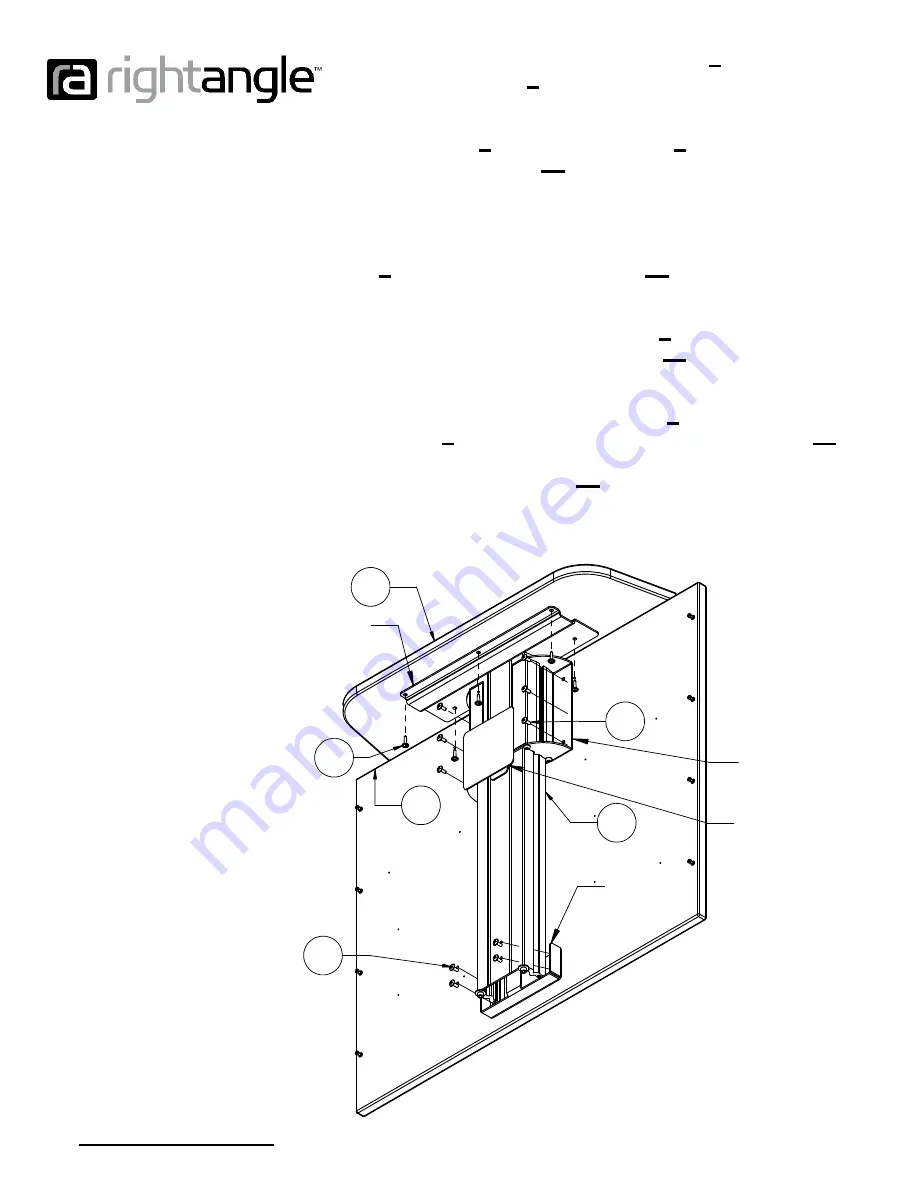
Step 4:
Lay the column assembly
8
assembly on
the back panel
3
as shown below.
Step 5:
Attach the bottom plate of the column
assembly
8
to the back panel
3
by screwing (4)
machine screws
12
through the back of the
bottom plate and into the inserts installed in the
back panel. Do not fully tighten.
Step 6:
Attach the side brackets to the back panel
3
with (6) machine screws
12
as you did the
bottom plate. Do not fully tighten.
Step 7:
Attach the top panel
9
to the worksurface
support with (5) wood screws
13
. Do not fully
tighten.
Step 8:
Square the top panel
9
with the back
panel
3
and fully tighten all the wood screws
13
holding the top panel to the worksurface support and
the machine screws
12
holding the column assembly
to the back panel. Set the assembly aside for
installation on the workstation later.
9
Steps 4-8
13
3
Bottom
Plate
came with them.
Mounting
Monitor
12
12
Bracket
8
Side
panel using the instructions that
Plate
nest, attach them to the back
Note:
If your workstation has a
mouse nest and/or a keyboard
Worksurface Support


