


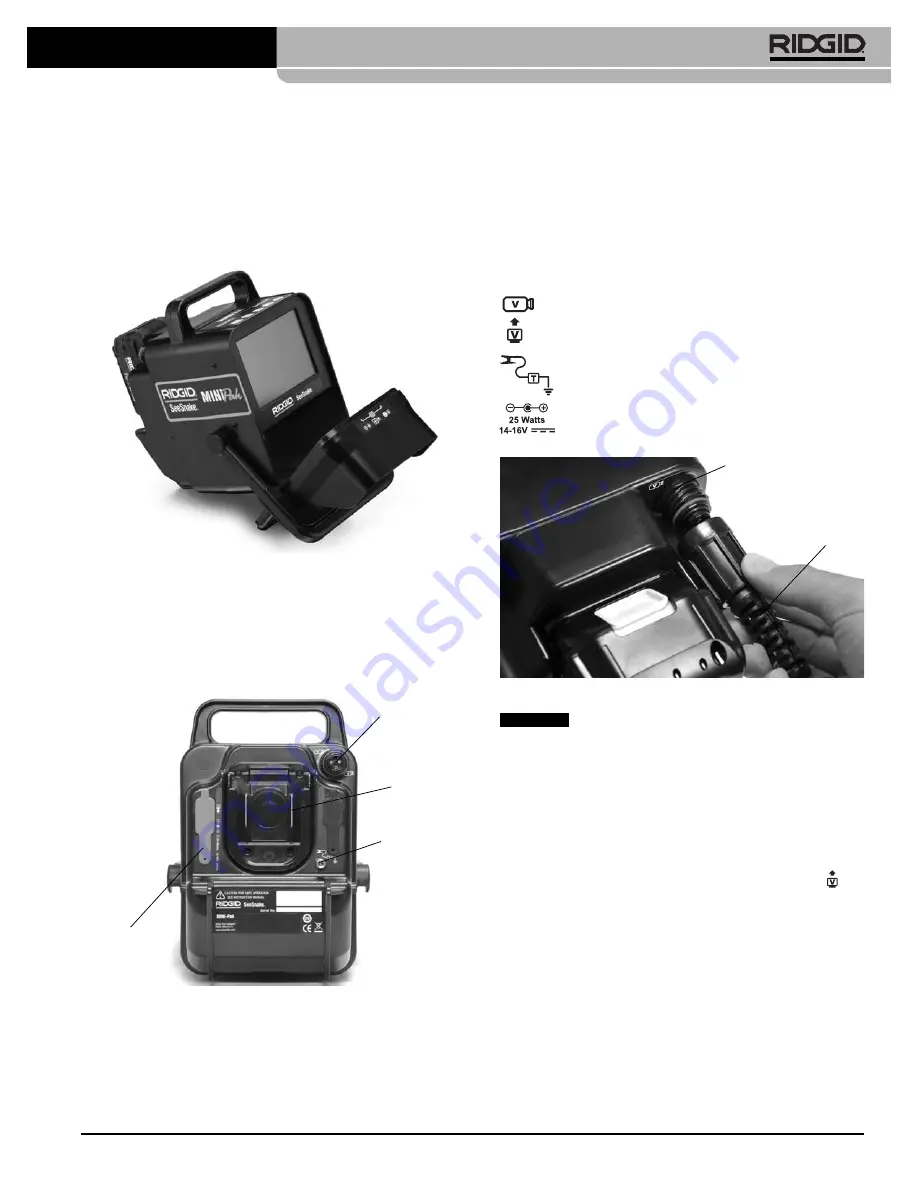
the connectors, align the guide pin to the guide socket,
push the connector straight in and tighten the outer
locking sleeve.
NOTE! A guide ridge molded into the top of the cable
connector will point up when the plug is correctly
aligned.
When connecting/disconnecting the SeeSnake
system cable, turn only the locking sleeve. To prevent
damage, do not bend or twist the connector or cable.
External Monitor
4. The MINI
Pak may be used with an external SeeSnake
monitor by connecting an RCA cable from the Video
Out port on the external monitor. Connect the other
end of the cable to the yellow MINI
Pak video input
port on the back of the MINI
Pak, marked with .
Ridge Tool Company
7
SeeSnake
®
MINI
Pak
NOTICE
If desired, the front cover and its handle can be used as
a tilt stand for easier viewing.
1. Tilt the unit back slightly and then pull forward on
the front cover latch to free the rotating front cover.
2. Rotate the front cover and front cover handle toward
the bottom of the unit until it latches in place.
Figure 5 – MINI
Pak with Tilt Stand Deployed
3. To return the front cover to its horizontal position,
squeeze the front cover handle and latch together to
release, and rotate upward until it latches in posi-
tion.
Connecting the MINI
Pak
Figure 6 – DVD
Pak Connections
SeeSnake System Cable
Unwrap the SeeSnake System Cable from its holder
and match the System Cable plug to the matching
SeeSnake System Connector on the MINI
Pak. To join
Battery
Dock
Transmitter
Clip-on
Terminal
DC Jack and
Video Port
SeeSnake System Connector
Connection Icons
Video In Plug
Transmitter Clip-on Terminal
MINI
Pak Power Jack
Figure 7 – Connecting System Plug To CCU
SeeSanke
System
Connector
SeeSnake System
Connector
Guide
Ridge


