


3.
When the "Power LED" lights purple, release the "Menu" key quickly, wait a minute, then
press the "Menu" key again. The projector will power on.
4.
Connect the projector to the PC with a USB cable (USB type A to A).
5.
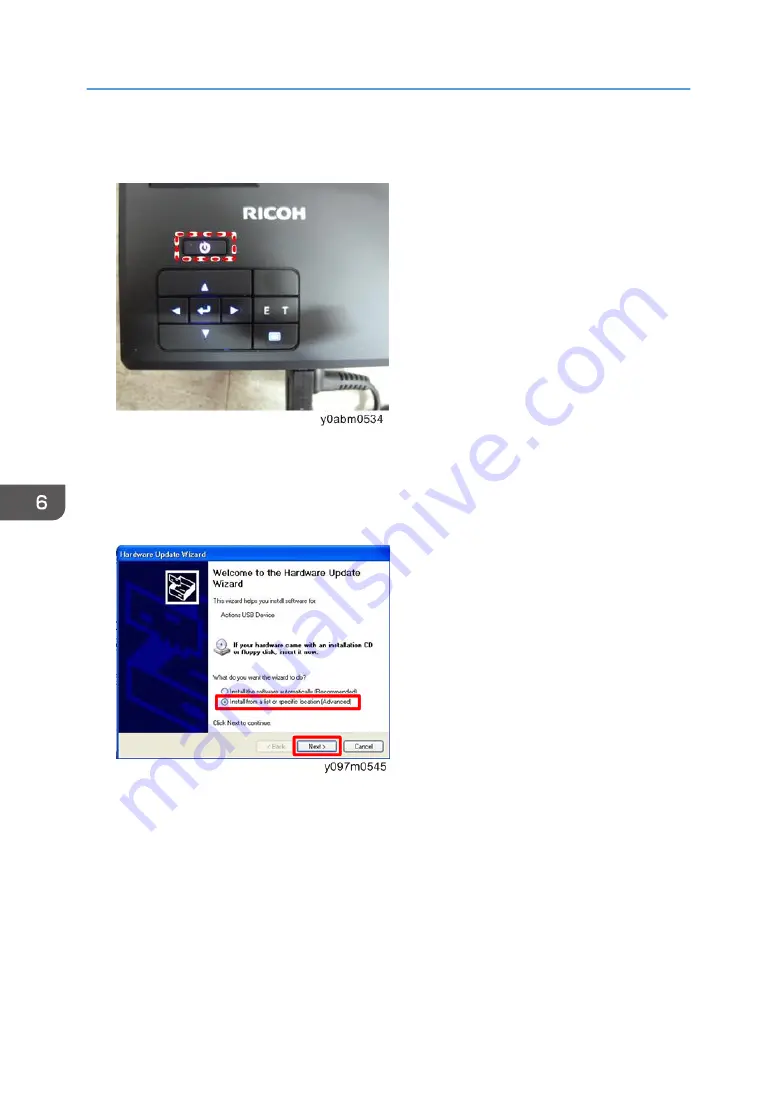
The found new hardware wizard will appear on the screen.
- Select "Install from a list or specific location (Advanced)".
- Then click "Next".
6. Firmware Update
70
Summary of Contents for WXC1110 Y0AB
Page 1: ...Kaus PJ1 RICOH PJ RICOH PJ WXC1110 Machine Codes Y0AB Field Service Manual May 2016...
Page 2: ......
Page 7: ...1 Product Information Overview Main Unit 5...
Page 20: ...1 Product Information 18...
Page 24: ...2 Installation 22...
Page 33: ...2 FPC cable A Multimedia Board 1 Top Cover page 25 2 FPC Cable page 30 Part Replacement 31...
Page 35: ...Engine Module 1 Bottom Cover page 28 2 Remove screws M1 6 4 x3 Part Replacement 33...
Page 39: ...Adjustable Foot 1 Adjustable foot A Part Replacement 37...
Page 40: ...3 Replacement 38...
Page 50: ...4 Adjustment 48...
Page 51: ...5 Troubleshooting Troubleshooting Main Procedure 49...
Page 52: ...No Power Troubleshooting 5 Troubleshooting 50...
Page 53: ...Power Troubleshooting Troubleshooting 51...
Page 54: ...Image Performance Troubleshooting 5 Troubleshooting 52...
Page 55: ...Troubleshooting 53...
Page 56: ...Remote Control Troubleshooting 5 Troubleshooting 54...
Page 60: ...5 Troubleshooting 58...
Page 64: ...4 Click Next 5 Click Next 6 Click Next 6 Firmware Update 62...
Page 76: ...3 Click Download 4 The success information will appear on screen 6 Firmware Update 74...
Page 78: ...MEMO 76 EN...