Printing Functions
101
3
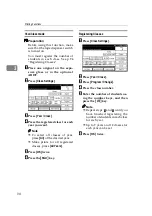
Erase Original Border
A
Place the originals.
B
Press
[
Edit Image
]
.
C
Press
[
Edit Image
]
.
D
Press
[
Erase Border
]
.
E
Press
[
Erase Original Border
]
.
F
Select the size and direction of the
original.
G
Press
[
OK
]
four times.
H
Press the
{
Start
}
key.
Erase Paper Border
A
Place the originals.
B
Press
[
Edit Image
]
.
C
Press
[
Edit Image
]
.
D
Press
[
Erase Border
]
.
E
Press
[
Erase Paper Border
]
.
F
Select the size and direction of the
paper.
G
Press
[
OK
]
four times.
H
Press the
{
Start
}
key.
Auto Erase Original Border
This machine can automatically erase
page border shadow, which is created
if Erase Original Border or Erase Pa-
per Border is not selected before
printing from a thick original such as
a book (thick originals prevent the
ARDF or exposure glass cover closing
fully).
However, use of this function can re-
sult in loss of light characters on dark
backgrounds. To reproduce such de-
tail, select Erase Original Border or
Erase Paper Border on the machine.
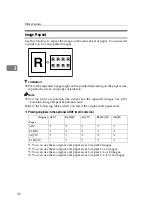
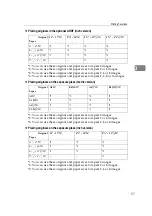
Margin Adjustment
You can make a binding margin.
Note
❒
You can change the width of the
binding margin as follows:
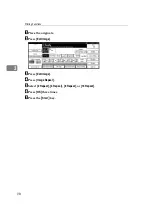
A
Place the originals.
Metric
version
0–30 mm (increments of 1
mm)
Inch
version
0"–1.2" (increments of 0.1")
Summary of Contents for Priport DX 4640PD
Page 25: ...13 AUX167S...
Page 74: ...Basics 62 2...
Page 152: ...Printing Functions 140 3...
Page 190: ...Troubleshooting 178 4...
Page 210: ...User Tools 198 5...
Page 222: ...Remarks 210 6...
Page 238: ...226 EN USA C269 0756...
Page 240: ...Operating Instructions Type for 3585DNP2 CP6340D LDD350d DX 4640PD EN USA C269 0756...

