background image

0

CIP Training 

L5160/L513

 Maintenance

CIP Training 

C7200 series

Adjustment Settings for Operators 

DWT316

1

4. Close the center cover.

After cleaning, check that the pinch rollers are dry before setting media.

Cleaning the Media Sensors

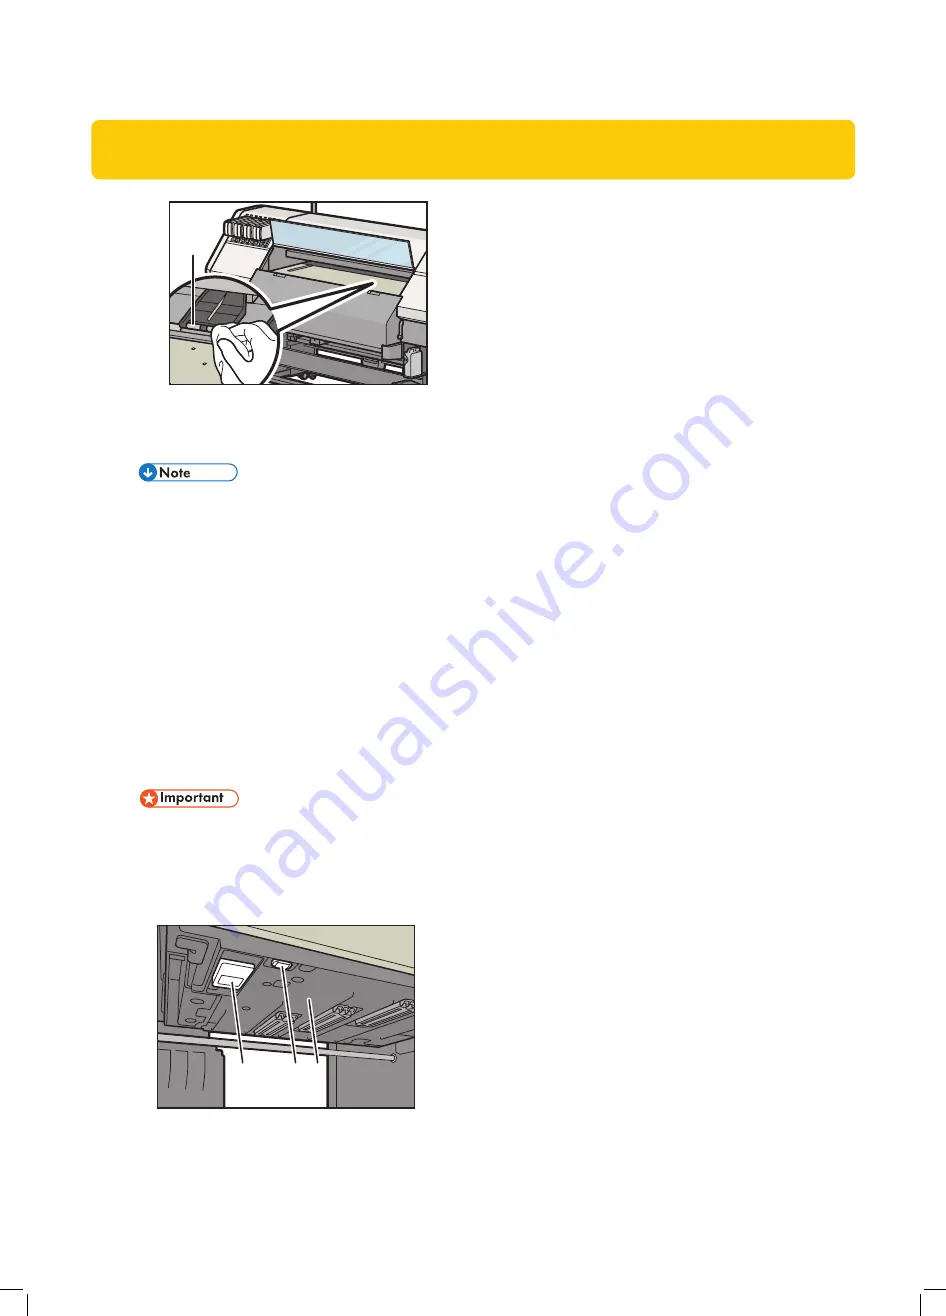
Media sensors are located above the media feeding surface at the rear of the machine and on 
the underside of the carriage. If dust builds up on the sensors on the underside of the carriage, 
it may not be possible to correctly detect media. When dust builds up on the surface of the 
sensors, remove the dust with a cotton swab.

1. Pinch roller

Cleaning the media sensor on the underside of the carriage

When cleaning the media sensor on the underside of the carriage, see "Cleaning the Area 
around the Print Heads".

When cleaning the media sensor on the underside of the carriage, do not touch the
sensors with your hand. Touching the sensors may cause malfunctions.

Do not touch the colorimetric sensor as cleaning may cause the sensor to become
misaligned.

1

2 3

DWT313

1. Colorimetric sensor
2. Media sensor
3. Underside of the carriage

Summary of Contents for L5130

Page 1: ...CIP Training L5160 L5130 5 Maintenance...

Page 2: ......

Page 3: ...ink station or the heads or replacing the cleaning cartridge make sure to wear the attached goggles When performing maintenance on the machine make sure to wear the attached gloves Please use protect...

Page 4: ...ng items are disposable waste cloth paper towel non woven fabric protective gloves and cleaning stick Be sure to use new ones instead of reusing them When cleaning the caps and the area around the pri...

Page 5: ...quid get into contact with eyes wash eyes immediately with running water Consult a doctor if necessary If ink flushing liquid or displacement liquid are ingested consult a doctor immediately with Safe...

Page 6: ...artridge DWT172 2 Pull out the white ink cartridge DWT173 3 With the connecting parts of the white ink cartridge facing upwards hold a dry cloth on the ink supply port and lightly shake the cartridge...

Page 7: ...to lock the white ink cartridge Wait until the ink indicator turns off and the message disappears DWT175 Cleaning the Media Guides If dust or ink is present on the media guides problems such as ink dr...

Page 8: ...the media guides with a soft dry cloth If this does not remove the dirt wipe the media guides with a damp and tightly wrung cloth If a damp cloth still does not remove the dirt try using a mild deterg...

Page 9: ...forming maintenance on the machine make sure to wear the attached gloves If ink flushing liquid and displacement liquid get into contact with eyes wash eyes immediately with running water Consult a do...

Page 10: ...more have passed after the carriage moves the machine will make a buzzer sound As nozzle dryness may cause a nozzle defect perform nozzle maintenance promptly 1 Press the Maintenance key DWU102 2 Pres...

Page 11: ...safely for an extended period Cleaning the Caps Clean the caps and the area around the print heads each time you replace the nozzle cleaning cartridge or if nozzle defects are not resolved by head cle...

Page 12: ...ome into contact with your skin wash the affected area thoroughly with soap and water The supplied gloves are consumables If they are damaged or lost use polythene gloves instead When 10 minutes or mo...

Page 13: ...herwise the edge of the cap might deform If there is any ink dirt around the caps wipe the dirt off Wipe off completely so that no cleaning liquid remains DWT301 1 2 1 Edge of the cap 2 Around the cap...

Page 14: ...the ink station or the heads or replacing the cleaning cartridge make sure to wear the attached goggles When performing maintenance on the machine make sure to wear the attached gloves If ink flushing...

Page 15: ...that the media is not deformed or that there is no floating media When 10 minutes or more have passed after the carriage moves the machine will make a buzzer sound As nozzle dryness may cause a nozzl...

Page 16: ...emoved screws will be used when refixing the cover DWT304 1 2 7 Apply cleaning liquid to a cleaning stick and then use it to wipe off any dust and dirt on the area around the print heads DWT305 Wipe o...

Page 17: ...tton swab etc 1 2 DWT307 1 Colorimetric sensor 2 Media sensor Do not touch the colorimetric sensor as cleaning may cause the sensor to become misaligned DWT073 9 Use the two screws removed in Step 6 t...

Page 18: ...ne Cleaning the Exterior Depending on the operating environment particles or dust may adhere to the exterior of the machine Clean the exterior if they are dirty Keep the warning labels on this machine...

Page 19: ...eater Wipe the pre heater with a soft dry cloth If this does not remove the dirt wipe the pre heater with a damp and tightly wrung cloth If a damp cloth still does not remove the dirt try using a mild...

Page 20: ...y clean it Allow the temperature of the platen to cool sufficiently before cleaning it The grooves of the media guides are a particularly susceptible location for dirt to build up Clean the grooves su...

Page 21: ...nter cover After cleaning check that the platen is dry before setting media Cleaning the Pinch Rollers If bits of media or ink are affixed to the pinch rollers it may not be possible to successfully f...

Page 22: ...not be possible to correctly detect media When dust builds up on the surface of the sensors remove the dust with a cotton swab 1 Pinch roller Cleaning the media sensor on the underside of the carriage...

Page 23: ...g media When 10 minutes or more have passed after the carriage moves the machine will make a buzzer sound As nozzle dryness may cause a nozzle defect perform nozzle maintenance promptly For cleaning l...

Page 24: ...and then gently wipe the nozzle faces of the print heads The nozzle faces should only be wiped gently so that they are soaked in cleaning liquid Do not strongly rub the nozzles faces DWT314 7 Fix the...

Page 25: ...__________________________________________________________ __________________________________________________________________________________ __________________________________________________________...

Page 26: ...__________________________________________________________ __________________________________________________________________________________ __________________________________________________________...

Page 27: ...__________________________________________________________ __________________________________________________________________________________ __________________________________________________________...

Page 28: ......

Reviews: