background image

OTHER

Calling to Request a Message (Polling)

Overview

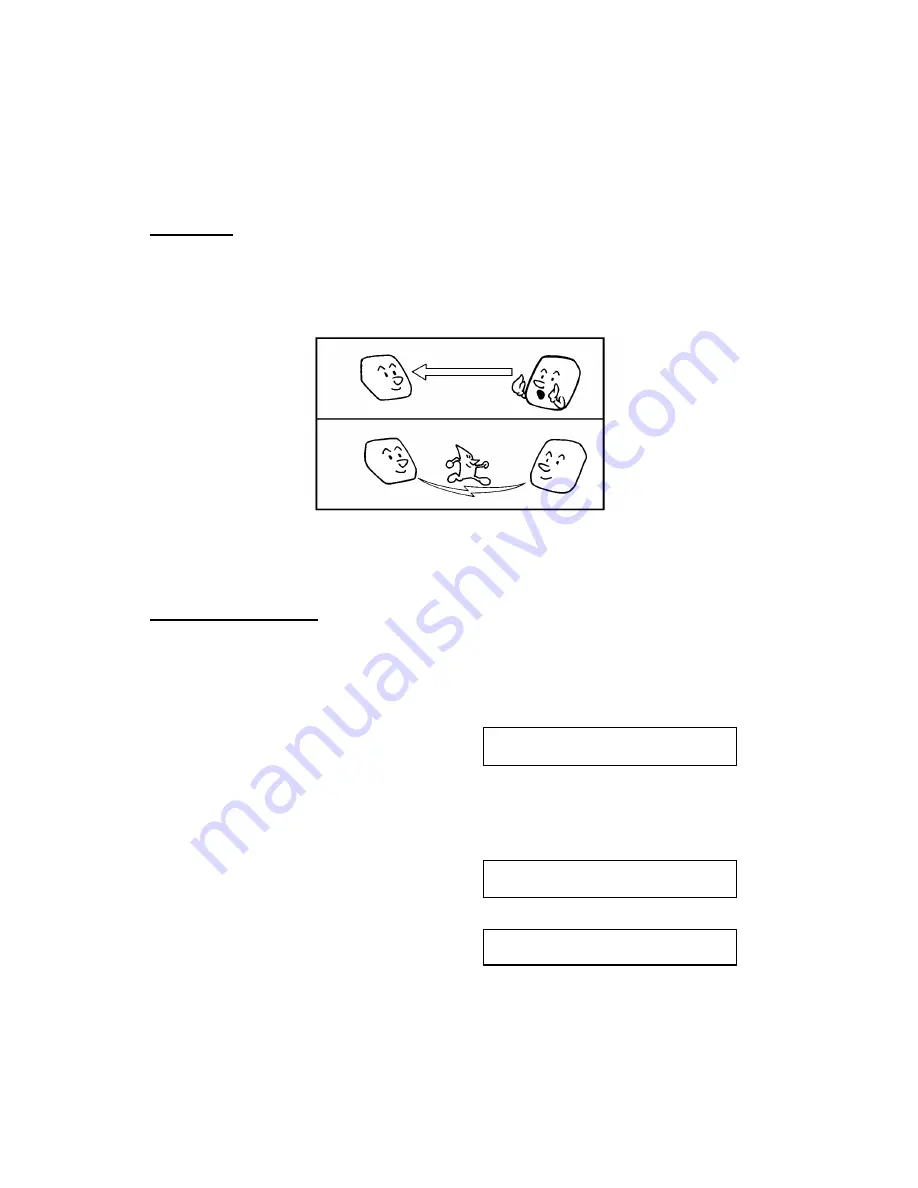
Polling means "picking up" a document that has been left for you at a remote fax
terminal. You can also leave a document in your machine’s memory (on Type I
models)  or in the document feeder (Type II models) for other machines to poll
from you. 

With polling, telephone line costs are charged to the person receiving the
message (the message receiver).

Polling can only be used when both machines have the Polling feature.

Storing the IDCode 

This code can be any four-digit code (using digits 0 to 9 and letters A to F),except
0000 and FFFF. This ID Code is also used ID for Transmission. (see page 64). 
Before programming the ID Code, agree with other users in your fax network on
an ID Code.

1. Press the Function key and

6,2,2,2,2,6,1 using ten keypad, then
press the Yes key.

                      Y/NEXTk

SET POLLING ID

2 If the above display has not appeared,

press the 

k

 key until the screen is as

shown opposite.

 3. Press the Yes key.

POLLING ID           KPAD

llll

4. Input the Polling ID that you will be us-

ing. 
Example: 0917 , press 0,9,1,7using the
ten keypad.

POLLING ID           KPAD

0917

5. Press the Yes key .

6. Finish: Press the Function key

Message Transmitter

Message Reciever

76

Summary of Contents for 170 / 180

Page 1: ...OPERATOR S MANUAL RICOH FAX 170 180 Type I RICOH FAX 180 Type II RICOH FAX 170 Please read all of these instructions and keep this manual by your machine ...

Page 2: ...arty Line Service is subject to state tariffs WHEN PROGRAMMING EMERGENCY NUMBERS AND OR MAKING TEST CALLS TO EMERGENCY NUMBERS 1 Remain on the line and briefly explain to the dispatcher the reason for the call before hanging up 2 Perform such activities in the off peak hours such as early morning hours or late evenings CANADA The Industry Canada label identifies certified equipment This certificat...

Page 3: ...mance Headquarters Ricoh Corporation 5 Dedrick Place West Caldwell NJ 07006 201 882 2000 U S Government Marketing Ricoh Corporation 1700 N Moore Street Suite 1200 Arlingon VA22209 403 525 3234 Ricoh Business Machines Ltd 23 F China Overseas Building 139 Hennessy Road WANCHAI Hong Kong 2862 2888 Ricoh Company Ltd 15 5 Minami Aoyama 1 chome Minatoku Tokyo 107 Japan ENG Part No H0688601B Printed in C...

Page 4: ...ed Consult the dealer or an experienced radio TV technician for help Notice about the Telephone Consumer Protection Act Valid in the USA only Attention Please The Telephone Consumer Protection Act of 1991 among other things makes it unlawful for any person to send any message via a telephone fax machine unless such message clearly contains in a margin at the top or bottom of each transmitted page ...

Page 5: ...blems occur the user is not to contact Telecom Faults Service Immediately disconnect the equipment should it ever suffer physical damage which results in their internal parts becoming accessible in normal use Arrange for its disposal or have it repaired before it is reconnected Should it necessary to move the equipment it is necessary to disconnect the Telecom network connection before disconnecti...

Page 6: ...t apply in countries in which the 2 wire non grounded type plug is used 10 Do not allow anything to rest on the power cord Do not locate this product where persons will walk on the cord 11 If an extension cord is used with this product Make sure that the total of ampere ratings of the products plugged into the extension cord do not exceed the extension cord ampere rating Also make sure that the to...

Page 7: ... COLD WEATHER POWER UP 8 THUNDERSTORMS 8 PAPER PRECAUTIONS 9 OPERATING PRECAUTIONS 9 GENERAL 9 GUIDE TO COMPONENTS 1 OPERATION PANEL 10 Type I Model USA 10 ASIA 10 Type II Model 10 2 FRONT VIEW 12 3 REAR VIEW 12 INSTALLING THE MACHINE LOCATION 13 INSTALLATION 13 Installation Procedure 14 SOME ITEMS MUST BE PROGRAMMED FIRST 16 Overview 16 Setting the Date and Time 17 Setting Your Machine s Identifi...

Page 8: ...p Dials 33 Programming the Group Key 34 OTHER ITEMS TO PROGRAM AT YOUR LEISURE 34 Storing and Dialing Part of a Number 34 BASIC OPERATION SENDING IMMEDIATELY VS SCANNING QUICKLY 35 Sending Quickly 35 Scanning Quickly Type I Only 35 Sending Quickly Immediate Transmission 36 Scanning Quickly Memory Transmission Type I Only 37 Sending to More Than One Location Broadcasting 38 Canceling a Memory Trans...

Page 9: ... the Telephone Answering Machine 52 If the caller is another fax machine 52 If the caller is a telephone caller 52 Receiving Fax Messages When There Is a Problem Type I Only 53 Over view 53 Switching Substitute Reception On or Off 53 CHANGING RECEPTION MODE 55 Switching Reception Mode Switch Over On off 55 Using Reception Mode Switchover 55 MAKING TELEPHONE CALLS 56 Making a Telephone Call 56 Usin...

Page 10: ...g the Forwarding Feature 72 Switching Forwarding On Off 73 Selecting Which Message to Forward 73 Switching Local Printing On Off 74 Enabling and Disabling the Forwarding Mark 74 Wild Cards 75 OTHER 76 Calling to Request a Message Polling 76 Overview 76 Storing the IDCode 76 Leaving Documents to Be Picked up by Others Polling Transmission 77 Free Polling 77 Secured Polling 77 Stored ID Override 78 ...

Page 11: ...95 COMMUNICATION PROBLEMS 96 OPERATING DIFFICULTIES 96 DISPLAYED ERROR MESSAGES 97 ERROR CODES 98 TECHNICAL REFERENCE ENTERING TELEPHONE NUMBERS 100 ENTERING NAMES AND LABELS 100 ON OFF SWITCHES AND USER PARAMETERS 101 On Off Switches 101 User Parameter Settings 102 COUNTERS 106 DOING TWO THINGS AT ONCE Dual Access Type I Only 106 DOCUMENT TYPE 107 LIMITS ON THE USE OF STORED TELEPHONE NUMBERS 109...

Page 12: ...sent out over the telephone line to the destination fax machine The receiving fax machine reconstructs your letter from the incoming signal and prints it If you are worried about whether the message arrived at the destination you can check a report called the TCR Transaction Confirmation Report When you print this report you can see the result of the most recent fax communications made by your mac...

Page 13: ...at the Top of Your Message TTI Print 46 4 4 Telephone Directory 43 4 4 Automatic Redialing 47 4 4 Redial Key 48 4 4 Auto Select Mode 49 4 4 Telephone Mode Manual Receive Mode 50 4 4 FAX Mode 50 4 4 Connecting the External Telephone Answering Machine 50 4 4 Receiving a Fax message When There Is a Problem Substitute Reception 53 4 6 Using the Handset 57 4 4 Using On Hook Dial 56 4 4 Leaving Document...

Page 14: ...8 19 20 4 4 Paper Save mode 82 4 4 Automatic Cutter 22 4 4 Cutting the Leading Edge of the Paper 24 4 4 On Off Switches 101 4 4 User Parameter Settings 102 4 4 TCR Transmission Confirmation Report 85 4 4 Transmission Result Report 85 4 4 Error Report 85 4 4 Communication Result Report 85 4 6 Communication Failure Report 85 4 6 File Reserve Report 85 4 6 Power Failure Report 86 4 6 Polling Clear Re...

Page 15: ... location It also explains the things you have to do before you can send your fax message and lists important features that will make faxing more convenient Basic Operation This section describes the features and settings that would normally be used daily Advanced Features This section explains how to take advantage of the special features of your fax machine Reports This section explains the repo...

Page 16: ... brought it up on the display After following a step in a procedure check the display to see if it corresponds to the one in the manual This may help you to check whether you are following the procedure correctly The following examples show three common types of display Example A The keys that can be pressed are shown in the top right In this example you can press the Yes or Start key TRANSMIT Y S...

Page 17: ...urns to standby mode If you want to change this contact your service representative TYPE I Models Immediate Transmission mode READY 100 10 00AM SET DOC OR DIAL NO Memory Transmission mode MEM TX 100 10 00AM SET DOC OR DIAL NO TYPE II Models READY 10 00AM SET DOC OR DIAL NO Symbols The text contains two symbols that highlight important points or direct you towards other parts of the manual that are...

Page 18: ...on the power cord 6 Do not connect other equipment to the same extension cord 7 Be sure that the power cord is not in a position where it would trip someone Grounding Ground the machine and the lightning protection circuit in accordance with regulations Do not ground to gas or water pipes or to a telephone ground plug Proper grounding is to the ground terminal of the power outlet Be sure that the ...

Page 19: ...r cord and telephone line cord NOTE All fax messages stored in the memory are erased if power cord is disconnected Precautions When Installing and Using the Handset Never install telephone wiring during a lightning storm Never install the telephone jack in wet locations Never touch uninsulated telephone wires or terminals unless the telephone line has been disconnected at the network interface Use...

Page 20: ... copy paper if your fingers are wet and oily fingerprints may appear on the copy Do not let paper clips staples or other small metal objects fall into the machine Do not place beverages on or near the machine they may spill on or into it GENERAL Since some parts of the machine are supplied with high voltage make sure that you do not attempt any repairs or attempt to access any part of the machine ...

Page 21: ...NENTS 1 OPERATION PANEL Type I Model USA ASIA Type II Model 1 4 3 5 6 8 7 1 4 2 3 5 6 8 7 10 9 1 4 2 3 5 6 8 7 10 9 01 02 03 04 05 06 07 08 09 10 01 02 03 04 05 06 07 08 09 10 01 02 03 04 05 06 07 08 09 10 2 11 12 10 ...

Page 22: ...iting a displayed item Function Key Press to use one of the numbered functions 4 Quick Dial Key Each of these can be programmed with a telephone number 5 Speed Dial Key Tel Directory Key Press this to dial using a Speed Dial or the Tel Directory feature Pause Redial Key Press this if you need to insert a pause when dialing Also press this to redial On Hook Dial Key Press this to dial without picki...

Page 23: ... VIEW 3 REAR VIEW Transparent Strip Document Table Copy Tray Document Guide Operation Panel Handset LINE TEL2 TEL1 Speaker Volume Control Telephone Company s Jack Telephone Handset Jacks GUIDE TO COMPONENTS 12 ...

Page 24: ...temperature Within 2m 2 2 yards of a three pin grounded power outlet With the clearance as shown on the right NOTE If you wish to receive legal size messages or copy the legal size docu ments you must allow 8 20cm clearance at the back of the machine INSTALLATION CAUTION Do not plug it in until everything is connected properly When moving the machine first disconnect the telephone line then the po...

Page 25: ...aper size The paper roll must be set in the center 2 4 Install the rod into the paper roll as shown then set the roll into the machine hold the roll in a direction so that it rolls away from you when pulled upwards NOTE Make sure the ends of rod fit into the paper guides there is no slack paper inside the machine 2 5 Pull out the leading edge and insert it between the roller and the cover until yo...

Page 26: ...e Jack 3 4 Connect an external telephone it you wish 3 5 Press the Start key to tear off the excess paper 4 Adjust the speaker volume using the dial G at the back of the machine LINE TEL2 TEL1 G F INSTALLING THE MACHINE Telephone Telephone Company s Jack Power Source North America 115 Vac 60 Hz Saudi Arabia 115 Vac 60Hz or 220 240 Vac 50 60 Hz Other Areas 220 240 Vac 50 60 Hz INSTALLING THE MACHIN...

Page 27: ...ender s organization and the date and time that the fax was sent In addition you also have to make sure that the fax machine s dialing circuits are set up correctly There are two settings Pulse Dial and Tone Dial If you select the wrong setting your machine will not be able to dial the fax number If you are not sure which setting to use contact your telephone company To change this setting see the...

Page 28: ...ess the key to advance a month Press the key to go back a month Press the k key to move the cursor and accept the setting 3 Type in the date year and time using the keypad NOTE The day of the week will be set automatically Example Press 2 4 9 5 1 1 3 0 using the ten keypad THU KPAD Y AUG 24 1995 11 30PM 4 When the display is correct press the Yes key then press the Function key to finish Cross ref...

Page 29: ...on reports printed by the machine later Some machines may reject your transmitted fax messages if you have not stored the RTI or CSI in advance NOTE You can switch the TTI off for a particular transmission if you do not wish it to be printed on your pages at the other end See page 46 RTI Identification Display Your RTI appears on the other party s operation panel during communication if the other ...

Page 30: ...I can have up to 32 characters numbers and letters can be used along with some symbols Program something easy to recognize such as your name company name or department name within the company 1 Either Y NEXTk SET TTI If you have just entered the RTI in the previous procedure press the Yes key Press the Function key and 6 2 2 2 2 6 1 using the ten keypad then press the Yes key Press the k key until...

Page 31: ... of your machine may not work if the CSI is not the same as the telephone number 1 Either Y NEXTk SET CSI If you have just entered the TTI in the previous procedure press the Yes key Press the Function key and 6 2 2 2 2 6 1 using the ten keypad then press Yes key Press the k key until the screen is as shown above then press the Yes key 2 Press the Yes key CSI KPAD llllllllllllllllll 3 Input your t...

Page 32: ...SELECT LINE 2 Press the Yes key In the opposite dis play TT is currently selected SELECT LINE Y j k kTT PD 3 Change the setting by using the j and the k keys SELECT INE Y j k TT kPD 4 Press the Yes key to store your setting then press the Function key to finish When You Change to Daylight Saving Time Whenever local custom requires advancing the clock or setting the clock back use this feature You ...

Page 33: ...our machine is in standby mode and no document is in the feeder then press the Start key to cut the paper Switching the Automatic Cutter On If you wish to use Automatic Cutting you must switch the Automatic cutter on Do the following procedure 1 Press the Function key and the 6 2 2 2 2 6 2 using the ten keypad then press the Yes key Y NEXT k SELECT LINE 2 Press the k key until the display is as sh...

Page 34: ... wish to change the setting press 0 using the ten keypad 5 Press the Yes key then press the Func tion key NOTE With On hook Dial or when using the handset this feature has no effect Setting The Access Number If you select inside line you have to program the number which preceeds the telephone number 1 Press the Function key and 6 2 2 2 2 6 1 using the ten keypad then press the Yes key Y NEXT k SET...

Page 35: ...epresentative 1 Press the Function key and 6 2 2 2 2 6 3 using the ten keypad then press the Yes key SETTING Y j PRINT LIST j At this time you can print the user parameter list press the j key then press the Yes key 2 Press the Yes key Press the k key until the settings for switch 13 are displayed KPAD Y j k SWITCH 13 0000 0000 3 Change the setting of digit 7 KPAD Y j k SWITCH 13 1000 0000 4 If yo...

Page 36: ...irst you have to program the telephone numbers that you need into the Quick Dial keys and Speed Dial codes in your machine After programming your Quick Dials and Speed Dials you can dial a telephone number with very few keystrokes For Quick Dial just press the appropriate Quick Dial key then press the Start key For Speed Dial press the key on the operation panel labeled Speed Dial enter a two digi...

Page 37: ...n see page 80 CAUTION There are limits on the number of addresses that can be dialed with each of these features Do not store more numbers in the group than the capacity of the feature that you plan to use it with These limits are Broadcasting 10 addresses Polling Reception 10 addresses Programming Quick Dials This machine has 10 Quick Dial keys 01 to 10 each of which can be programmed as one of t...

Page 38: ...achine is behind a PBX include the access code and a pause before the telephone number For an international number place a pause after the country code To input a pause press the Pause key 4 Press the Yes key n 01 Y N PROGRAM LABEL 5 To enter a label for this Quick Dial Press the Yes key n 01 ABC llllllllllllllllll If you do not want to program a label press the No key and go to step 8 6 Enter the...

Page 39: ...he label Example NEW YORK BRANCH n 01 ABC Y N NEW YORK BRANCHllllll 8 Press the Yes key If the display is not as opposite press the Yes key again n l QUICK j k PRINT LISTj SEARCHk 9 Either Edit another Go to step 2 Print a list of Quick Dial Numbers Press the j key Finish Press the Function key Erasing a Quick Dial 1 Press the Function key and 3 1 using the ten keypad then press the Yes key n l QU...

Page 40: ...begin with that letter until you find the right one Programming a New Speed Dial 1 Press the Function key and 3 2 using the ten keypad then press the Yes key N ll KPAD j k PRINT LIST j SEARCH k At this time you can print Speed Dial List if you press the j key then press the Start key 2 Input the Speed Dial Code that you wish to program Type I 00 to 49 Type II 00 to 19 using the ten keypad Then pre...

Page 41: ...u press the j key then press the Start key 2 Input the Speed Dial code that you wish to edit Example Quick Dial 01 N 01 CHANGE Y j k WASHINGTON OFFICE If the wrong number is displayed use the j and k keys to scroll through the Speed Dial keys on the screen 3 Press the Yes key N 01 KPAD Y N 2262310471lllllllll 4 Edit the number N 01 KPAD Y N 2391500482lllllllll Use the j and k keys to move the curs...

Page 42: ... ll Y j k PRINT LIST j SEARCH k 5 Either Program another Go to step 2 Print a list of Speed Dial Numbers Press the j key Finish Press the Function key Programming Groups Type I Only Groups allow you to combine some numbers into one group for easy sequential transmission to all the numbers in that group These numbers can be selected from those already stored in Quick Dial keys or Speed Dial codes o...

Page 43: ...you wish to store in this group For example Quick Dial 08 Press the Quick Dial 08 key GROUP 1 Y N n 08 Speed Dial 10 Press the Speed Dial key and 1 0 using the ten key pad GROUP 1 Y N N 10 Full number Input it using the key pad on the operation panel GROUP 1 KPAD Y N 3104712262lllllllll 9 Press the Yes key 10 Either Input another number Go to step 8 Print a list of Group Dial Numbers Press the j k...

Page 44: ... then press the Yes key Erase a number from this group Enter it using the ten keypad then press the Yes key again to confirm the deletion Finish Press the Yes key Erasing Group Dials 1 Press the Function Key and 3 3 using the ten keypad then press the Yes key GROUPl 1 3 j k PRINT LIST j SEARCH k At this time you can print a group dial list by press ing the j key then press the Start key 2 Enter th...

Page 45: ...f which may be input using the keypad For example you can program commonly used area or country codes into Speed Dial Codes or Quick Dial keys The maximum number of digits is 240 including pauses This feature is convenient if You often communicate with many terminals for which the area code or the international code is the same You often make international calls For example if you often call Tokyo...

Page 46: ...mory Transmission It is convenient because Fax messages can be scanned much more quickly you can take your document away from the fax machine without waiting for the transmission to be be completed While your fax message is being sent another user can operate the machine people will not have to wait by the fax machine a long time You can send the same message to more than one place in the same ope...

Page 47: ...cument feeder TRANSMIT OPTIONk DIAL FAX NUMBER The Pages must be placed in the feeder with the first page at the bottom of the stack Feed the pages in so that the top edge goes in first Do not feed in more than 10 pages Do not use unsuitable types of originals see page 108 Adjust the document guides to fit the width of the pages Do not use pages of different sizes 4 Press the Start key 5 The machi...

Page 48: ...rnational numbers press the Pause key after entering the country code Carefully place your fax message face down into the auto document feeder MEM TX OPTIONk DIAL FAX NUMBER The Pages must be placed down in the feeder with the first page at the bottom of the stack Feed the pages in so that the top edge goes in first Do not feed in more than 10 pages Do not use unsuitable type of original see page ...

Page 49: ...on number After dialing all destinations press the Start key Canceling a Memory Transmission If you would like to cancel a transmission after scanning or if your machine s memory is becoming full please follow this procedure This is also useful when you need space for an important job 1 Press the Function key and 2 1 using the ten keypad then press the Yes key FILE NO lll KPAD j k PRINT LIST j SEA...

Page 50: ... Enter the file number then press the Yes key 3 Press the Start key Transmission Using The Group Key 1 Either Place a document into the feeder Press the Quick Dial 10 Group Key Then enter the group num ber GROUP Y START G1 DISTRIBUTOR 2 Press the Start key If You Make a Mistake If you make a mistake when inputting a name or number either Press the No key to erase the entire name or number and star...

Page 51: ...ctions on the display For more information about error displays see page 97 Sending a Page With Very Fine Detail You may wish to send many different types of fax messages Some of these may be difficult to reproduce at the other end However your machine has two settings Resolution and Halftone that you can adjust to help you transmit your document with the best possible quality In this model contra...

Page 52: ...procedure 1 Press the Function key and 6 2 2 2 2 6 3 using the ten keypad then press the Yes key SETTING Y j PRINT LIST j At this time you can print a User Parameter List if you press the k key them press the Start key 2 Press the Yes key then press the jaand the k keys until the settings for Switch 10 are shown KPAD Y j k SWITCH 10 0000 0000 The setting on the display is the current setting 3 To ...

Page 53: ... 0000 The settings that you may need to change are those for Switch 00 and 01 The functions of these are as follows SWITCH 00 indicates the factory settings Digit Purpose 4 5 Resolution Digit 5 Digit 4 Setting Digit 5 Digit 4 Setting 0 0 Standard 1 0 Fine 0 1 Detail 1 1 Do not use 6 Transmission mode Type I Only 0 Memory Transmission 1 Immediate Tranmission 7 Halftone On Off home postion 0 Off 1 O...

Page 54: ...UM OR ABC NOTE On Type II models you will see 0 1 in the upper right corner of the display 4 Press the appropriate Quick Dial key for the Speed dial label TEL DIR Y j k N 01 XA COMPANY Quick Dial Letter Quick Dial Letter Quick Dial Letter Quick Dial Letter 01 ABC 02 DEF 03 GHI 04 JKL 05 MNO 06 PQR 07 STU 08 VWXYZ 5 If the label you want does not appear scroll through the labels using the j and k k...

Page 55: ...ry is full you will have to keep the message in the document feeder This means that nobody can use the document feeder unless they remove your document This would automatically cancel the Send Later Operation 1 Press the k key until SEND LATER is displayed SET OPTION Y k SEND LATER 2 Press the Yes key SET OPTION KPAD Y TIME 00 00AM 10 00AM 3 Example Send at 11 30 PM Press 1 1 3 0 using the ten key...

Page 56: ...nted in batch numbering format for example P1 3 P2 3 and P3 3 for a three page message This makes it easy for the other party to see how many pages you sent and if any are missing However you have to input the number of pages using the keypad before sending them NOTE On Type I models when you use Memory Transmission Page number is automatically switched on and the number of pages is automatically ...

Page 57: ... Converting Immediate Transmission to Memory Transmission If there is a message still waiting in the document feeder you can convert it into memory file Press the Line Select key to make sure that the machine is in Memory Transmission mode then press the Start key The document will be scanned and stored into memory leaving the document feeder free for others to use Memory Transmission as Your Firs...

Page 58: ...was no reply from the other party The message was rejected by the machine at the other end because of ex cessive errors in this case redialing will only take place if Memory Trans mission was used Redialing is done 4 times at 5 minute intervals for Memory Transmission or 2 twices at 5 minute intervals for Immediate Transmission The number of redials and the redial intervals may be adjusted by a se...

Page 59: ...dress that you sent one to recently you don t have to dial the full number again if it is still in the Redial memory Place the message in the feeder then press the Start key Press the Redial key until the required telephone number or name is displayed then press Start key NOTE Using Redial you cannot retry a failed Memory Transmission However you can redial the telephone number as explained in the...

Page 60: ...hine detects an incoming call it will ring to attract your attention While the machine is ringing you have a chance to answer the call after ringing stops the fax machine takes the line and you are no longer able to answer the call yourself The Auto Ring Count is the number of ringings that the machine will ring 1 Press the Function key and 6 2 2 2 2 6 1 using the ten keypad then press the Yes key...

Page 61: ...de This mode is selected when the Auto Select indicator and Manual Receive indicators are not lit If one of the reception mode indicators are lit press the Reception Mode key under the indicators until the both lights go out Your machine will treat each incoming call as if it comes from a fax machine You do not have to be by the machine as long as you have kept the power on Use this setting if you...

Page 62: ... the handset to receive the message Do nothing The machine keep ringing After a number of rings the auto ring time the machine will begin to receive a message You can change the number of rings the auto ring time see page 49 FAX Mode 1 The telephone rings once 2 The machine automatically starts to receive a fax message 2 1 The machine rings once Connecting NOW COMMUNICATING SET DOC OR DIAL NO BASI...

Page 63: ...hen replace the handset The machine will start to receive the messages When You Connect the Telephone Answering Machine If the caller is another fax machine If the caller is a telephone caller 1 The phone rings until the Auto Ring Count is reached 2 If you do not pick up the phone before the Auto Ring Count is reached the answering machine takes the call it starts recording 3 If the fax machine he...

Page 64: ...ou may wish to disable this feature If you do not like keeping received fax messages in memory After your machine has received a fax message to memory it sends an OK signal to the other end However if something happens to your machine and you lose the fax message before you have a chance to read it the sender will not be informed Therefore you may not wish to use the Substitute Reception feature I...

Page 65: ... settings for Switch 05 are displayed KPAD Y j k SWITCH 05 0000 0000 3 Change the settings of digit 0 and 1 The meanings of these setting are as follows KPAD Y j k SWITCH 05 0000 0000 indicates the factory settings Digit Purpose 0 Substitute Reception 0 Off 1 On 1 Reception to memory when no RTI or CSI identifiers were received from the other party 0 Enabled 1 Disabled 4 If you wish to change the ...

Page 66: ...2 2 6 3 using the ten keypad then press the Yes key SETTING Y j PRINT LIST j At this time you can print a User Parameter List if you press the k key then press the Start key 2 Press the Yes key Then press the k key until the settings for Switch 07 are dis played KPAD Y j k SWITCH 07 0000 0000 The setting which is in the display is the current setting normally seen in a machine just delivered from ...

Page 67: ...lt in speaker you can pick up the handset This keeps both hands free for referring to telephone numbers while you are dialing You can use this feature to talk before sending a fax or to just make a telephone call 1 Press the On Hook Dial key ON HOOK MODE llllllllllllllllll 2 Dial ON HOOK MODE 3841037227lllllllll NOTE Do not press the Start key If you wish to cancel the call press the On Hook Dial ...

Page 68: ...one rings continuously 1 Pick up the handset and speak to the other party If you hear a high pitched tone a fax is coming in Press the Start key then hang up 2 If the caller wants to send you a fax press the Start key after speaking Then hang up If nothing happens after you press the Start key the power may be switched off or the telephone may not be connected correctly To Talk Before Sending a Fa...

Page 69: ...ument will be printed first You can also program a destination for each Auto Document into the same Quick Dial Key Before instaling make sure that the ECM is switched on Function 62 Storing an Auto Document 1 Make sure that the machine is in standby mode READY 100 10 00AM SET DOC OR DIAL NO If you select Memory Transmission READY on the display is replaced by MEM TX 2 Take the document that you wa...

Page 70: ...am a Quick Dial number and the Auto Document in the same Quick Dial key If you program the key as a Quick Dial before pro gramming the Auto document the display below will appear in Step 4 If you press the Yes key Whenever you press the Quick Dial key the Auto Document will be attached to that transmission n 08 PROGRAM Y j k USED AS DIAL Using a Program 1 Make sure that the machine is in standby m...

Page 71: ... press the Yes key n l QUICK j k PRINT LIST j SEARCH k 2 Press the Quick Dial key that holds the program that you wish to erase Exam ple Press Quick Dial key 04 n 04 CHANGE Y j k USED AS AUTO DOC 3 Press the Yes key n 04 Y N PROGRAM LABEL 4 Press the No key n 04 Y N AUTO DOC CLEAR 5 To delete the program Press the Yes key n l QUICK j k PRINT LIST j SEARCH k 6 Either Erase another program Go to ste...

Page 72: ...et up for dialing in Tone Dial DTMF mode Operating the Tone Key 1 Make sure that the machine is in standby mode and that there is no document in the feeder 2 Pick up the telephone handset or press the On Hook Dial key 3 Dial the remote facility Do not press the Start key 4 After your line is connected to the remote facility do the following If your telephone Line type is DTMF Tone Dial Go to step ...

Page 73: ...ission in which case damaged data cannot be resent at all ECM is more efficient because it only resends the damaged parts of the data the maximum possible number of retransmission attempts is much higher and it also works with Immediate Transmission You can switch ECM on by following the procedure below 1 Press the Function key and 6 2 2 2 2 6 2 using the ten keypad Then press the Yes key Y NEXT k...

Page 74: ... or CSI is displayed Your machine compares the number that you dialed with the CSI received from the other end If the CSI is not the same as the telephone number the transmission is stopped This feature has to be switched on by a service technician NOTE If you cannot send a message to a certain location while using this fea ture contact the other end and make sure that they have stored their CSI c...

Page 75: ... ten keypad then press the Yes key SETTING Y j PRINT LIST j At this time you can print a User Parameter List if you press the Start key 2 Press the Yes key then press the j key until the settings for switch 6 are shown The setting that you need to change is that for digit 2 KPAD Y j k SWITCH 06 0000 0000 3 If you wish to change the setting press 2 using the ten keypad KPAD Y j k SWITCH 06 0000 010...

Page 76: ...ced by a different manufacturer Cross references ID Transmission see page 64 Rejection of Messages from Unidentified Senders You can make the machine reject incoming messages that require storing in to your machine s memory if they are not accompanied with an identifier such as the RTI or CSI Features that would be affected are Substitute Reception and Forwarding The procedure is as follows see pa...

Page 77: ...I of each sender ask the sending party what their RTI CSI is Or make a communication with that terminal print a TCR and read off the RTI CSI If the other party is using a machine made by another maker they may not be familiar with the terms RTI or CSI Explain that you are interested in the telephone number that they stored in the machine for identification purposes Function 71 Switch Authorized Re...

Page 78: ... Before you use Authorized Reception you have to switch it on using Function 62 If it is switched off the machine will accept any incoming fax message 1 Press the Function key and 6 2 2 2 2 6 2 using the ten keypad Then press the Yes key Y NEXT k SELECT LINE 2 Press the k key until AUTHORIZED ON OFF is displayed Y NEXT k AUTHORIZED ON OFF 3 Press the Yes key AUTHORIZED Y j k ON kOFF 4 Use the j an...

Page 79: ...he display is not as opposite press the Yes key again RTI CSI Y N STORE AS WILD CARD 5 Either RTI CSI ABC j k llllllllllllllllll Store this RTI as a Wild card Press the Yes key Otherwise Press the No key 6 Either Store another RTI CSI Go to step 2 Finish Press the Function key Editing the Authorized Senders 1 Press the Function key and 6 2 2 2 2 7 1 using the ten keypad then press the Yes key SETT...

Page 80: ... the display is not as opposite press the Yes key again RTI CSI Y N STORE AS WILD CARD 7 Either RTI CSI ABC j k llllllllllllllllll Store this RTI as a Wild card Press the Yes key Otherwise Press the No key 8 Either Edit another RTI CSI Go to step 2 Finish Press the Function key NOTE If you switch Authorized Reception on without programming any authorized senders all incoming messages will be rejec...

Page 81: ...umber Function 72 Switch Forwarding on Decide whether you want your machine to automatically print messages that it forwards This feature is called Local Printing Function 63 Select how to treat the Specified Senders Function 63 Either forward All messages except those from Specified Senders Only messages from Specified Senders In this machine you can specify up to 5 forwarding stations The number...

Page 82: ...ey SETTING Y j k PRINT LISTj SEARCHk To print a list press the j key then press the Start key 2 Press the Yes key FORWARD KPAD j k llllllllllllllllll 3 Input the telephone number of the for warding station using the ten keypad FORWARD KPAD j k 4710319266lllllllll The Forwarding Station is the number that you wish to direct incoming messages to If your machine is behind a PBX add the access code be...

Page 83: ...llllllllll 3 Press the j and the k keys until the RTI CSI that you wish to edit appears FORWARD CHANGE Y j k 3479037227 4 Press the Yes key then edit this for warding station number and enter the correct number using the ten keypad FORWARD KPAD Y N 3104719266 5 Press the Yes key FORWARD Y N SET RTI CSI 6 Press the Yes key RTI CSI ABC j k llllllllllllllllll 7 Either RTI CSI ABC Y N SAN JOSE BRANCH ...

Page 84: ... FORWARDING Y j k ON kOFF 4 Use the j and the k keys to switch this feature on or off FORWARDING Y j k kON OFF 5 Press the Yes key to store your setting then press the Function key FOWARD 100 9 02 AM SET DOC OR DIAL NO Selecting Which Message to Forward 1 Press the Function key and 6 2 2 2 2 6 3 using the ten keypad then press the Yes key SETTING Y j k PRINT LIST j 2 Press the Yes key then press t...

Page 85: ...rding mark is printed at the receiving end on the top of each page of the fax messages that are forwarded from your machine This mark will help the operator at the other end to recognize messages that have been forwarded If you wish you can switch this mark off To switch the Forwarding Mark on or off do the following procedure See page 100 if you need more information about the User Parameter sett...

Page 86: ...l and acts accordingly When you program RTI s for these features you can program wild cards to greatly expand the number of terminals that you can specify Example If you store MAN as a wild card and a terminal with an RTI that includes MANCHESTER HUMAN or HUMANE calls you your machine will recognize MAN as a wild card and accept and or forward the message CAUTION This feature cannot recognize spac...

Page 87: ... code can be any four digit code using digits 0 to 9 and letters A to F except 0000 and FFFF This ID Code is also used ID for Transmission see page 64 Before programming the ID Code agree with other users in your fax network on an ID Code 1 Press the Function key and 6 2 2 2 2 6 1 using ten keypad then press the Yes key Y NEXTk SET POLLING ID 2 If the above display has not appeared press the k key...

Page 88: ...can use the other terminal s ID Code just for this transmission ask the other terminal s operator what their ID Code is Your machine s stored ID Code will be ignored For extra security both parties can specify an ID Code just for this communication The ID Codes of both machines will be ignored All communicating parties need to coordinate their ID Codes in this case Free Polling 1 Follow both steps...

Page 89: ...ET OPTION KPAD ID llll 3 Enter the ID code that you wish to use for this message Example 0824 Press 0 8 2 4 using the ten keypad SET OPTION Y N ID 0824 4 Press the Yes key POLLING TRANS OPT k PUSH START 5 Press the Start key Your fax message is held on polling standby Printing the Contents of Stored Polling Messages Type I Only 1 Press the Function key and 5 2 using ten keypad then press the Yes k...

Page 90: ...ither Erase the file Press the Yes key Keep the file Press the No key 4 Either Erase another file Press the Yes key and go to step 2 Finish Press the Function key Type II Models When you want to use the machine when the document has been set in the document feeder Take out the document from the document feeder The transmission is automatically canceled Options for Polling Transmission When you set...

Page 91: ...terminals that you can poll in one operation is 10 for Type I Models and 1 for Type II Models Cross references Groups see page 31 Procedure 1 Press the Function key and 1 1 using the ten keypad then press the Yes key POLLING RECV OPTIONk DIAL FAX NUMBER 2 Dial the number s and press the Yes key POLLING RECV Y START 3104719266 3 Press the Start key Stored ID Override Option This procedure overrides...

Page 92: ... Start key Canceling Polling Reception 1 Press the Function key and 2 2 using the ten keypad Then press the Yes key FILE NO lll KPAD j k PRINT LIST j SEARCH k 2 Either FILE NO 011 KPAD j k n HEAD OFFICE If you do not know the file number Scroll through the file numbers with the j and k keys until the required file appears If you know the file number Input it directly 3 Press the Yes key twice 4 Fi...

Page 93: ...r time cannot be more than 24 hours in the feature Saving Paper This will help you to reduce paper costs When the machine prints a received message and copies some documents it reduces the horizontal ratio to half length 1 Press the Function key and 6 2 2 2 2 6 2 using the ten keypad Then press the Yes key Y NEXT k SELECT LINE 2 Press the k key until SAVE PAPER ON OFF is displayed Y NEXT k SAVE PA...

Page 94: ...f 24 hours after it has been switched on Switching RDS On Off Use this function when the service technician has changed the factory setting If you wish to switch RDS back on you must switch it on yourself using the following procedure 1 Press the Function key and 6 2 2 2 2 6 2 using the ten keypad Then press the Yes key Y NEXT k SELECT LINE 2 Press the j key until RDS ON OFF is displayed Y NEXT k ...

Page 95: ...mum communication parameters for calling that number The next time you dial that number the machine will remember these parameters and the preliminary handshaking will be significantly reduced saving communication costs Copying If you need to make a copy of something and there is no copier available use your fax machine Copying an original is a good way to test contrast and resolution before sendi...

Page 96: ...eport is printed after each unsuccessful communication compare with the Communication Failure below which is printed after an operation has been completed So while doing a broadcast the machine may print a number of error reports and at the end it prints a Communication Failure Report or Transmission Result Report if it is switched on Check the report and retransmit any pages that were not sent Ke...

Page 97: ...Press the Function key and 6 2 2 2 2 6 3 using the ten keypad then press the Yes key SETTING Y j PRINT LIST j 2 Press the Yes key The settings for Switch 00 are now displayed KPAD Y j k SWITCH 00 0000 0000 3 Press the j and k keys until the settings for Switch 03 are displayed Each digit from 0 to 7 except digit 1 controls a re port KPAD Y j k SWITCH 03 0000 0000 Switch 03 Digit Purpose 0 Communic...

Page 98: ...this feature on or off is as follows see page 103 if you need more information about the User Parameter settings adjustment procedure 1 Press the Function key and 6 2 2 2 2 6 3 using the ten keypad then press the Yes key SETTING Y j PRINT LIST j 2 Press the Yes key The settings for switch 00 are now displayed KPAD Y j k SWITCH 00 0000 0000 3 Press the j key until the settings for Switch 04 are dis...

Page 99: ...SS MODE TIME PAGE RESULT FILE APR 28 9 51AM DR J ALVAREZ RS 0 24 P 1 OK 006 9 58AM 2015551234 RES 0 27 P 1 OK 008 10 56AM XYZ PARIS RES 0 28 P 1 OK 011 11 01AM M JONES RES 0 24 P 1 OK 012 In the Result column some reports may have an E followed by a code and there may be a message printed at the bottom of the report This code and there may be a message printed at the bottom a problem occurred The ...

Page 100: ...ing the ten keypad then press the Yes key START PRINT FILE LIST 2 To print Press the Start key Telephone Number List This is a list of the telephone numbers and other items you have stored in the machine s Quick Dial Keys Speed Dial Codes and Groups Type II is only available for Quick Dial and Speed Dial list 1 Press the Function key and 4 3 using the ten keypad then press the Yes key ALL LISTS ST...

Page 101: ...names that you have specified for Forwarding 1 Press the Function key and 6 2 2 2 2 7 2 using the ten keypad then press the Yes key SETTING Y j PRINT LIST j SEARCH k 2 Press the j key START SPECIAL NUMBERS LIST 3 To print a list Press the Start key User Parameter List This shows the current settings of the User Parameters 1 Press the Function key and 6 2 2 2 2 6 3 using the ten keypad then press t...

Page 102: ...eck the Check display indicator If it is blinking correct the fault 2 Check the copy quality 2 1 Place the document in the feeder 2 2 Type I Models Press the Start key Type II Models Press the Copy key 3 Disconnect the power cord 4 Clean the scanner and rollers 4 1 Open the operation panel 4 2 Pull up the green levers 4 3 The Scanner glass A shaded area which is under the white rollers B Clean the...

Page 103: ...d down to the bottom 5 Clean the Thermal head 5 1 Lift the catch to unlock the printer cover Then hold the paper guides and open the cover 5 2 Gently wipe the thermal head E with the soft and damp cloth CAUTION The black stripe above the head may be wiped but do not rub it 5 3 Reset the paper roll 5 4 Close the printer cover until it audi bly locks into place 6 Clean the machine s exterior with a ...

Page 104: ...r guides 3 Pull out the leading edge until you can see it and feed the paper between the roller and the cover until it appears out side the back of the machine NOTE Make sure that there is no slack paper inside the machine and the transparent strip that prevents paper curling is above the copy tray 4 Close the printer paper cover until it audi bly locks into place 5 The machine will tear off the e...

Page 105: ...panel up and away from the machine 2 Take out the jammed document NOTE When you pull out the paper in direction A slant the operation panel a little If the document will not come out push forward the two green levers After you have removed the document replace the levers 3 Close the cover until it audibly locks into place NOTE If you hear an unusual noise when you are closing the operation panel c...

Page 106: ...de the machine and cut off any damaged parts of the roll Do not leave any pieces inside the machine 4 If the carriage is not in the home posi tion replace it to the left side 5 Install the paper roll Hold the roll so that it rolls away from you when pulled upwards 6 Pull out the leading edge until you can see it and feed the paper between the roller and the cover until it appears out side the back...

Page 107: ...annot dial out from behind a PBX The number must contain the access code A pause may also be necessary after the access code if there is one already try adding more pauses The telephone keeps ringing and no fax is printed You are in Manual TEL receive mode Switch to Auto or Fax mode The power cord is unplugged You cannot receive phone calls the unit only rings then goes into fax receiving mode You...

Page 108: ... Start key UNABLE USE PRINTER MEMORY OVER There is not enough memory to store your fax message Use a lower resolution or send the message in several transmissions ERROR PRESS STOP KEY There was an error during transmission or reception Press the Stop key to return to standby mode Check the Error Report CAN NOT PROGRAM The limit of the number of group stations has been exceeded ALEADY INPUT This nu...

Page 109: ...y machine at the other end Poor line condition 0 05 Poor line condition 0 06 Incompatible or faulty terminal at the other end Poor line condition 0 07 The facsimile machine that you were sending to was disconnected during the call either due to noisy phone lines a paper jam or because it ran out of paper Resend the page 0 08 The machine at the other end received the page that you sent but there we...

Page 110: ...ID codes with the other party 5 20 5 21 Insufficient memory to receive the message When the pages in memory have been printed ask the other party to resend 5 25 Fault in your machine 6 01 6 02 Poor line condition or a problem with your machine 6 05 Poor line condition a problem with the machine at the other end or a problem with your machine 6 06 A problem with the machine at the other end or a pr...

Page 111: ...cursor to the character that you wish to delete then press the Clear key To insert a character Move the cursor to the insert position then input the new character The new character is inserted at the cursor position If you press the j and k keys after pressing the Quick Dial you may search through the alphabet 1 If you want to store a letter press the Quick Dial key for the letter Example if you w...

Page 112: ...low However each of the adjustments that can be made using this procedure are explained in the relevant parts of the manual As well as a series of on off switches Function 62 allows access to many features see the features table on the next page 1 Press the Function key and 6 2 2 2 2 6 2 at the ten keypad then press Yes key Y NEXTk SELECT LINE 2 Scroll through the list of features with the k key u...

Page 113: ... or more digit The value of the digit determines the status of the feature The overall procedure is explained below However each of the adjustments that can be made using this procedure are explained in the relevant parts of the manual 1 Press the Function key and 6 2 2 2 2 6 3 using the ten keypad then press the Yes key SETTING Y j PRINT LIST j At this time you can print a User parameter list Pre...

Page 114: ... 5 Digit 4 Setting 0 0 Standard 0 1 Detail 1 0 Fine 1 1 Do not use 6 Transmission mode 0 Memory Transmission Position 1 Immediate Transmission 7 Halftone mode 0 Off 1 ON Digit 01 Home position settings Digit Purpose 0 to 6 Do not change these settings 7 If you change any of the resolution transmission mode or Halftone settings before before making a transmission then 0 The setting s will not retur...

Page 115: ... of reports Digit Purpose 0 to 6 Do not change these settings 7 Inclusion of part of the image on the following reports Transmission result report Communication failure report Type I Only 0 Off 1 On Switch 05 Options for reception Digit Purpose 0 Substitute reception Type I Only 0 Off 1 On 1 Memory reception if no RTI or CSI received 0 Enable 1 Disable 2 to 7 Do not change these settings Switch 06...

Page 116: ...rded messages only from senders whose RTI CSI s are programmed 1 1 Forwarded messages only from senders whose RTI CSI s are not programmed Switch 09 Do not use Switch 10 Halftone type Digit Purpose 0 to 6 Do not change these settings 7 Halftone type 0 STD 1 SPD Switch 11 Polling Digit Purpose 0 to 5 Do not use these settings 6 Local printing Type I Only 0 Off 1 On 7 Do not use these settings Switc...

Page 117: ...ying out a task you may be able to operate the machine For instance if your machine is currently receiving a long fax message but you want to send a message and go back to your desk without having to wait by the machine you can place your message in the feeder select the required transmission features dial the number and press the Start key Your message will be scanned and stored to memory while t...

Page 118: ...ength and Width See the above diagram If the page is too short put it inside a document carrier or enlarge it with a copier If the paper is too long divide it into two or more sheets Clearly Written Small faint characters may not be transmitted clearly Uniform Page Sizes Do not use different sizes of document in the same transmission Dry Ink All ink must be dry before you place the document in the...

Page 119: ...e following materials and photographs should not be placed in the document feeder Make copies of these originals and scan the copies NOTE Copies made with a copier that uses silicone oil may cause a misfeed To avoid this do not scan such copies until five or ten minutes after copying DOCUMENT TYPE 108 ...

Page 120: ...pe I 1 Model Type II 2 Programming Feature Item Quick Dial keys Number of Quick Dial keys 10 1 to 10 Maximum length of a name 20 characters Maximum length of telephone or fax numbers 240 digits Speed Dial keys Number of Speed Dial Type I 50 00 to 49 Type II 20 00 to 19 Maximum length of a name 20 characters Maximum length of telephone or fax numbers 240 digits Groups Type I Only Number of Group St...

Page 121: ...erage Maximum power consumption 56W 8W Acceptable Document Width 148 257 mm Dimensions Length 105 357 mm Thickness 0 05 0 15mm ADF Capacity 10 pages Memory Capacity 156 KB ECM on 216 KB ECM Off Type I Only Measured usinng ITU T 1 chart Slerexe letter at standard resolution Resolution Standard 8 x 3 85 dots per mm Detail 8 x 7 7 dots per mm Fine 8x 15 4 dots per mm Transmission Type I 9 seconds at ...

Page 122: ...0 000 of them and then sends them out at a top speed of 2 400 to 9 600 bps depending on the model Broadcasting In G3 fax communication terminology broadcasting is the transmission of a document to more than one address in sequence not simultaneously ITU T This committee sets international standards for communication Communication Transmission or reception Copy When used as a noun this refers to a ...

Page 123: ...ile Group 3 This is an internationally agreed signaling and data transfer method used for facsimile communication approved by ITU T It is also known as G3 Handset This is the telephone that is connected to the jack marked TEL 1 or TEL2 Home Position Some of your machine s features can be adjusted The home position is the setting to which the machine always returns at the end of an operation Intern...

Page 124: ...ct of receiving a document RTI Remote Terminal Identification Sending Same as Transmission see below Standby Mode The terminal is said to be in standby mode when it is idle Terminal A facsimile terminal such as your machine Tone Dialing This method of dialing uses a tone to represent each dialed digit Transmission The act of sending a document TTI Transmit Terminal Identification TECHNICAL REFEREN...

Page 125: ...GLOSSARY 114 ...

Page 126: ... Dual Access 106 Ducument Jam 94 E ECM 62 Entering Names and Labels 100 Entering telephone number 100 Error Code 98 99 Error Messages 97 Error Report 85 88 Extension Telephone System 23 F Fax Mode 50 File List 89 Forwarding 70 Forwarding Mark 74 Fowarding List 90 Free Polling 77 File Reserve Report 85 86 87 104 G General Precaution 9 Glossary 111 114 Grounding 7 Group Dial 31 34 39 Group Dial List...

Page 127: ... Sender 65 Replacing The Paper 93 Reports you can print out yourself 89 90 Resolution 41 RTI 18 S Scanning Quickly 37 Secured Polling 77 Send Later 44 Sending Quickly 36 Sending To More Than One Location 38 Solving Problems 94 95 97 99 Specifications 110 Speed Dial 29 Speed Dial List 89 Storing an Often used Document 58 Substitute Reception 53 T TCR 85 88 89 Technical Reference 99 101 103 105 107 ...

Page 128: ...89 42 Printing the File List 89 43 Printing the Telephone Number List 89 44 Printing an Auto Document 58 51 Printing the contents of Memory Files 39 52 Printing the contents of Polling Files 78 53 Printing the contents of an Auto Document 60 Functions 60 and above can only be used after a password has been entered 61 System Set Up Polling ID RTI TTI CSI PSTN Access Number Auto Ring Time 19 62 On O...

Page 129: ...eed Dial List 30 41 Printing the TCR 90 42 Printing the Telephone Number List 90 Function 60 and above can only be used after a password has been entered 61 System Set Up Polling ID RTI TTI CSI PSTN Access Number Auto Ring Time 19 62 On Off Switches 102 63 Programming User Parameters Printing a User Parameter List 103 71 Programming Authorized Senders Printing an Authorized Senders List 67 81 Prog...

Page 130: ...s To select an option press the right arrow on the scroll key then press one of the following combinations of keys Send Later Page Count TTI On Off 6 Enter the telephone number in one of the following ways Quick Dial Speed Dial Group Dial Ten Key Pad Handset On Hook Dial Quick Dial Speed Dial Ten Key Pad Handset On Hook Dial 7 Press the YES key Press the START key 8 Either Dial another number go t...

Page 131: ...ook Dial 6 Press the START key 7 The machine dials then your message is fed scanned and sent to the other terminal Clear File From Memory 1 Memory Transmission Type I Only Press the Function key and 2 1 using the ten keypad then press the Yes key Polling Reception Press the Function key and 2 2 using the ten keypad then press the Yes key Polling Transmission Type I Only Press the Function key and ...

Page 132: ...Star guidelines for energy efficiency This product was designed to reduce the environmental impact associated with this fax equipment This is accomplished by means of energy saving features such as Low Power Energy Saver modes and Night Timer Please see applicable sections of operating manual for details ...

Page 133: ...E You must program the paging telephone number first 1 Press the Function key and 6 2 2 2 2 6 1 using ten keypad then press the Yes key Y NEXTk SET PAGING TEL NO 2 If the above display has not appeared press the k key until the screen is as shown above 3 Press the Yes key PAGING TEL KPAD llllllllllllllllll 4 Input the paging telephone number that you wish to use Example 7227050552 press 7 2 2 7 0 ...

Page 134: ...sing ten keypad then press the Yes key Y NEXTk SET PAGING TEL NO 2 Press the k key until the screen is as shown opposite Y NEXTk SET NOTIFY TEL NO 3 Press the Yes key NOTIFY TEL KPAD llllllllllllllllll 4 Input the paging telephone number that you wish to use Example 3122620471 press 3 1 2 2 6 2 0 4 7 1using the ten keypad NOTIFY TEL KPAD Y N 3122620471 5 Press the Yes key 6 Finish Press the Functi...

Page 135: ...s a Remote ID of 0000 when it leaves factory we recommend that you store a new Remote ID immediately 1 Press the Function key and 6 2 2 2 2 6 1 using ten keypad then press the Yes key Y NEXTk SET PAGING TEL NO 2 Press the k key until the screen is as shown opposite Y NEXTk SET REMOTE ID 3 Press the Yes key REMOTE CHANGE Y N 0000 4 Press the Yes key and the No key to clear REMOTE ID KPAD llll 5 Inp...

Page 136: ...k from the new one NOTE If you wish to play back again press 3 0 and If you wish to stop play back press the key twice 6 When you have listened to all messages press the key twice Sometimes during this feature you will hear one or more beeps Sound Reason Required Action One high beep Acknowledgment No problem keep going A short beep three times Rejection Operation error Try again A high beep three...

Page 137: ...SELECT LINE 2 Press the k key until TOLL SAVING ON OFF is displayed Y NEXT k TOLL SAVING ON OFF 3 Press the Yes key TOLL SAVING Y j k ON kOFF 4 Use the j and the k keys to switch this feature on or off TOLL SAVING Y j k kON OFF 5 Press the Yes key to store your setting then press the Function key ...

Page 138: ...d Then press the Yes key Y NEXT k SELECT LINE 2 Press the k key until SELECT AUTO RECEIVE MODE is displayed Y NEXT k SELECT AUTO RECEIVE 3 Press the Yes key PRIORITY Y j k k AUTO TAM 4 Press the j and the k key to switch TAM Mode on PRIORITY Y j k AUTO k TAM 5 Press the Yes key and the Function key 6 Make sure that the Auto Select Indicator is lit If it is not lit press the Reception key until it ...

Page 139: ...one This machine can record messages of up to about 6 minutes in all Keys Listening to the received voice messages 1 Make sure that the machine is in TAM mode 2 Press the No key now you are in TAM standby mode 01 MESSAGE S EXIT i ERASE C k 3 Either The number is displayed on the first line you received messages Go to step 4 00 message s is not displayed you have not received any mes sage Go to ste...

Page 140: ...e Yes key Otherwise Press the No key 5 Press the Function key Cancelling the TAM M ode 1 Press the Function key and 6 2 2 2 2 6 2 using the ten keypad Then press the Yes key Y NEXT k SELECT LINE 2 Press the k key until SELECT AUTO RECEIVE MODE is displayed Y NEXT k SELECT AUTO RECEIVE 3 Press the Yes key PRIORITY Y j k AUTO k TAM 4 Press the j and the k keys to switch TAM Mode off PRIORITY Y j k k...

Page 141: ...if power is switched off If you wish to avoid this please put two batteries into the machine NOTE Do not turn on the machine 1 Open the battery cover on the bottom of the machine 2 Put in the batteries making sure the ter minals are the right way up See the dia gram 3 Replace the battery cover ...

Page 142: ...ed upward NOTE Make sure the ends of the rod fit into the paper guides P15 Cut off excess paper after plugging in the power cord Disregard step 2 7 and insert the following after step 3 3 3 4 Press the start key to cut off the excess paper P85 86 87 and 104 Replace Memory Storage Report and Polling Reserve Report with File Reserve Report This report is printed after storage for memory transmission...

Page 143: ...o communications However there is no guarantee that interference will not occur in a particular installation If this equipment does cause harmful interference to radio or television reception which can be determined by turning the equipment off and on the user is encouraged to try to correct the interference by one or more of the following measures Reorient or relocate the receiving antenna Increa...

Page 144: ...blems occur the user is not to contact Telecom Faults Service Immediately disconnect the equipment should it ever suffer physical damage which results in their internal parts becoming accessible in normal use Arrange for its disposal or have it repaired before it is reconnected Should it necessary to move the equipment it is necessary to disconnect the Telecom network connection before disconnecti...

Page 145: ...t apply in countries in which the 2 wire non grounded type plug is used 10 Do not allow anything to rest on the power cord Do not locate this product where persons will walk on the cord 11 If an extension cord is used with this product Make sure that the total of ampere ratings of the products plugged into the extension cord do not exceed the extension cord ampere rating Also make sure that the to...

Page 146: ... release the printer cover you need to squeeze the catch backwards see opposite The cover will spring out a little Then grasp the paper guides and raise the cower up NOTE The catch must be squeezed backwards If you apply too much pressure in the opposite direction the catch will become detached from the machine If this happens follow the instruc tions below Reattaching the printer cover catch If y...

Page 147: ...To release the printer cover you need to squeeze the catch Backwords see opposite the cover will spring out slightly allowing you to raise it up NOTE The catch must be squeezed backwards If you apply too much pressure in the opposite direction the catch will become detached from the machine If this happens follow the instruc tions below Reattaching the printer Cover Catch If your printer cover cat...

Reviews: