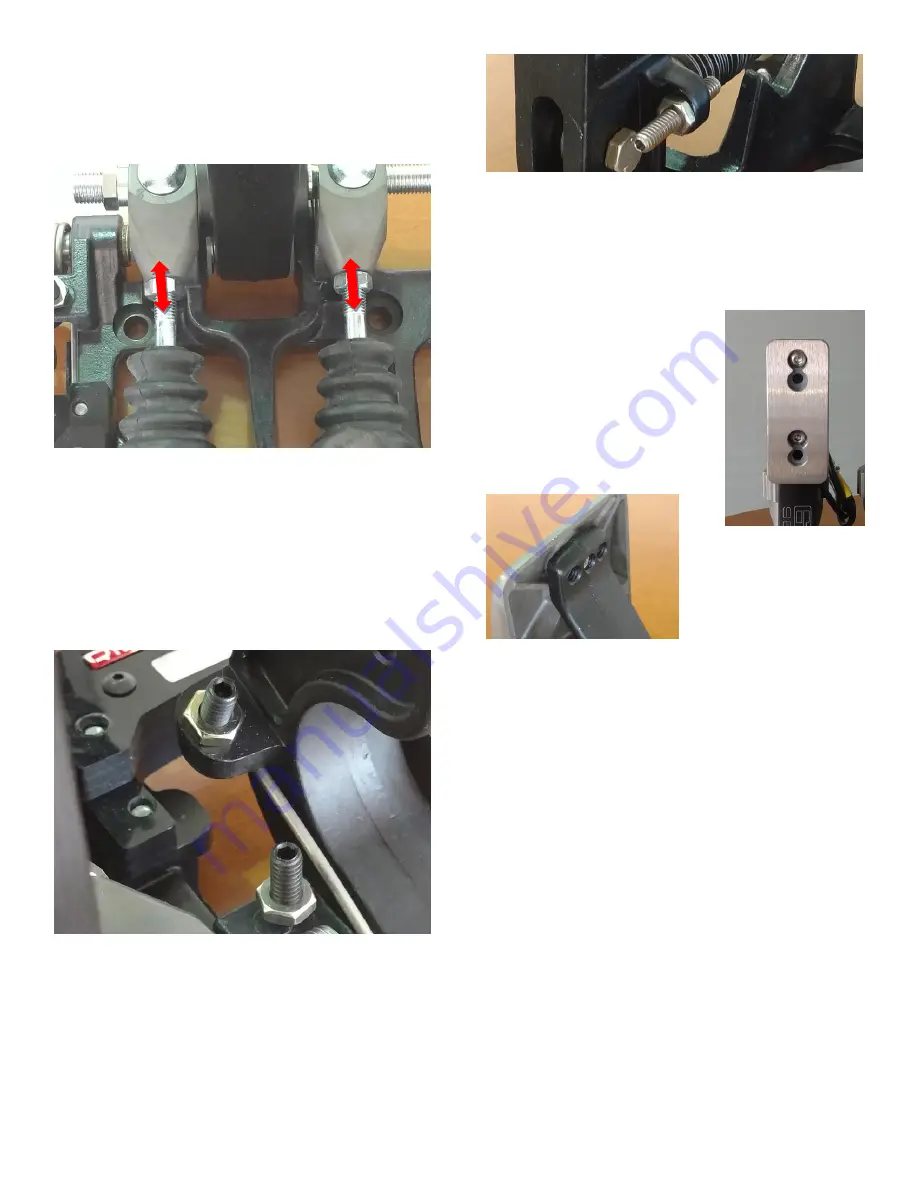
The initial position of the brake pedal can be adjusted by
threading the master cylinder rod into or out of the clevises.
First loosen the jam nut and then rotate the master cylinder
shaft. After you have reached the desired position tighten the
jam nut to prevent it from moving.
The starting and ending positions of the throttle pedal can be
adjusted by turning the stop screws located to the left of the
throttle pedal. Turning clockwise will reduce the travel and
counter-clockwise will increase the travel. Tighten the lock
nuts when complete to prevent the settings from changing.
Over-extending the pedal range is not recommended as it
places additional strain on the spring which may cause them
to break. The spring is a consumable item and replacements
can be purchased as needed.
Similarly, the clutch pedal ending position can be adjusted by
turning the stop screw located to the right of the pedal.
Turning the screw clockwise will reduce the travel, while
turning the screw counter-clockwise will increase the travel.
Tighten the jam nut when the adjustments are complete to
prevent the setting from changing.
When any adjustments are made to the travel of the throttle
or clutch pedal, those pedals should be recalibrated by
setting the new Absolute Min and Absolute Max in the
SmartPanel software.
The pedal faces can be installed in one of 4 different positions
vertically and 3 different positions
horizontally. The height can be
adjusted to two different positions
by moving the pedal face to the
other screw hole and can be set to 2
additional positions by flipping the
pedal face upside-down. The holes
are drilled off-center to allow four
different positions.
Three different horizontal
positions can be attained by
moving the pedal to one of
the other three mounting
holes on the pedal arm.
Step 3: Making the Connections
Plug the pedals into the PCU as follows:
Port A = Throttle
Port B = Brake
Port C = Clutch
Port D = Hand Brake (Optional)
Port E = (Spare for warranty purposes)
Windows will install its internal drivers. The pedals are
powered from the USB port, no external power is required.
Step 4: Test Your Pedals to be Sure Windows has Installed
Drivers Correctly
Windows XP, Vista, 7 and 10: click Start, type:
joy.cpl
and
ENTER
On Windows 8 and 8.1 go to the Start screen, type:
joy.cpl
and ENTER
The Game Controllers panel will open and there should be a
controller named GTpro Gen2, double click on it. A window
with several axis and buttons should appear. Press each pedal
in sequence and verify the X, Y and Z axis respond. If they do
then Windows has properly installed the drivers and the data


