background image

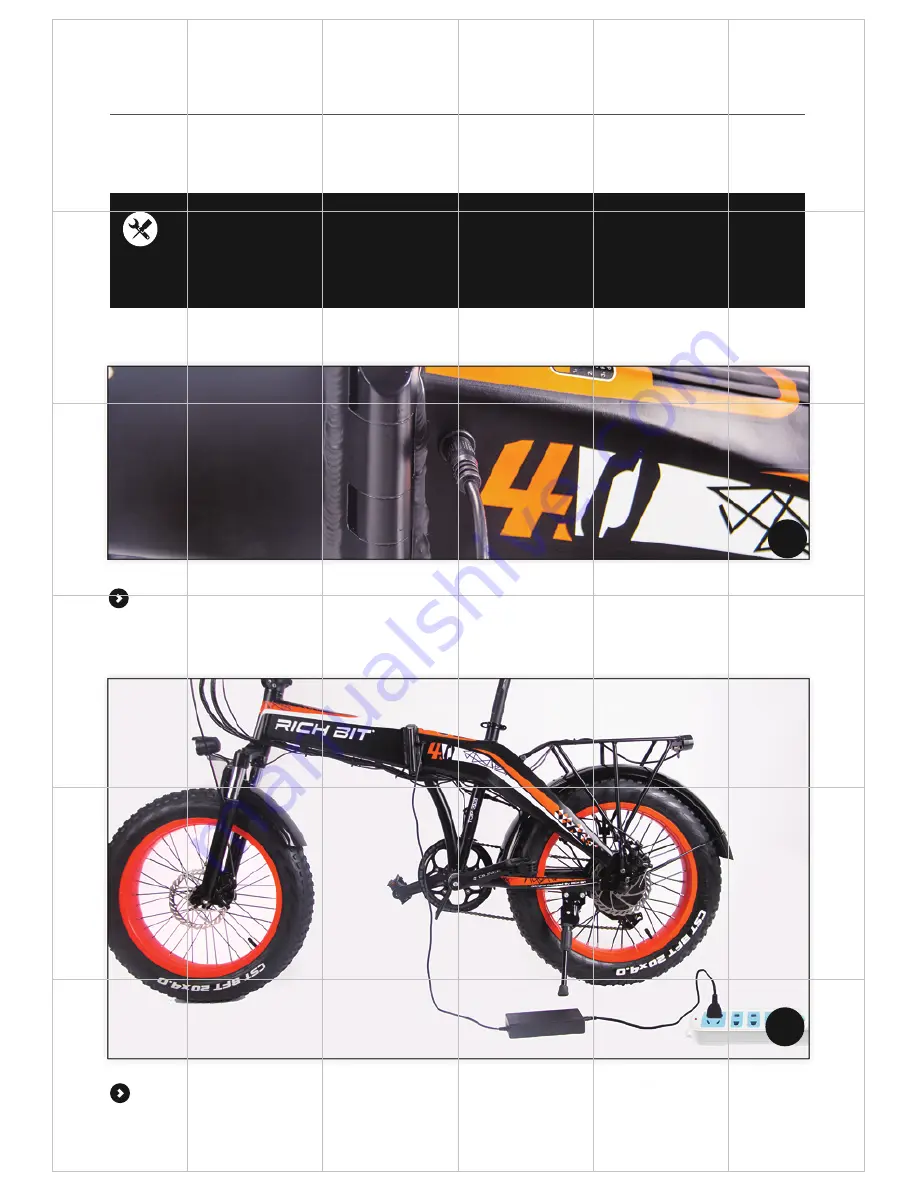
Open the jack protector and insert the jack directly into the hole.

When plug in the power, red indicator shows the start of charging. Green light indicates that charging 
is completed.

02

03

Plug-in battery disassembly and charge mode 
(direct charge).

09

Electric Bicycle User Manual

Summary of Contents for TOP-016

Page 1: ...Shenzhen Xinhuanan Bicycle Industry Co Ltd Electric Bicycle User Manual Before The First Cycling Please Read This Manual For Security MODEL TOP 016 ...

Page 2: ...stallation 08 Saddle Installation 09 Plug in Battery Disassembly and Charge Mode direct charge 11 Control operation instructions 12 Maintenance 13 After Sale Service 14 Quality Guarantee 10 Plug in Battery Disassembly and Charge Mode seating charge 02 Warning 03 Safety Precautions 01 Electric Bicycle User Manual ...

Page 3: ...r brake If works well sound good or not 8 Spokes no crack and no loose spokes 9 Front and rear hub check if fixed on the wheels 10 Rear Carrier check if tightened well 11 Battery If correctly installed and fixed 12 Pedal crank No rattling 13 Chain Do not idle whether pebbles are not jammed tooth skipping play is appropriate 14 Wheels rattling spokes hub rattling bending no deformation or tire pres...

Page 4: ...le or handle 6 Use front and rear brakes and do not put your feet on the pedals when stop 7 Do not ride the ebike in night especially in night check the battery condition before your ride in night 8 Do not ride when you are not feeling well such as drunk or taking medication 9 Do not wear slippery shoes such as sandals or high heeled shoes 10 Do not use mobile phone when riding or stopping 11 Wear...

Page 5: ... indicator light Brake lever material alloy aluminum It does not include asbestos Front light Alloy Aluminum rim Tire Hub Disc Brake Crank Pedal Brake Caliper Not including asbestos Right indicator light Electric Bicycle Parts Introduction 04 Electric Bicycle User Manual ...

Page 6: ...Fold the folding handle to the buckle and lock the buckle 3 Remove quick release of the tube cover and open the cover Place the handlebars in the slots align them with the middle close the cover and fasten the handlebars 03 02 01 06 05 04 05 Electric Bicycle User Manual ...

Page 7: ...nching quitting fast speed leisurely fitting fitting before wheelchair finished inexpensive hard rocking jumping one piece swinging dynamic phenomenon For your safety please check regularly to see if the quick release is loosen install the wrench in the proper direction at 10 o clock on the quick release wrench Tyre Installation 06 Electric Bicycle User Manual ...

Page 8: ...Saddle Installation Open the clamp and place the seat post Adjust the mat to a suitable height and snap the seat post clamp until it does not shake 01 02 07 Electric Bicycle User Manual ...

Page 9: ...easily Before installation you should observe positions of the pedal the bottom shows the general position L corresponds to the left as Figure 3 and R corresponds to the right 1 For pedal installation please rotate and tighten with a tool Both sides of the pedal are in the front direction 01 02 03 04 L R Pedal Installation 08 Electric Bicycle User Manual ...

Page 10: ...e jack directly into the hole When plug in the power red indicator shows the start of charging Green light indicates that charging is completed 02 03 Plug in battery disassembly and charge mode direct charge 09 Electric Bicycle User Manual ...

Page 11: ...ycle User Manual 02 01 03 05 04 Under the ebike frame there is one hole you need use the another key to open it and loose the pack to fold the ebike frame Pull the battery out and fold the ebike Pull the battery outside at the right side of the battery one hole for the charge ...

Page 12: ... display 4 Rear shifter 5 PAS 1 Mileage 3 Speed 2 Trip 4 PAS level down 3 1 Turn on off light PAS level up 2 Power ON OFF 5 Turn on off LCD 4 Turning light 6 Klaxon on off 7 Battery 5 Control operation instructions 11 Electric Bicycle User Manual ...

Page 13: ...Note Inspect it seriously before shipping when aligning align it to the tapped hole and tighten the screw If you do not align the tapped hole and tighten the screw the tapped hole may become bad 3 It will not work properly for the battery or LCD display Note The battery and LCD display are waterproof but be careful when there is a lot of water or heavy rain 12 Electric Bicycle User Manual ...

Page 14: ...find rust or worn replace it in time If it cannot be used you should check the brake rubber 3 Shaft Please lubricate properly to make the front wheel gear crank and rear wheel move smoothly 4 Wire When enter dust and moisture it may rust on the brake and derailleur wire You could take out of the pipe and lubricate the wire once in 2 years 5 Tires 1 Don t be too full 2 The tires will slide and move...

Page 15: ...cratches apply paint Adjustment of shifter Although the shifter was installed which was manufactured from RICHBIT was out of strong motion during the transportation If any problem with adjusted shifter please consult with the person in charge Summer is a season that makes it easy to puncture tires Please be careful It is necessary to check the tires before putting the air in the tire 1 Please push...

Page 16: ...15 Electric Bicycle User Manual ...

Page 17: ...16 Electric Bicycle User Manual ...

Page 18: ...Tel 0755 81736468 Fax 0755 81736451 Email info richbitebike com Shenzhen Xinhuanan Bicycle Industry Co Ltd Address 1 336 xiangshang Rd 3th Luotian Industry Zone Songgang Town Bao an Dist Shenzhen China ...

Reviews: