background image

Contents

1.0 

Introduction.................................................................................................................................. 1

2.0 

Assembly Instructions ................................................................................................................. 2

3.0 

Scale Setup.................................................................................................................................. 4

4.0 

Scale Operation ........................................................................................................................... 6

5.0 

Calibration ................................................................................................................................... 7

5.1  Numeric Data Entry  . . . . . . . . . . . . . . . . . . . . . . . . . . . . . . . . . . . . . . . . . . . . . . . . . . . . . . . . . . . . . .  7

6.0 

Troubleshooting & Testing........................................................................................................... 8

6.1  Test Mode . . . . . . . . . . . . . . . . . . . . . . . . . . . . . . . . . . . . . . . . . . . . . . . . . . . . . . . . . . . . . . . . . . . . .  9

7.0 

Maintenance .............................................................................................................................. 10

7.1  Basic Maintenance . . . . . . . . . . . . . . . . . . . . . . . . . . . . . . . . . . . . . . . . . . . . . . . . . . . . . . . . . . . . . .  10
7.2  Cleaning . . . . . . . . . . . . . . . . . . . . . . . . . . . . . . . . . . . . . . . . . . . . . . . . . . . . . . . . . . . . . . . . . . . . . .  10

8.0 

Specifications ............................................................................................................................ 11

For More Information ............................................................................................................................. 12
Neonatal Scale Limited Warranty ......................................................................................................... 13

Technical training seminars are available through Rice Lake Weighing Systems. 

Course descriptions and dates can be viewed at 

www.ricelake.com

 or obtained 

by calling 715-234-9171 and asking for the training department

© 2010 Rice Lake Weighing Systems. All rights reserved. Specifications subject to change without notice. 

November 2010

Summary of Contents for 610-10-2 Series

Page 1: ...118767 Rice Lake Neonatal Scale 610 10 2 Series Technical Operating Instructions To be the best by every measure ...

Page 2: ......

Page 3: ...0 7 2 Cleaning 10 8 0 Specifications 11 For More Information 12 Neonatal Scale Limited Warranty 13 Technical training seminars are available through Rice Lake Weighing Systems Course descriptions and dates can be viewed at www ricelake com or obtained by calling 715 234 9171 and asking for the training department 2010 Rice Lake Weighing Systems All rights reserved Specifications subject to change ...

Page 4: ...ii Neonatal Technical and Operating Instructions Rice Lake continually offers web based video training on a growing selection of product related topics at no cost Visit www ricelake com webinars ...

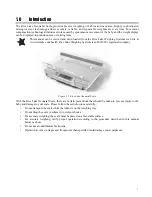
Page 5: ...eighing Systems is an ISO 9001 registered company Figure 1 1 Rice Lake Neonatal Scale With the Rice Lake Neonatal Scale there are certain precautions that should be taken to prevent injury to the baby and damage to your scale Please follow these instructions carefully Do not transport the scale while the infant is on the weighing tray Do not drop the scale or subject it to violent shocks For accur...

Page 6: ...king material carefully to prevent scratching the unit s parts Figure 2 1 Neonatal Assembled Parts 1 Place the base assembly on a sturdy flat surface 2 Attach the weighing tray to the base assembly 3 Plug in the power supply Power Supply The Rice Lake Neonatal Scale has a 120VAC or 230VAC adaptor to use when power is not readily available The AC power adaptor plugs into the back of the indicator a...

Page 7: ...ge battery or connect the scale to an AC power source as soon as possible for accurate weighing Battery Charging When the scale is on the BAT display indicates that the scale battery requires recharging The scale should be connected to an AC power source Figure 2 3 Low Battery Display Location When the AC adaptor is connected to a power source the rechargeable battery goes into recharge mode NOTE ...

Page 8: ...on this display indicates that the scale battery requires recharging The scale should be connected to an AC power source 6 ZERO indicator When the scale is on this display indicates that the scale is stable and ready for use 7 6 Digit LCD Digital display The LCD displays the infant weight in pounds ounces or kilograms and shown by the LB or KG indicator on the right side of the display When the RE...

Page 9: ...recompute the weight of the item on the scale 7 Remove the weight from the scale The digital display will continue to show the weight of the item that was on the scale 8 Press the ZERO key and the display will return back to zero 9 Disconnect the scale from the AC power source The scale will automatically switch over to battery power and if a rechargeable battery is in use the Charge indicator wil...

Page 10: ...are not touching the surface on which the scale is positioned 4 Press the ZERO key to cancel the weight of the pad or other accessory that is on the weighing tray 5 Place the infant on the scale The display will blink until the weight of the infant is determined 6 Press the REWEIGH key to weigh the infant again used to achieve a more accurate result 7 Remove the infant from the scale The digital d...

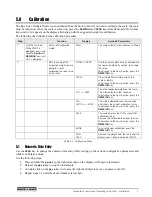
Page 11: ... While START is displayed press and hold the Kg Lb and REWEIGH keys until CAL is displayed Enters into calibration mode StArt The scale automatically advances to Step 2 2 Sets the value of the calibration weight you are going to use for calibrating the span value of the scale LOAd XXX X Use the numeric data entry as explained in the numeric data entry section to change the value To advance to the ...

Page 12: ...erly Place the weighing tray in its proper place Scale is out of calibration Check the weight with a known weight value The display shows a STOP message The load on the scale exceeds the capacity Remove the excess weight and use the scale according to its stated limit The display shows LO Bat message The rechargeable battery is low Recharge the battery according to instructions The display shows m...

Page 13: ...EIGH and ON OFF keys This enters into the test mode of the scale StArt The scale automatically advances to Step 2 2 Identifies the software ID IdEnt 10999 Press the REWEIGH key to advance to the next function 3 Shows the current weight value tESt 0 0 To advance to the next function press the REWEIGH key 4 Shows the current A D value A d XXXX To advance to the next function press the REWEIGH key 5 ...

Page 14: ... the following steps for basic maintenance 1 Check the overall appearance of the entire scale for any obvious signs of damage abuse etc 2 Inspect the condition of the AC adaptor for cord cracking or fraying or for broken or bent prongs 7 2 Cleaning Proper care and cleaning is essential to ensure a long life of accurate and effective operation Before beginning the cleaning process disconnect the sc...

Page 15: ... 0 2 Kg x 1 g 5 12 Lb x 0 1 oz 2 6 Kg x 5 g 12 30 Lb x 0 2 oz 6 15 Kg x 5 g Power Requirements 120 VAC 9VDC 50Hz 230 VAC 9VDC 50Hz Environmental Operating temperature 50 to 95ºF 10 to 35ºC Storage temperature 32 to 122ºF 0 to 50ºC Humidity 85 relative humidity Dimensions 22 x 16 x 7 75 56 x 40 5 x 20 cm Weight 21 Lb 9 5 Kg ...

Page 16: ...s Technical Support 800 472 6703 Canadian and Mexican Customers 800 321 6703 International 715 234 9171 Immediate Emergency Service For immediate assistance call toll free 1 800 472 6703 Canadian and Mexican customers please call 1 800 321 6703 If you are calling after standard business hours and have an urgent scale outage or emergency press 1 to reach on call personnel Fax Fax Number 715 234 696...

Page 17: ...y exists and was not caused by accident misuse neglect alteration improper installation improper repair or improper testing RLWS shall be the sole judge of all alleged non conformities Such equipment has not been modified altered or changed by any person other than RLWS or its duly authorized repair agents RLWS will have a reasonable time to repair or replace the defective equipment Buyer is respo...

Page 18: ...PN 118767 11 10 ...

Reviews: