Page
10
/
18
with the tools.
IV. GETTING STARTED
4.1- Unpacking
•
Remove the product from packaging
•
Check if the product and accessories (if any) are intact.
4.2- Content
•
1 sander body
•
1 abrasive belt
•
1 dust collection bag
•
1 instruction manual
4.3- Assembly
WARNING!
Before starting assembly or changing accessories, turn it off and disconnect from
main power source.
Installing the dust collection bag
•
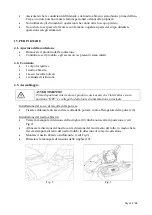
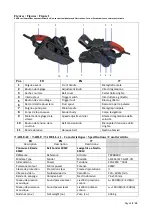
Attach an empty dust collection bag onto the dust spout (6) securely.
Installing the abrasive belt
•
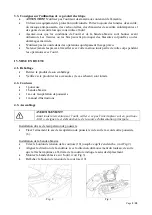
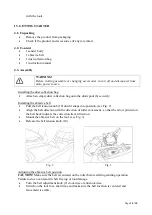
Pull the belt tension knob (10) until it snaps into position. (see Fig. 2)
•
Align the belt direction with the direction of roller movement., so that the arrow printed on
the belt back indicate the correction travel direction.
•
Mount the abrasive belt on the tool. (see Fig. 3)
•
Release the belt tension knob (10).
Fig. 2
Fig. 3
Adjusting the abrasive belt position
CAUTION!
Make sure the belt is centered on the roller before starting sanding operation.
Failure to do so can result in belt fraying or tool damage.
•
Turn the belt adjustment knob (2) clockwise or anticlockwise.
•
Switch on the tool for a short time and make sure the belt location is centered and
movement is stable.


