14
G
B
1
2
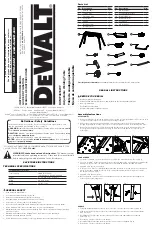
INFRARED SIGNAL TRANSMITTER - TX
TRANSMITTER
SETTINGS AND CONNECTIONS
J2
Terminal block
AD+TEST Power Supply 12-24V ac/dc
AD-
Power Supply12-24V ac/dc
DLTX
Green LED function indicator
J1
Connector
for connecting the
transmitter diode
ASSEMBLY OF THE INFRARED TRANSMITTER
-
Separate the cover with the rubber support
(1)
from the base
(2)
and remove the electronic
board
(3)
(Fig. 2).
- Remove the lid doing pressure with a screwdriver and insert the conduit supplied.
-
Place the base
(2)
on the lower border of the leaf of the gate and fasten it immediately
using 2 self-tapping screws TCCR3,5X16 supplied
(4)
.
-
Check that the gasket is present and it is intact within the cover
(1)
.
-
If necessary, rotate the bellows assembly which includes the lens by 90°, so to direct
the infrared ray as per need (VERTIGO comes with the infrared ray set as per Fig. 2). It is
possible to direct the ray according to the needs:
-
Insert the electronic board
(3)
, linked to the cover with the bellow, in the special rails on
the base
(2)
.
- As power supply has been given to the transmitter, the DLTX green led (Fig. 1) turns ON
indicating the proper functioning.
-
Assemble the cover
(1)
attaching it to the base
(2)
on the top part using the special tooth
and then close the cover.
-
Once the cover is closed, check that it is parallel to the base. Otherwise, open it again and
check that the circuit and the connection wires are correctly fitted in their seats.
-
Fasten the cover
(1)
to the base
(2)
with the 4 self-tapping screws TCCR2,9X9,5 supplied
(5)
.
2
12
6
1
7
11
5
4
3
9
10
8
DLTX
J2
J1
3
TX
TX
Summary of Contents for ACG8044
Page 25: ...25 NOTES ...
Page 26: ...26 NOTES ...