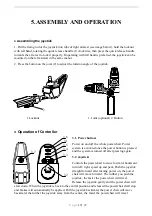
3.3. Speed control button
Press the increase speed control button sequentially to accelerate the powerchair. The speed button
offers 5 discrete steps to speed up. Similarly, then press the reduce speed button sequentially to
decelerate, also the speed button offers 5 discrete steps for speed reduction.
3.4. Speed indicator:
Press the increase speed control button and the speed indicator shall light up by 5 steps accordingly.
Press the reduce speed control button and the speed indicator shall be lowered in the proper
sequence.
3.5. Horn button:
Press the horn button when powered on, the beeper will buzz. Releasing the button, the buzz stops.
3.6. Battery gauge:
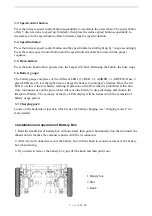
The battery gauge comprises of five different LEDs (1 x RED, 2 x AMBER, 2 x GREEN). Once 2
green LEDs are off, it is the right time to charge the battery to prolong it’s lifetime. Once the red
LED is on, this is the low battery warning. Operation on the Powerchair is prohibited at this time
since continuous use on the powerchair will cause the battery to deep discharge and shorten the
lifespan of battery. The accuracy of the five LEDs display will be reduced with the extension of
battery usage period.
3.7. Charging port:
Locate on the backside of joystick, which is use for battery charging (see “charging mode I” for
more details)
●
Installation and operation of Battery Box
1. Hold the handle bar of battery box with one hand, then push it horizontally into the slot under the
chassis until it reaches the end and connects with the its connector.
2. After it is well connected, secure the battery box with the knob to avoid movement of the battery
box when driving.
3. If you want to remove the battery box, just lift the knob and then pull it out.
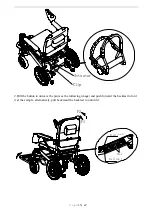
1.Battery box
2.Slot
3.Knob
P a g e
11 | 22


