


10
Installation
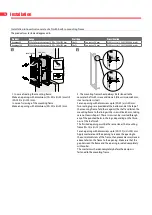
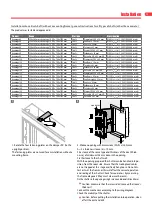
Installation into vertical concrete shaft with built-in mounting frame
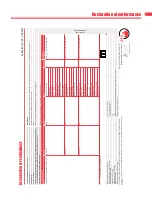
The product was tested and approved in:
Product
Range
Wall type
Classification
Avantage 60
350x385 mm ≤ Avantage 1V DP ≤ 700x1075 mm
Shaft
Concrete ≥ 70 mm
EI 60 (v
ed
i
n
o) S 500 C10000 AA multi
Avantage 120
350x385 mm ≤ Avantage 1V DP ≤ 700x1075 mm
Shaft
Concrete ≥ 70 mm
EI 90 (v
ed
i
n
o) S 500 C10000 AA multi
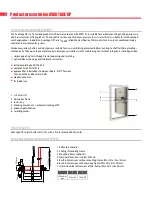
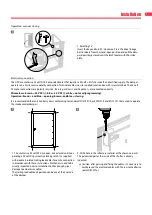
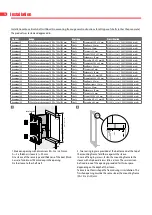
AVANTAGE DP
EASY-KAP
A=20-100 mm
A=20 mm
(W+
A
) x (H+
A
) mm
Mortar
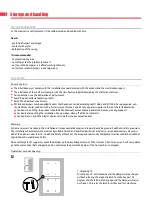
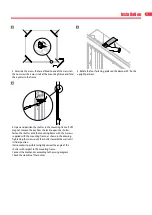
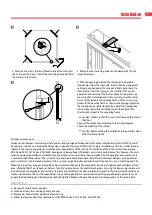
1. In case of sealing the mounting frame:
Make an opening with dimensions (W+20) x (H+20) mm till
(W+100) x (H+100) mm.
In case of screwing of the mounting frame:
Make an opening with dimensions (W+20) x (H+20) mm.
2. The mounting frame should always be fastened to the
concrete shaft with screws and dowels (Ø6 x minimum 60 mm,
steel or stainless steel).
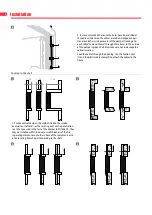
For an opening with dimensions up to (W+20) x (H+20) mm:
Two sealing lugs are provided at the bottom and at the top of
the mounting frame: fold these against the shaft and fasten the
mounting frame to the lining with 4 screws Ø6 x 60 mm, taking
care not to misshape it. These screws can be inserted through
any of the punched holes in the lugs, depending on the thick-
ness of the shaft wall.
The finished opening must be the same size as the mounting
frame (W+10) x (H+10) mm.
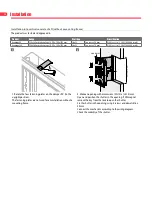
For an opening with dimensions up to (W+100) x (H+100) mm:
Apply mortar around the opening to reduce the opening to
the outer dimensions of the frame, then proceed as mentioned
above to fasten the frame to the opening. Make sure that the
gap between the frame and the opening in sealed completely
with mortar.
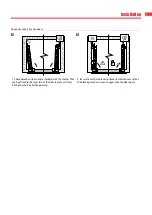
The mortar must harden completely before the damper is
fastened to the mounting frame.
1
2