


RIoT-MINIHUB Quickstart Guide
Page: 10
QS-RIOT-MINIHUB-1
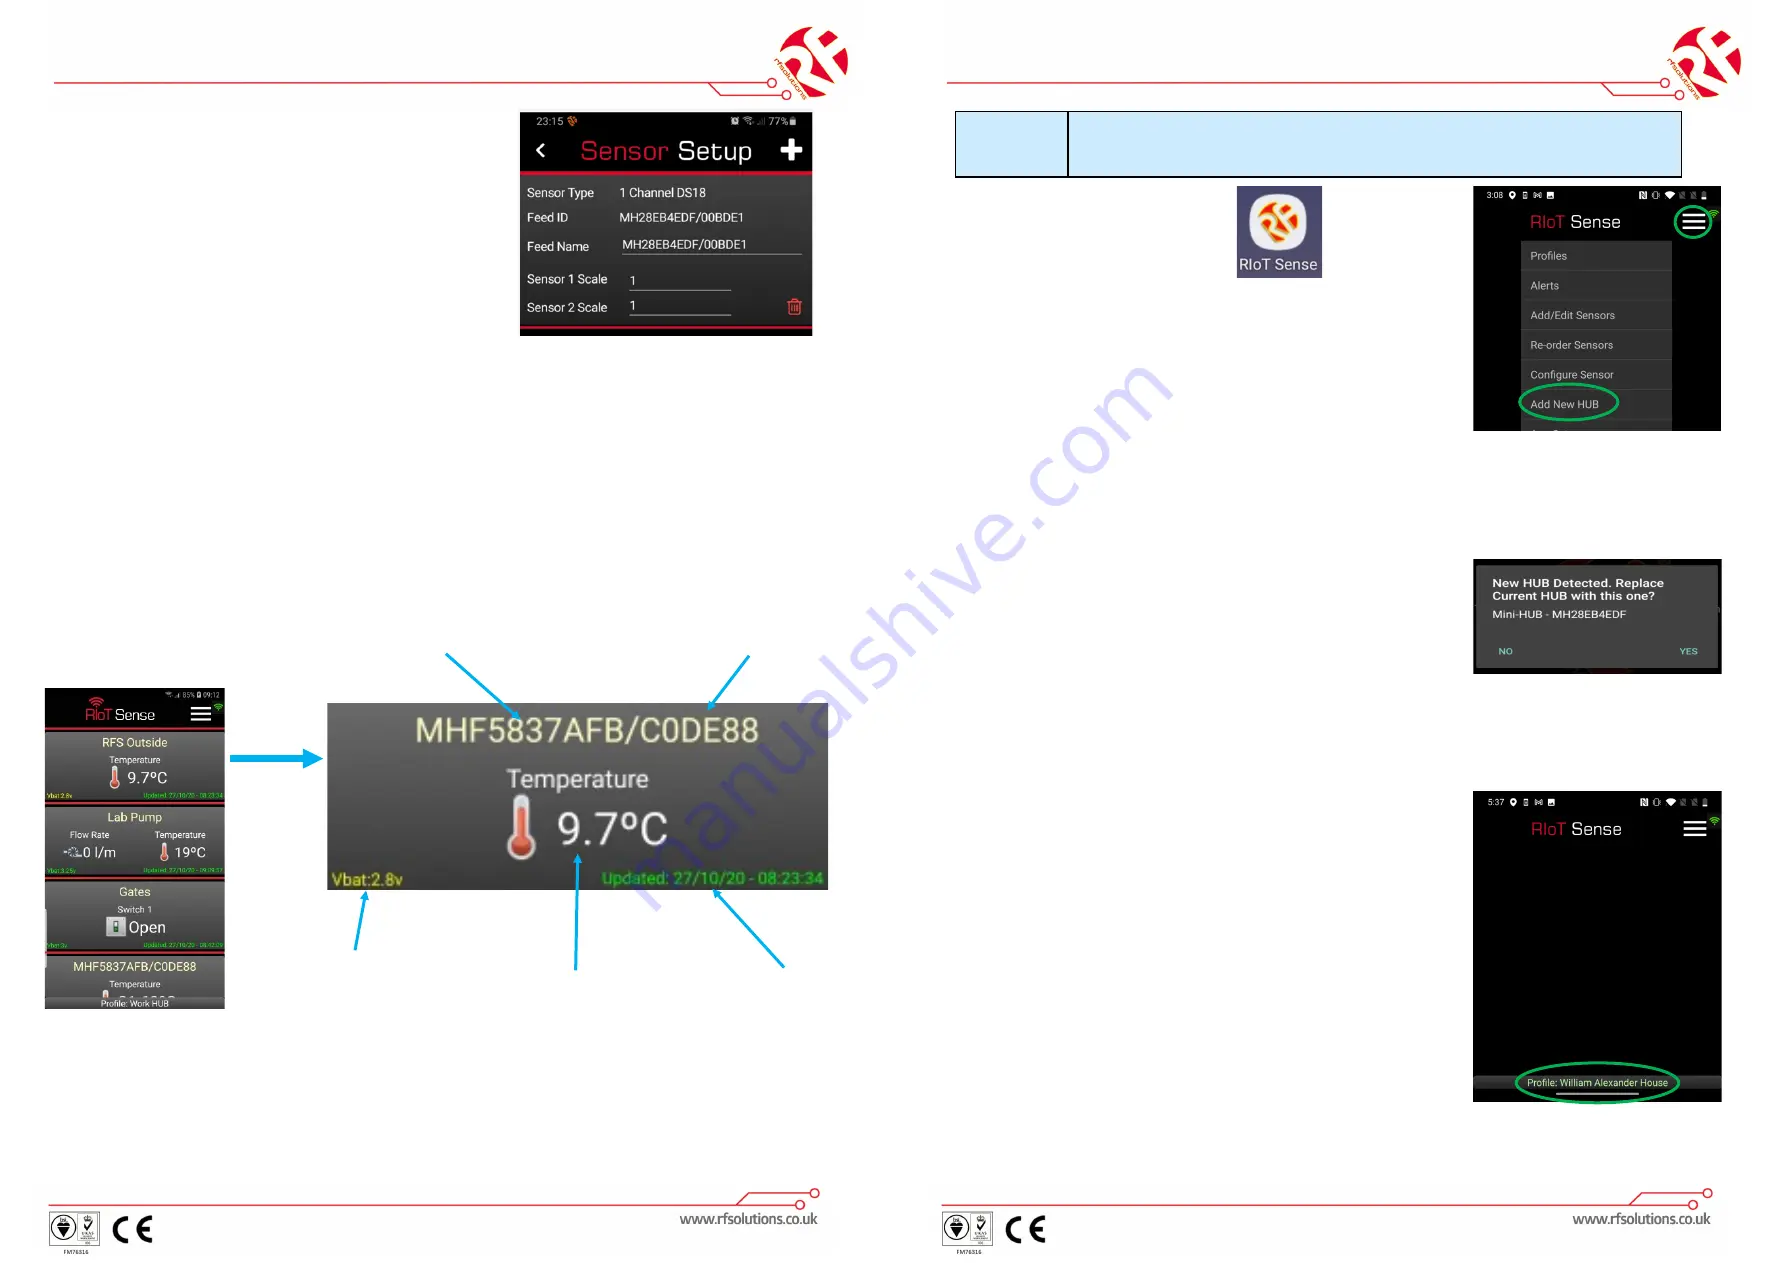
Each Sensor/Switch appears on your SMART DEVICE as below:
Updates are sent in real time (indicated by a Green Highlight)
If a Sensor is lost, out of range/flat battery, the last valid reading is displayed for 2
hours, before an error message is displayed.
You can now Reorder, Rename and configure each RF Sensor/Switch.
RIoT Hub ID
This can be changed to
any user friendly name -
E.G. RFS Outside
Sensor ID
This can be changed to a
user friendly name
RF Sensor Reading
Time of Last Update
RF Sensor
Battery Voltage
Green = Good
Yellow = OK
Red = Replace battery
6.
Select the RF Sensor “+” to add this
Sensor to the App
7. You can now update the Sensor Feed ID
Name, then select ‘+’ to confirm
RIoT-MINIHUB Quickstart Guide
Page: 7
QS-RIOT-MINIHUB-1
1. Run the
SENSE
App
2. Select Menu, Add New Hub
3. Your Smart device is now ready to pair with the
RIoT
-MINIHUB
4. On the
RIoT
-MINIHUB briefly press and release the Setup Switch, (RIoT-
MINIHUB transmits a Learn Signal, The Data LED switches off briefly)
5.
Sense APP will show “Hub Detected”
6. Select Yes
7. Your SMARTDEVICE is now paired with the
RIoT
-MINIHUB
8. Select OK to Exit the hub Setup
Note: PROFILES
RIoT Sense App can operate with Multiple RIoT-
MINIHUB’s located in different locations.
In order to differentiate these, are set as Profiles. So
for Example the user may have;
Minihub at Home, Work, or in a shed!
RIoT SENSE App can communicate with each
RIoT
-
MINIHUB as an individual “Profile”
Stage
2
Pair your Smart Device with RIoT-MINIHUB


