background image

Introduction

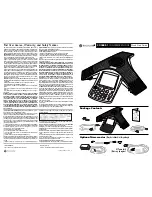
Congratulations on your purchase of the Revolabs FLX2

TM

 Wireless Conference Phone.  

This system utilizes state of the art technology providing high band-width audio and 
enabling clear, reliable, un-tethered communications with your telephone, PC, mobile 
device, and video conferencing system. 

The Revolabs FLX2 Conferencing Phone allows enhanced freedom for VoIP calls and 
video conferences by allowing independent locations of the microphones and the 
speaker used during the call. 

The FLX2 Conference Phone utilizes encrypted digital communication for its wireless 
transport, ensuring highest security for your conversations. The FLX2 Conference 
Phone is a flexible solution for all your communication needs, allowing it to be used in 
your VoIP telephone network, for your video conferences, and with your Bluetooth 
enabled cell phone or computer. 

Welcome to the 21

st

 century Unified Communications Technology! 

Please read this documentation carefully and follow the instructions before using your 
FLX2 Wireless Conference phone. 

Safety Warnings 

Do not expose any of the FLX2 components to water, moisture, or high humidity.

Do not expose any of the FLX2 components to extreme high or low temperatures.

Do not expose any of the FLX2 components to lit candles, cigarettes, cigars, or to
open flames, etc.

Do not drop, throw, or try to bend any of the components, as rough treatment could
damage them.

Do not open the casings of any of the components of the FLX2 Conference Phone

Do not use any other accessories than Revolabs’ originals intended for use with
this product.  Use of non-original accessories may result in loss of performance,
damage to the product, fire, electric shock or injury.  The warranty does not cover
product failures which have been caused by use of non-original accessories.

Only use the power adapter provided to connect the components to the electric
mains.

Do not open or try to modify any of the batteries delivered with the FLX2
Conference Phone components.  Replace batteries only with Revolabs approved
batteries.

Extreme heat, short circuits, or any attempt to open or modify the batteries might
cause them to ignite or explode.

Summary of Contents for 10-FLX2-002-VOIP

Page 1: ...REVOLABS FLX2 Wireless Conference System for Voice over IP System Guide Models 10 FLX2 200 VOIP 10 FLX2 020 VOIP 10 FLX2 002 VOIP 10 FLX2 101 VOIP 10 FLX2 200 DUAL VOIP...

Page 2: ...S INC All rights reserved No part of this document may be reproduced in any form or by any means without express written permission from Yamaha Unified Communications Inc Product specifications are su...

Page 3: ...instructions before using your FLX2 Wireless Conference phone Safety Warnings Do not expose any of the FLX2 components to water moisture or high humidity Do not expose any of the FLX2 components to e...

Page 4: ...all 21 Declining an Incoming VoIP Call 22 Ending a Telephone call 23 Calling a Directory Contact 23 Active Call Management 23 Component behavior in and out of the Charger Base 26 Bluetooth 27 Activati...

Page 5: ...shooting 82 Warning Messages 82 Microphone Speaker or Dialer not connecting to Base Station 83 Microphone Speaker or Dialer not paired with Base Station 84 LED Indicators 84 Reset to Factory Defaults...

Page 6: ...are the Charger Base Speaker Microphones and Dialer handset In addition the Base Station receives the wireless signals from those components and connects to your VoIP network for conference calls with...

Page 7: ...ower injector that can be bought through your reseller which adds the necessary power to that Ethernet connection Connecting the Charger Base Place the Charger Base at a location where you can easily...

Page 8: ...P you can go to the System Info menu and select About System The assigned IP address for the FLX will be shown here If you configured a VLAN Virtual LAN for your voice traffic on your IP network you n...

Page 9: ...ang up button on the Dialer NOTE It is also possible to have a conference call with the microphones in the charger base However due to the proximity of microphone and speaker at that time audio qualit...

Page 10: ...omputer to make speaker phone calls The technology used allows the Microphones the Dialer and the Speaker to co exist with other wireless products such as wireless LANs 802 11b g without interference...

Page 11: ...X Microphones and one Speaker wirelessly The Base Station is designed to optimize audio and video conferencing by providing consistent audio input from all participants The FLX2 VoIP Base Station is s...

Page 12: ...the Microphones by allowing them to charge in one simple and organized location The FLX2 Charger Base is not required while in a conference call however it can maintain the charge of the FLX Speaker...

Page 13: ...ialer is not only used to make and answer conference calls but it is also used for configuring the system settings having a call using the handset and monitoring the system components The FLX Dialer s...

Page 14: ...optimized specifically for use with the FLX Conferencing System The Speaker is equipped with a pairing button on the bottom and 4 LED indicators on the top to display the activity of the Speaker and...

Page 15: ...es include an omnidirectional tabletop Microphone a directional tabletop Microphone and a wearable lapel style Microphone Any combination of two FLX Microphones can be used with a FLX2 System as they...

Page 16: ...ed when the FLX2 System for example is connected to a video conferencing unit or a recording device The cables required for these connections are not included with the FLX2 system and need to be purch...

Page 17: ...be configured to work in your VoIP environment and communicate with your IP PBX You will have to enable the extension user you want to use with the FLX on your IP PBX Please review your IP PBX docume...

Page 18: ...eaker and Microphones are controlled by the FLX Dialer The user can switch between speaker mode and handset mode while in a call Handset Mode Handset mode allows a telephone call to take place through...

Page 19: ...led via the FLX Dialer While the FLX2 Conference Phone is connected to a video conferencing device it might still make and accept calls over the VoIP connection or via a Bluetooth device NOTE When usi...

Page 20: ...tor will show a grey symbol while charging In addition the first line will show if a Bluetooth link is currently active with a blue symbol If the Handset failed to connect to the Base Station a red cr...

Page 21: ...two available phone lines and the activity on each line In this case the outgoing call is being made on line 1 The green phone symbol represents an active call Answering an Incoming Call 1 When the F...

Page 22: ...ched on before by pressing the microphone button Declining an Incoming VoIP Call 1 When the FLX2 System identifies an incoming call it will play the ring tone through the FLX Speaker 2 The FLX Dialer...

Page 23: ...all key b Browse to contact menu Menu Contacts Select the contact and press the Enter key or the View key From the contact view screen press the green Call key Active Call Management The FLX2 System h...

Page 24: ...es work together Pressing either of these buttons will mute unmute all microphones out of the Charger Base or in the Charger Base if no microphone is outside Active Call Menu During a call pressing th...

Page 25: ...pressed 2 Once the second call is active using the left and right arrow keys you can highlight the different lines on your handset Swap allows swapping the two calls Join will join the two calls in a...

Page 26: ...Once the reboot is complete the audio will resume on the speaker When the Speaker is removed from the charger no change to call activity will take place Microphones When a Microphone is placed into t...

Page 27: ...the Speaker and Microphone for that application Please contact the provider of the application to find out which Bluetooth profile is supported Activating Bluetooth 1 Go to the Menu Bluetooth Select T...

Page 28: ...ery mode screen will read System in discoverable Mode Start Scan From BT Device System Name System Name 4 Scan for devices from the Bluetooth device you want to connect to the FLX2 System 5 When the F...

Page 29: ...device and press the Enter key or the Select key 3 Press the Option key 4 Select Unpair in the Device Options menu and press Select Accepting Device Connection Request If the trust setting for a previ...

Page 30: ...e The call will be conducted using the FLX Speaker and Microphones Answering a call via Bluetooth 1 You can answer a Bluetooth call directly from your FLX system If answering the call with the FLX sys...

Page 31: ...e audio on the video call Please visit the documentation of your video conferencing unit on how to disable the Echo Canceler Any audio device like external speaker or TV speaker attached to the video...

Page 32: ...ent audio mixer settings based on the output medium The Speaker Mixer shown allows defining the mix between AUX IN and the Phone input to be played back on the Speaker It is a sliding scale from 8 to...

Page 33: ...u 4 When setting levels such as Volume in the menus the Up and Down keys are used to change these values 5 You leave the menu either by pressing the Return soft key which will bring you back one level...

Page 34: ...are colorized by type Dialed calls appear blue received calls appear green and missed calls appear red NOTE The recent call log can be deactivated in the advanced setup menu see page 47 If it is deac...

Page 35: ...ogress 2 In the recent call list select the entry you want to add to the contacts and press View This displays more information for the recent call you selected 3 Press the Save key to save the recent...

Page 36: ...hions a Browse to the Contacts menu Menu Contacts or b From the home screen in idle ready state press the enter key 2 To leave the Contacts menu press the red hang up button Add a Contact 1 Browse to...

Page 37: ...without saving changes to the contact name Pressing the Enter key will finish editing the name and go on to the number editing screen 5 Edit the phone number The key Clear will clear delete the number...

Page 38: ...ered any contact name starting with C will be shown The user can scroll through the filtered list using the up and down buttons View Contact Information 1 Browse to the Contacts menu Menu Contacts 2 S...

Page 39: ...changes showing that FLX is dialing the number Pressing and holding a number key that has not yet been assigned to a contact has no effect Audio Control The following is a list of FLX Dialer menus tha...

Page 40: ...EQ and press enter to set the selected EQ 3 The selected equalizer will be listed in yellow upper case letters while the others are listed in lower case letters In the example to the right VOICE is t...

Page 41: ...will appear yellow System Information The following is a list of FLX Dialer menus that allow the user to retrieve system information System Info 1 Browse to System Info Menu System Info 2 About System...

Page 42: ...to a generic area of features that are not password protected and Advanced Setup which requires a password Display 1 Browse to the Display menu Menu Setup Display 2 The Display menu offers five option...

Page 43: ...ed date formats are MM DD YY DD MM YY or YY MM DD While highlighting either setting the Enter or Select key will change the different settings 5 Time Zone allows the user to choose what the GMT offset...

Page 44: ...dio The Mic Audio allows controlling the Microphones 1 If All Mic Mute is ON all active Microphones are affected when a mute button is pressed If one or more active Microphones are outside the Charger...

Page 45: ...e Aux Out connectors to either Mic level or Line level RF Power The RF Power level setting allows changing the signal strength of the base station and microphones Factory default is HIGH Low or medium...

Page 46: ...istrative password to the factory default 7386 Set Password 1 Browse to the Set Password menu Menu Setup Advanced Setup Admin Settings Set Password 2 Set the password to an admin specified password No...

Page 47: ...FLX Dialer Dialer 1 Turn off the Dialer by pressing and holding the red end call button until an overlay appears asking whether you want to shut the Dialer down Press Yes 2 Plug in the FLX2 Base Stat...

Page 48: ...d in and powered up 3 On the Dialer browse to the Pairing menu Menu Setup Advanced Setup Pairing 4 Select MIC 1 Microphone 1 or MIC 2 Microphone 2 and press the Enter key to enter pairing state 5 The...

Page 49: ...ge any of these values a sixth option Load Settings will display to restart the FLX base with the changed settings c VoIP Settings allow you to set minimal required settings to connect to a VoIP switc...

Page 50: ...etermin whether a VLAN is in place and request the VLAN identifier from the network Enabled will enable the VLAN but requires a VLAN identifier to be manually set in the Voice VLAN ID menu Disabled me...

Page 51: ...ions Support Web Interface The FLX web interface provides access to advanced configuration settings call statistics and system logs Web access can be enabled or disabled from the FLX Handset and the w...

Page 52: ...ut to protect against unwanted access if the session is left open for more than fifteen minutes Connecting to the FLX Web Interface To use the web interface open a web browser and navigate to the IP a...

Page 53: ...hown as unknown To update these fields remove the microphones from the charger tray wait a few seconds for the phone to detect the microphone state and then refresh the web page by selecting your brow...

Page 54: ...es Ring 1 Ring 6 EQ Setting The Equalizer setting allows you to adjust the speaker frequencies to your preference for the room and the types of calls The EQ options are Voice Bass Boost and Treble Boo...

Page 55: ...ied number if the local phone is in Do Not Disturb mode or if both lines are busy Forward on No Answer The Forward on No Answer option will forward incoming calls to the specified number if the call i...

Page 56: ...5 30 Mumbai 5 45 Kathmandu 6 Yekaterinburg 6 30 Yangon 7 Bangkok 8 Beijing Hong Kong 9 Tokyo 9 30 Adelaide 10 Sydney 11 Vladivostok 12 Auckland 13 Nuku alofa Daylight Saving Time DST Use the Daylight...

Page 57: ...gain This is a security measure to protect against unwanted access if the web client is left unattended To force the web session to close before the timeout interval choose Logout from the User Menu o...

Page 58: ...ss for the phone and the network server addresses provided by your network administrator If you select Static IP as the Connection Type you will have to provide the Static IP Address Subnet Mask and D...

Page 59: ...S server and a secondary backup DNS server Secondary DNS Server This is the address of the secondary DNS server VLAN Settings Voice VLAN The options are Enabled Disabled or Automatic Enabled indicates...

Page 60: ...gistration page After changing any settings the changes must be saved and the phone must be restarted for the changes to take effect The table below describes the SIP Registration settings Different I...

Page 61: ...re are multiple SIP proxies separate the addresses by a comma Also note that on the SIP Settings page there s an option to allow strict routing If that option is set and you have a SIP proxy that is c...

Page 62: ...termined at call negotiation If one of the UAs in a call does not receive the refresh request within the expiration timeout period it will terminate the session The available options in FLX are Inacti...

Page 63: ...Via header and register a new Contact to the SIP registrar This option will also update the public name of the UDP transport if STUN is configured Suppress SIP event subscription when transferring ca...

Page 64: ...P Media on hold method The Media on hold method setting allows switching the Media on Hold behavior between the different RFC definitions M line only RFC3264 implements the functionality according to...

Page 65: ...nage transport and Network Address Translation NAT settings and to enable or disable Quality of Service QoS The illustration below shows the Transport page After changing any of these settings the pho...

Page 66: ...tised SIP and RTP address of this transport the public address The IP address does not have to correspond with one of the local host network interfaces it may be the public IP address of a NAT router...

Page 67: ...the maximum number of local ICE host candidates that may be used in evaluating candidate pairs when determining the best route The default value is 1 or an empty field which indicates that there is n...

Page 68: ...note that at least one Codec has to be provided as Codec 1 does not offer the option Disabled The default precedence order is as shown in the list above Audio Quality The Audio Quality setting determi...

Page 69: ...effect Call Settings Auto answer This option allows to automatically answer calls even if not physically at the location where the phone is located We recommend enabling this feature only for test pur...

Page 70: ...icrophones are outside the Charger Base pressing the mute button will change the mute status on all microphones outside of the Charger Base Microphones in the Charger Base will not be affected and wil...

Page 71: ...cess Control page to set the system password enable or disable the Recent Call list on the FLX Handset and enable or disable web access The illustration below shows the Access Control page You do not...

Page 72: ...fferent country region or if advised by Yamaha Unified Communications support to do so Importing and Exporting Configuration Settings Through the web interface you can import and export FLX configurat...

Page 73: ...and then click the Import button After importing the settings you must minimally set the target phone specific settings that were not uploaded with the import Use the web interface to browse to the Ne...

Page 74: ...ple log 10 134 123 101 120131 210112 tar gz You should be able to email the compressed file as instructed by the support staff The support staff may also ask you to select the option to Enable Verbose...

Page 75: ...1 2Kpkt 200 6KB 250 8KB IP hdr avg 63 8Kbps 79 8Kbps pkt loss 0 0 0 dup 0 0 0 reorder 0 0 0 msec min avg max last dev loss period 0 000 0 000 0 000 0 000 0 000 jitter 0 375 3 925 15 000 15 000 5 570...

Page 76: ...n Off To power off a FLX Microphone hold down the button located on the Microphone until the LED indicator turns solid red Once the LED indicator is solid red release the button and the Microphone wil...

Page 77: ...hours after exchanging the battery Caution Risk of explosion if batteries are mishandled or replaced by an incorrect type Do not disassemble batteries or attempt to charge outside the system Do not d...

Page 78: ...Slide the back of the microphone back in place Place the microphone back into the charger base The LED should go on indicating the charge status of the microphone Dialer The battery in the dialer can...

Page 79: ...m of the speaker Once the screw is loose the bottom door of the speaker will open revealing the rechargeable battery pack Carefully take this battery pack out of the speaker enclosure unplugging the w...

Page 80: ...O35MS 01 Lifesize Team 220 Mic Input Mic 07 35MUTO35MU 01 Line Output 07 35MUTO35MS 01 Polycom HDX7000 Main Line Input 1 Line 07 35MUTODRCA 01 Line Output 07 35MUTODRCA 01 Polycom HDX8000 Main Line In...

Page 81: ...and two cables to connect to the FLX Troubleshooting Warning Messages Speaker Microphone Link Lost If a FLX Microphone or FLX Speaker loses connection to the FLX2 Base Station the LED indicator will b...

Page 82: ...bout every second If not please power up the Base Station All components should automatically connect to the Base Station after a few seconds 2 The Base Station is powered up but the Status LED indica...

Page 83: ...d flash every second On connected battery charged Master Mute or All Mic Mute is ON microphones muted Alternating Yellow Green flash On connected battery low un muted Alternating Yellow Double Red fla...

Page 84: ...no phone call in progress microphones outside of Charger Base All Mic Mute is ON all Microphones are muted Flashing Yellow Red Yellow Green Searching for a connection to the Base Station Alternating s...

Page 85: ...g that Base Station is functional Skip every fifth double flash Fault indication This also indicates past faults that have no bearings on current operation Continuous Fast Flashing Updating non volati...

Page 86: ...ons Speaker 157mm x 93mm diameter Weight 600 3g Bandwidth 120 11 000 Hz from Analog IN This is reduced for VoIP calls based on the bandwidth supported by the selected transport codec Battery life talk...

Page 87: ...300 3300Hz Battery life 8 hours Charge time 3 hours Display High resolution color LCD display Caller ID Support for multiple Caller ID standards Phonebook Up to 100 entries Keypad 12 key telephone key...

Page 88: ...d in accordance with the instructions may cause harmful interference to radio communications However there is no guarantee that interference will not occur in a particular installation If this equipme...

Page 89: ...provide a separation distance of at least eight inches 20 cm from all persons This equipment must not be operated in conjunction with any other antenna This device complies with RF exposure requiremen...

Page 90: ...nments of the United States of America and Canada may restrict the exportation or re exportation of this product to certain destinations For further information contact the U S Department of Commerce...

Page 91: ...ddress WEEE Notification The Waste Electrical and Electronic Equipment WEEE directive 2012 19 EU is intended to promote recycling of electrical and electronic equipment and their components at end of...

Page 92: ...stomer an equivalent product or part to replace the defective item or if neither of the two foregoing options is reasonably available Yamaha Unified Communications may in its sole discretion refund to...

Page 93: ...SHALL FAIL OF ITS ESSENTIAL PURPOSE Disclaimer Some countries states or provinces do not allow the exclusion or limitation of implied warranties or the limitation of incidental or consequential damag...

Page 94: ...rring to freedom not price Our General Public Licenses are designed to make sure that you have the freedom to distribute copies of free software and charge for this service if you wish that you receiv...

Page 95: ...tim copies of the Program s source code as you receive it in any medium provided that you conspicuously and appropriately publish on each copy an appropriate copyright notice and disclaimer of warrant...

Page 96: ...also do one of the following a Accompany it with the complete corresponding machine readable source code which must be distributed under the terms of Sections 1 and 2 above on a medium customarily us...

Page 97: ...ther restrictions on the recipients exercise of the rights granted herein You are not responsible for enforcing compliance by third parties to this License 7 If as a consequence of a court judgment or...

Page 98: ...lar in spirit to the present version but may differ in detail to address new problems or concerns Each version is given a distinguishing version number If the Program specifies a version number of thi...

Page 99: ...E PROGRAM PROVE DEFECTIVE YOU ASSUME THE COST OF ALL NECESSARY SERVICING REPAIR OR CORRECTION 12 IN NO EVENT UNLESS REQUIRED BY APPLICABLE LAW OR AGREED TO IN WRITING WILL ANY COPYRIGHT HOLDER OR ANY...

Page 100: ...blems or if you have questions about the operation configuration or troubleshooting of any Revolabs product please email uc support music yamaha com or call 1 800 326 1088 Copyright 2018 Yamaha Unifie...

Reviews: