REVCAMUK MON16 Instructions Manual Download Page 7

 7 

Cam Delay Sub Menu 

Changing the time for channel 2 will mean the monitor stays on this channel for however 
many seconds you set (1-20) after the trigger wire no longer has power.  This is useful for 
people who don’t want the monitor to switch on/off when making small back and forth 
parking manoeuvres or where channel 2 is a side camera and the trigger wire is attached to 
the indicator light and would require a time delay to ensure the picture doesn’t flash on and 
off with the indicator light.   

Mode Button 

This button can be pressed whenever you wish to quickly change the picture settings for the 
monitor.  There are 4 modes: 

Standard 

: Recommended for most of the time 

Soft

 : Recommended for night time driving 

Vivid

 : Bright with high contrast 

Light 

: Brightest picture for very bright conditions  


CAM button 

This button will change channel between the two available inputs.  If you have no camera in 
one of the inputs you will get a blue screen come up with the words “no signal” written on it.


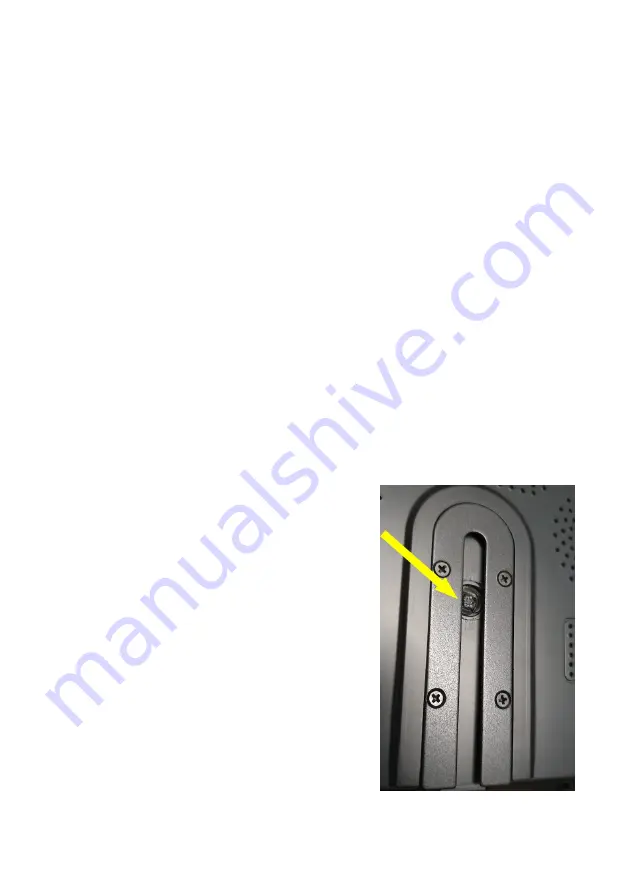
MON16 Standard Butterfly Mount 

When using the standard mount, there is only one 
position you can secure the monitor.  See the photo to 
the  right to see the indentation made to allow for the 
length of the bolt to secure to the square washer. 

If you position the bolt in to the wrong part of the 
channel then the monitor won’t tighten sufficiently and 
could damage the plastic back of the monitor. 

See the back page for details of other brackets available 
from our site. 

Our other brackets allow more adjustment and don’t 
require lining up to this indentation.  

Summary of Contents for MON16

Page 1: ...ave written this guide to help navigate some of the options inside the menu system Please be aware that some of the menu systems are subject to change if you notice anything that differs then please l...

Page 2: ...cameras attached to 6W with two cameras Digital Screen Resolution 800 x3 RGB x480 Contrast 500 1 Brightness 400cd m2 Viewing Angle U 50 degrees D 60 degrees R L 70 degrees Operating Temperature 10C t...

Page 3: ...s after not noticing the arrows that need to be lined up before pushing together Button Layout Both monitors have touch sensitive buttons as opposed to physical push in buttons We find these really re...

Page 4: ...lection up at any time Picture Sub Menu Scoll to required option and press menu button to enter modify required option Brightness Adjust the brightness of the picture Contrast Adjust the contrast of t...

Page 5: ...cameras are mirror imaged as standard so mirroring this mirror image will turn it back in to a normal view image Video Sub Menu As standard we recommend that you use Auto which will auto detect the v...

Page 6: ...up and down keys to change the number to the required value and the Menu button to go to the next number to adjust Interval Config Sub Menu This monitor can be setup to switch between two cameras auto...

Page 7: ...Soft Recommended for night time driving Vivid Bright with high contrast Light Brightest picture for very bright conditions CAM button This button will change channel between the two available inputs I...

Page 8: ...8 Optional Brackets for both monitors Both monitors have rear channels to allow for alternative brackets...

Reviews: