Response QM-8046 User Manual Download Page 8

Using the Setup Menu 

-


Select the desired sub-menu with the UP/DOWN buttons and confirm with the OK button. The 
respective functions of the sub-menus are being described below. 


-


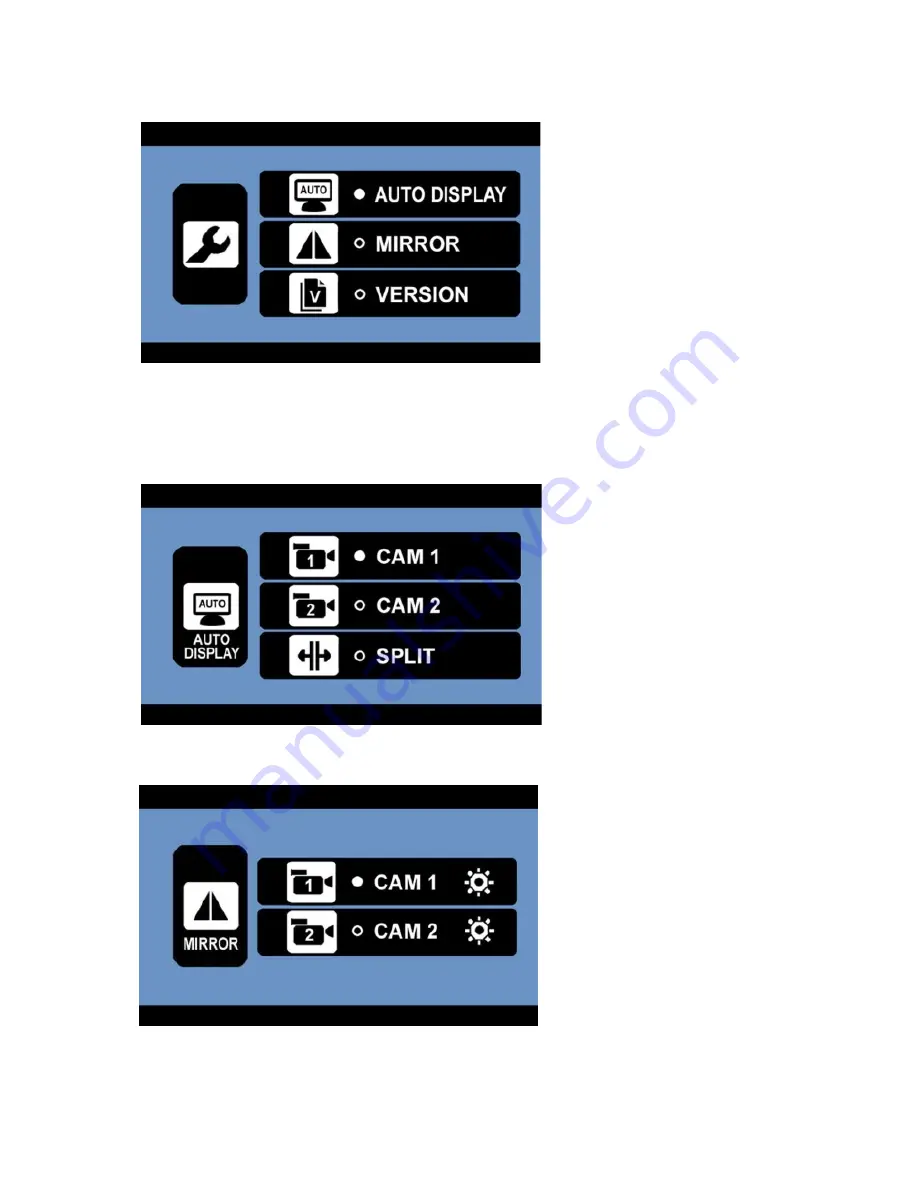
Auto Display; this setting allows you to set your main view. The selected camera (CAM1 or CAM2) 
will be displayed automatically when backing up. In order to show the picture of both cameras at 
the same time, please SPLIT in the menu (only if both signals can be received – otherwise the 
monitor will show the available picture in full screen). 


-


Mirror; select CAM1 or CAM2 in order to mirror the displayed picture horizontally or vertically. 


Summary of Contents for QM-8046

Page 1: ...Digital Wireless Reversing Camera with 7 LCD Display QM 8046 User Manual...

Page 2: ...please contact your vehicles manufacturer Camera Installation The camera can be tilted vertically to adjust the viewing angle Make sure that its field of view is not obstructed There are several ways...

Page 3: ...ble precaution Choose a drill that is suitable for the supplied grommet and material 7 After drilling the hole insert the supplied grommet and pass the camera cables through the grommet into the vehic...

Page 4: ...Press the stand against the dashboard surface firmly to fix the location 4 Snap in the monitor to the stands mounting arm 5 Adjust the mounting arm to suit your viewing angle to the monitor 6 To remo...

Page 5: ...ly if not press the power button on the monitor 3 If it hasn t already been done please pair your camera s to the monitor as described in the section OPERATION 4 After testing and re adjusting the uni...

Page 6: ...screen on the monitor will turn on automatically when the vehicle is in reverse gear when already paired to the cameras When the monitor is on and gets a signal the blue LED will light up otherwise i...

Page 7: ...he camera The screen will show that the pairing has been successful Back in the pairing menu a symbol will appear next to the paired cameras The unit will now pair automatically to the camera when pow...

Page 8: ...llows you to set your main view The selected camera CAM1 or CAM2 will be displayed automatically when backing up In order to show the picture of both cameras at the same time please SPLIT in the menu...

Page 9: ...the UP DOWN buttons confirm by pressing the OK button and change the values with the arrow buttons Save the settings with the OK button and exit the screen by pressing the MENU button Using the LINES...

Page 10: ...reas the IR LEDs will turn on automatically ATTENTION Do not look directly into the IR LED light as this can be harmful to your eyes Distributed by TechBrands by Electus Distribution Pty Ltd 320 Victo...

Reviews: