Response QM-8046 User Manual Download Page 4

11.


Reinstall the reverse lights; secure all the wires with cable ties or electrical tape. 
 

12.


Re-attach the negative cable of your battery. 


MONITOR INSTALLATION 

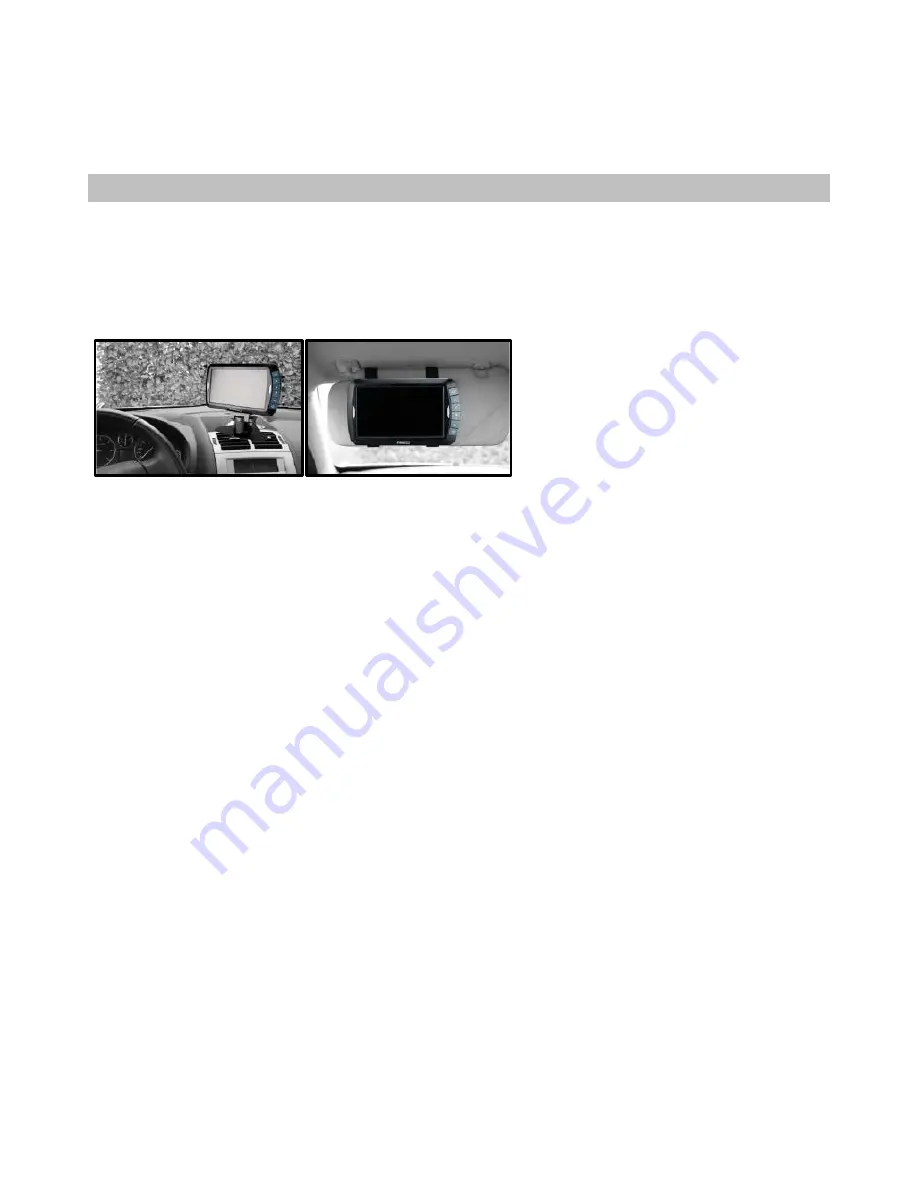
When choosing a location for the monitor, make sure the monitor is mounted in an area that will not 
obstruct your vision while driving. 

The QM-8046 can be fixed to your vehicle in several ways. The monitor can be placed on your dashboard 
with the mounting bracket, or fixed onto your visor with the mounting straps. 


Dashboard Mount 

1.


Before mounting the monitor, clean the surface. Put one side of the double-sided adhesive tape on 
the bottom of the dashboard stand. 

2.


Position the stand on the dashboard. 

3.


Press the stand against the dashboard surface firmly to fix the location. 

4.


Snap in the monitor to the stands mounting arm. 

5.


Adjust the mounting arm to suit your viewing angle to the monitor. 

6.


To remove the monitor from the dashboard stand, press the arrow sign on the mounting arm to 
release. 

Note: To maximize the bond strength of the adhesive, it is recommended to apply the tape under the 
following conditions: 

-


All surfaces must be clean, dry, dust and grease free. 

-


The adhesive temperature should be between 21°C and 38°C 

-


Don’t apply the tape below 10°C or under direct sunlight. 

-


If possible, choose a mounting position where no direct sunlight can heat up the dashboard stand. 


Visor Mount 

1.


Use the supplied straps and pull them through the gap at the top of the visor. 

2.


Position the monitor on the visor. 

3.


Pull the straps across the visor. 

4.


Fasten the straps. 

Summary of Contents for QM-8046

Page 1: ...Digital Wireless Reversing Camera with 7 LCD Display QM 8046 User Manual...

Page 2: ...please contact your vehicles manufacturer Camera Installation The camera can be tilted vertically to adjust the viewing angle Make sure that its field of view is not obstructed There are several ways...

Page 3: ...ble precaution Choose a drill that is suitable for the supplied grommet and material 7 After drilling the hole insert the supplied grommet and pass the camera cables through the grommet into the vehic...

Page 4: ...Press the stand against the dashboard surface firmly to fix the location 4 Snap in the monitor to the stands mounting arm 5 Adjust the mounting arm to suit your viewing angle to the monitor 6 To remo...

Page 5: ...ly if not press the power button on the monitor 3 If it hasn t already been done please pair your camera s to the monitor as described in the section OPERATION 4 After testing and re adjusting the uni...

Page 6: ...screen on the monitor will turn on automatically when the vehicle is in reverse gear when already paired to the cameras When the monitor is on and gets a signal the blue LED will light up otherwise i...

Page 7: ...he camera The screen will show that the pairing has been successful Back in the pairing menu a symbol will appear next to the paired cameras The unit will now pair automatically to the camera when pow...

Page 8: ...llows you to set your main view The selected camera CAM1 or CAM2 will be displayed automatically when backing up In order to show the picture of both cameras at the same time please SPLIT in the menu...

Page 9: ...the UP DOWN buttons confirm by pressing the OK button and change the values with the arrow buttons Save the settings with the OK button and exit the screen by pressing the MENU button Using the LINES...

Page 10: ...reas the IR LEDs will turn on automatically ATTENTION Do not look directly into the IR LED light as this can be harmful to your eyes Distributed by TechBrands by Electus Distribution Pty Ltd 320 Victo...

Reviews: