background image

Enrolling and Installing the HeliPAD

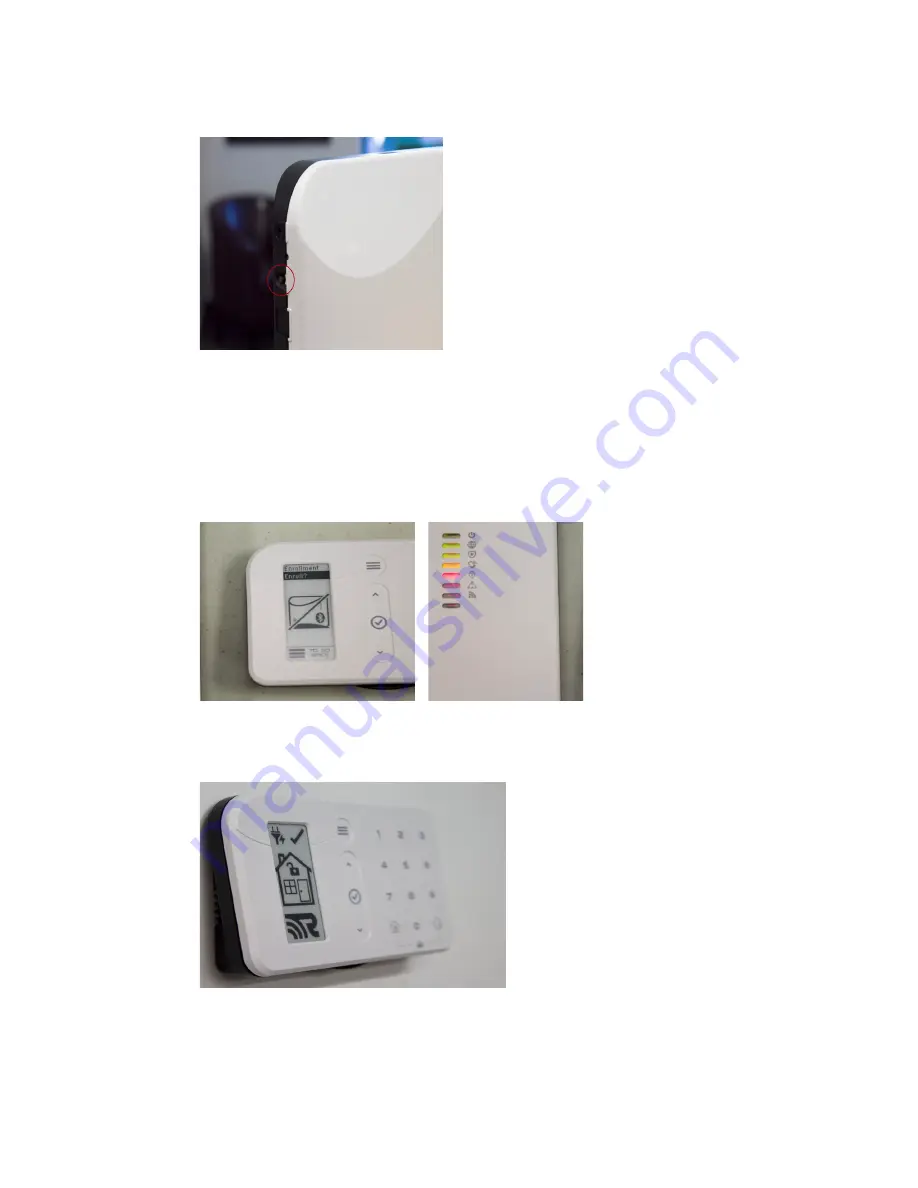
1)  Remove  HeliPAD  from  box,  remove  the  battery 
tab,  and  locate  the  small,  brown,  Bluetooth 
enrollment  button  on  the  side  of  the  Helix  panel.  
 

2)  Press  the  Bluetooth  enrollment  button 
for  3  seconds,  or  until  Helix  beeps.  You  now 
have  30  seconds  to  enroll  the  HeliPAD. 
3)  Select  the  HeliPAD’s  menu  button  and 
options to enroll should appear. Helix LEDs 
will 

appear 

as 

such 

before 

enrollment.  

4) Select the checkmark on HeliPAD 

(√) 

to enroll with 

the Helix panel. Once enrolled, the “Unenroll?” option 
should appear on HeliPAD’s screen. Mount HeliPAD. 

6)  To  learn  more  about  HeliPAD’s  settings  or  how 
to change its disarm code refer to the product 
manual and Helix Installation guide  or you can visit : 
www.resolutionproducts.com/helixsetup 

Summary of Contents for CryptiX

Page 1: ...ng the Helix platform This installation quick start guide will help the installer manually set up the Helix system and enroll Resolution CryptiX sensors to the panel But first if you have not setup an account or registered Helix please visit www resolutionproducts com helixsetup ...

Page 2: ...n the router and the Helix enrollment button simultaneously Helix will beep when successful Installing Helix 1 Plug power supply into Helix and the selected outlet no power strips Preferably near the router 3 Check Helix LEDs and ensure they are lit and the Network connectivity is green ...

Page 3: ...re or Google Play store on the smart device search SecureNet in the search bar Once search is complete scroll down on page until you see the SmartLink Security application 6 Download the application to the device and open To sign in use the user name and password that was designated to the user on the web portal ...

Page 4: ... front door name that zone Front Door Enrolling Installing NanoMax 1 Log into the demo portal at cloud securenettech com Ensure the panel communication status is green and reads as online 2 Select Helix Panel Settings underneath Alarm System on the right side of the page 3 Select the Zones Add Device form tab at the top ...

Page 5: ...rial Number slottotherightofthezonename Nospaces are needed Select Add Device by Serial Number below to enroll ENSURE the serial number is correct 7 The zone is now named enrolled Once device is enrolled you can now install to the designated location 8 Remove the NanoMax s battery tab to activate the sensor Simply pull the tab away from the housing to enable contact with battery ...

Page 6: ...r code on your smart device or keypad If Helix doesn t sound refer back to the Demo Portal to trouble shoot the problem Enrolling and Installing PIR Pet Immune 1 Return to the Add Device by Serial Number heading Name the zone in which the PIR will be installed For example Downstairs PIR 2 Remove the cover on the PIR to expose the serial number It is located on the battery bucket Enter the serial n...

Page 7: ...e 5 To test the PIR arm Helix to Arm Away mode on keypad or smart device Wait 2 5 mins before entering the room the PIR is installed in Walk in front of PIR If Helix sounds disarm If Helix does not sound return to the Dealer Portal to trouble shoot Enrolling and Installing Smokes COs 1 Return to the Add Device by Serial Number heading Name the zone in which the Smoke will be installed For example ...

Page 8: ...Enter serial number into the form and select Add Device by Serial Number when complete 4 Activate the sensor by removing the battery tab Lift battery door cover remove tab replace cover Ensure battery connection 5 Install the Smoke or CO in the designated zone location Refer to manuals for proper placement and regulations ...

Page 9: ... to enroll the HeliPAD 3 Select the HeliPAD s menu button and options to enroll should appear Helix LEDs will appear as such before enrollment 4 Select the checkmark on HeliPAD to enroll with theHelixpanel Onceenrolled the Unenroll option should appear on HeliPAD s screen Mount HeliPAD 6 To learn more about HeliPAD s settings or how to change its disarm code refer to the product manual and Helix I...

Reviews: