57
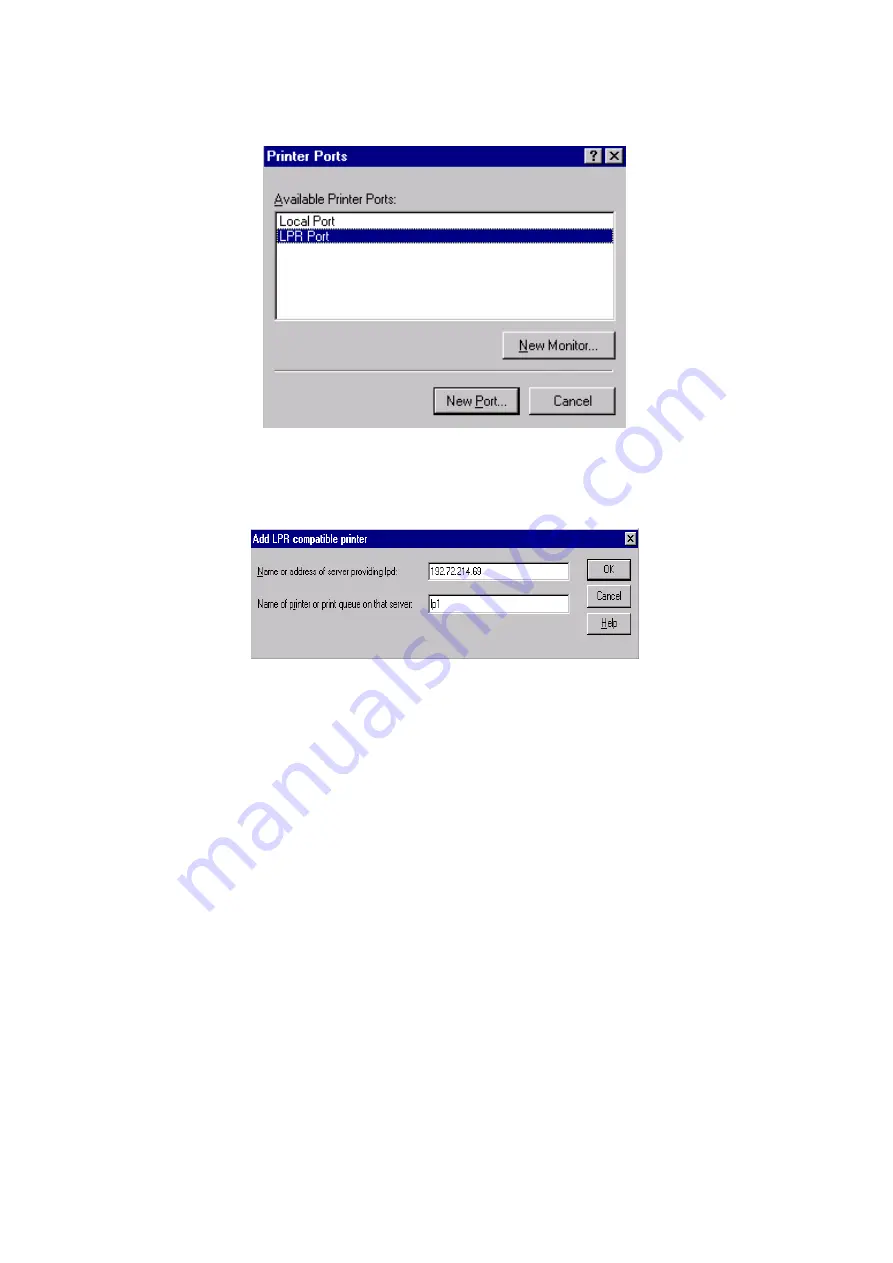
5. From the Printer Ports box as shown in the following picture, select the
LPR Port
.
6. The Add LPR compatible printers box will then appear as shown in the following picture.
Type in the IP address assigned to the print server in the
Name or address of server
providing lpd
box.
7. In the
Name of printer or print queue on that server
box, type in a printer name, for
example, lp1. Click
OK
.
8. In the Printer Ports box, select
Close
.
9. Click
Next
.
10. Select the appropriate printer manufacturer and printer type list and click
Next
.
11. Select
Shared
. Type in a new
Share Name
or leave it in default and click
Next
.
12. A message reading, “After your printer is installed, Windows can print a test page so you
can confirm that the printer is set up properly.”, Select
Yes
(Recommended)
and click
Finish
.
13. Done.
Summary of Contents for RP-2801
Page 6: ...6 Reset Button To printer Network Environment Wired Network with Print Server ...
Page 11: ...11 ...
Page 17: ...17 16 Right click select Properties Ports and verify that the print server s port appears ...
Page 64: ...64 13 Choose the model of printer and click Forward 14 Done ...
Page 67: ...67 4 Click Browse and select the firmware file 5 Click Upgrade 6 Done ...
Page 75: ...75 3 Click Add ...
Page 78: ...78 2 Now you can find the print server from the SMB workgroup of Windows Then double click it ...
Page 79: ...79 3 Double click it again 4 Now you have to install the printer s driver ...
Page 80: ...80 5 Choose it from the Add Printer Wizard 6 Install printer successfully ...
Page 82: ...82 Subnet Mask 255 255 255 0 Reset Button To printer ...


