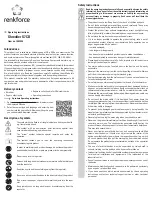
Operating elements
1
2
3
4
1 Input slot for credit cards/CDs/DVDs
2
CLEAR
button (release function)
3
AUTO / OFF / REV
selection switch
4 Paper input slot
Operation
Do not reach into the input slot.
Do not insert any paper clips or other metallic objects into the input slot.
Persons with long hair must make sure to maintain sufficient distance from
the input slot.
Keep ties, scarfs, loose clothing and long chains or bracelets away from
the input slot.
Do not use any spray bottles/cans in the direct vicinity of the product.
Do not let the product run continuously for more than 2 minutes in order to
avoid overheating the motor.
If the collection container is full before 2 minutes have elapsed, turn the
product off. Empty the collection container before continuing use.
Allow the product to rest for at least 60 minutes before continuing use.
a) Installation
• Unpack all parts and remove any existing films.
• Attach the small collection container for credit cards/CDs/DVDs to the holders on
the front of the big collection container.
• Place the cutting unit on the big collection container. Observe the recesses in the
collection container. The cutting unit must perfectly lock into the recesses on the
collection container. The input slot for credit cards/CDs/DVDs (1) must be positioned
exactly on top of the small collection container. Make sure not to squeeze your
fingers between the collection container and the cutting unit and not to jam the
mains cable.
b) Positioning and connection
• Place the product on a stable, even, nonslip surface.
• Make sure the
AUTO
/
OFF
/
REV
selection switch (3) is at
OFF
position in the center.
• Connect the power plug to an appropriate power outlet.
c) Shredding paper
Insert a maximum of 7 pieces of paper (size DIN A4) with a maximum
grammage of 70 g/m
2
into the input slot at the same time.
Do not shred self-stick notes or paper with residual adhesives.
• Slide the
AUTO
/
OFF
/
REV
selection switch to
AUTO
position on the left.
• Then carefully insert the paper into the input slot (4). The paper is pulled in
automatically and shredded. When shredding paper that is smaller than the
maximum input slot width, always feed the paper in the center of the paper input
slot.
• When finished, slide the
AUTO
/
OFF
/
REV
selection switch to
OFF
position in the
center.
d) Shredding credit cards, CDs/DVDs
Only shred one credit card/CD/DVD at a time.
• Slide the
AUTO
/
OFF
/
REV
selection switch to
REV
position on the left.
• Open the cover of the credit card/CD input slot (1).
• Carefully insert one single credit card or CD/DVD into the input slot. The credit card
or CD/DVD will be pulled in and shredded automatically. Make sure to insert credit
cards with the wide side first, in order to shred the magnetic strip.
• When finished, slide the
AUTO
/
OFF
/
REV
selection switch to
OFF
position in the
center. Close the cover of the input slot.
e) Removing a paper jam
The product features an overheat protection mechanism that is triggered in case of
continuous operation of more than 2 minutes and in case the maximum amount of
paper (7 sheets/each 70 g/m
2
) has been exceeded. In such a case the paper input slot
will be jammed.
When having used the product continuously for more than 2 minutes, leave the
product to cool down for at least 60 minutes until next use.
If the overheat protection mechanism has been triggered or paper is jammed, proceed
as follows:
• Slide the
AUTO
/
OFF
/
REV
selection switch to
OFF
position and disconnect the
mains plug from the wall socket.
• Pull and remove the excess paper from the top of the shredder.
• Connect the mains plug to the wall socket.
• Slide the
AUTO
/
OFF
/
REV
selection switch to
REV
position to the right.
• The shredding unit now runs in the opposite direction and pushes the jammed
paper back out. Slide the
AUTO
/
OFF
/
REV
selection switch to
OFF
position.
Remove the excess paper. Keep your hand and fingers away from the input slot in
order to avoid injury.
If the paper jam cannot be removed completely, follow the instructions
in chapter “d) Release function”.
• Slide the
AUTO
/
OFF
/
REV
selection switch to
AUTO
position on the left, in order to
continue shredding.
f) Release function
Shredding fibrous paper can cause the cutting unit to soil heavily or to jam. In such a
case, slide the
AUTO
/
OFF
/
REV
selection switch to
REV
(reverse) position for 2 to 3
seconds and then to
AUTO
position. Press the
CLEAR
button (2) for 2 to 3 seconds.
Repeat these steps 2 to 3 times in order to remove any residue paper from the cutting
unit.
Troubleshooting
Problem
Cause
Solution
In
AUTO
mode, the
shredding unit runs
without interruption.
The collection container
is full. Paper in the
shredding unit is not
drawn in.
Set the selection switch
to
OFF
position and
disconnect the mains
plug from the wall socket.
Empty the container.
Some bits of paper are
left in the shredding unit
after shredding.
The bits of paper are
stuck between the
blades.
Set the selection switch
to
REV
.
The automatic paper feed
is not working after the
shredding unit was run in
REV
mode.
Some bits of paper are
blocking the automatic
feed.
The automatic paper feed
stops even though there
is paper in the input slot.
The paper was inserted
into the input slot at a
slant.
Insert the paper into the
input slot straightly.
The paper is too soft,
too thin, damp or too
crinkled.
Fold, dry or smoothen the
paper.
The product is not
working even though
there are no bits of paper
left in the shredding unit.
The motor is overheated.
Let the product cool
down for at least
60 minutes before using
it again.


