background image

4

RGH22 RGS20 installation guide

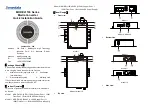
RGS20 scale installation drawing

Dimensions and tolerances in mm

NOTE: 

The surface roughness of the scale mounting surface must be ≤3.2 Ra.


   The parallelism of the scale surface to the axis of motion (readhead rideheight variation) must be within 0.05 mm.

Overall length (ML + 70)

Scale length (ML + 40)

Measuring length (ML)

Readhead optical centreline
Reference mark sensor position (inside readhead)

0.5

0.2/100

F

>5

>5

<10

30

13

(RGS20-S)


6.3 

(RGS20-P)

F = axis of motion

22

14

8

10

5

Optional bolted reference mark actuator 

(A-9531-0287)

<10

Q limit

P limit

Reference mark actuator position range

>3

>3

Summary of Contents for RGH22

Page 1: ...Installation guide M 9531 9818 01 B RGH22 RGS20 linear encoder system...

Page 2: ...g 4 Scale application 5 End clamps 5 Reference mark and limit switch actuator installation 6 Readhead mounting and alignment 6 Reference mark set up 7 Limit switch 7 Output signals 7 Speed 8 Electrica...

Page 3: ...formation relating to the RGH22 encoder range can be found in the RGH22 encoder system Data sheet L 9517 9676 This can be downloaded from our website www renishaw com encoder and is also available fro...

Page 4: ...ropan 2 ol CH3CHOHCH3 Acetone CH3COCH3 Methylated Spirits Chlorinated Solvents RGS20 100 mm NOTE Ensure self adhesive tape is on outside of bend Minimum bend radius Operating Storage System 55 C 0 C S...

Page 5: ...2 2 4 7 max 5 2 Pitch tol 1 0 8 44 38 3 Readhead to scale clearance Rideheight 0 8 0 1 A Detail A Scale surface 7 6 3 13 9 27 3 6 11 6 17 Dimensions measured from substrate Alternative mounting faces...

Page 6: ...e to the axis of motion readhead rideheight variation must be within 0 05 mm Overall length ML 70 Scale length ML 40 Measuring length ML Readhead optical centreline Reference mark sensor position insi...

Page 7: ...nting bracket using M3 screws Place the shim supplied with the readhead between the applicator and substrate to set the nominal height NOTE Scale applicator can be mounted either way round to enable e...

Page 8: ...uator A 9531 0250 Epoxy mounted reference mark actuator A 9531 0287 Screw mounted reference mark actuator Readhead mounting and alignment Mounting brackets The bracket must have a flat mounting surfac...

Page 9: ...ed Orange Blank LED flash during reference mark traverse only NOTE Dual limit versions P Q R S and H utilise the black wire pin 11 as the P limit output The E alarm signal on these versions is only av...

Page 10: ...t ensure they comply with the lowest recommended counter input frequency BID DIR connections Function Signal Colour 15 way D type plug L 12 way circular V 12 way circular coupling W 16 way in line con...

Page 11: ...sulated from each other If the inner and outer shields are connected together this will cause a short between 0 V and earth which could cause electrical noise issues Recommended signal termination Dig...

Page 12: ...atability 0 1 mm typical P Q Length of actuating magnet Repeatability 0 1 mm typical Q Asynchronous pulse Q Between 50 and 70 signal level X is a duty cycle 20 m duration Time spent at 5 V increases w...

Page 13: ...5 V increases with signal level At 70 signal level VX is nominal 5 V External set up voltage at VX 5 nom 50 70 100 0 0 signal level 20 m 90 108 18 0 Incremental 2 channels V1 and V2 differential sinu...

Page 14: ...egrated to achieve EMC compliance In particular attention to shielding arrangements is essential Scale specifications Scale type RGS20 S Reflective gold plated steel tape with protective lacquer coati...

Page 15: ...ls please visit our main website at www renishaw com contact RENISHAW and the probe symbol used in the RENISHAW logo are registered trade marks of Renishaw plc in the United Kingdom and other countrie...

Reviews: