background image

6

CLEANING YOUR TRIMMER

After each use, brush or blow accumulated hair from the cutting unit.

CLEANING INSIDE THE HANDLE

For a more thorough cleaning, remove hairs from inside the handle. 
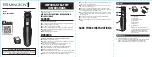
Make sure the trimmer is OFF and push down the lock to release the trimmer 
head. (Figure F)

1.  Remove trimmer head and clean both head and handle tip with brush.
2.  Apply a drop of mineral oil or baby oil to the top of the cutting blades.
3.  Replace trimmer head and snap into place by pushing the lock back up.

Note:

 This product does not contain any user-serviceable parts. Your trimmer 

is designed to give you comfortable use. To ensure that you get optimal 
performance from it, follow these simple cleaning and lubrication tips.

This product is not suitable to use in the bath or shower.

This product conforms to radio frequency interference requirements. 

Any product purchased and used commercially carries a limited 90 Day Warranty.

F

Summary of Contents for trim&shape MPT3801AU

Page 1: ...Beauty Trimmer MPT3801AU USE CARE MANUAL PLEASE READ PRIOR TO USE To register your product go to remington products com au remington co nz...

Page 2: ...vision or instruction concerning use of the appliance by a person responsible for their safety Keep the appliance away from the edge of table or countertops and out of reach of children and persons wi...

Page 3: ...Light Switch 6 Battery compartment not shown 7 Protective cap 8 Eyebrow comb guide 3 MPT3801AU BEAUTY TRIMMER USE CARE INSTRUCTION MANUAL Thank you for purchasing your new Remington Beauty Trimmer Ins...

Page 4: ...t Dead batteries should be removed immediately and disposed of properly Do not use rechargeable batteries The lower voltage in recharged batteries impairs the performance of the cutting unit BEFORE US...

Page 5: ...Figure E Using the Pivoting Head 1 Remove the protective cover and be sure the trimmer is turned off 2 Gently move the trimming head to the right Be sure the head is locked into position prior to use...

Page 6: ...p of mineral oil or baby oil to the top of the cutting blades 3 Replace trimmer head and snap into place by pushing the lock back up Note This product does not contain any user serviceable parts Your...

Page 7: ...the consumer has under either the Australian Consumer Law or the CGA The original purchaser of the Goods is provided with the following Warranty subject to the Warranty Conditions 3 We warrant the Goo...

Page 8: ...e connected to the electrical voltage requirements as specified in the ratings label located on the Goods 11 This warranty does not cover the cost of claiming under the warranty or transport of the Go...

Reviews: