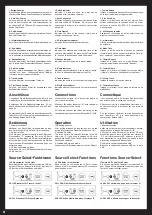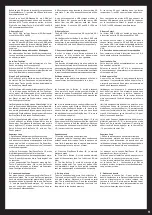
10. Track-Drehregler
Dieser Drehregler wird betätigt um einen Track oder
einen Ordner auszuwählen, abhängig davon welche
der beiden folgenden Funktionen ausgewählt wurde.
Track-Funktion: Mit dieser Funktion kann man durch
vor- und zurückdrehen des Reglers einzelne Tracks
auswählen. Wird der Drehregler gedrückt und dann
gedreht, so bewegt sich der Player in 10er-Schritten
zwischen den Tracks.
Folder-Funktion: Mit dieser Funktion kann man
durch vor- und zurückdrehen des Reglers einzelne
Ordner auswählen, sofern diese auf der SD oder
SDHC-Karte bzw. das USB-Speichermedium ange
-
legt worden sind.
11.Pitch-On/Off-Taste
Durch Betätigen dieser Taste kann man die Pitch-
Funktion ein- und ausschalten. Ist die Funktion ein
-
geschaltet, so leuchtet die Taste auf.
12.Pitch-Select-Taste
Durch Drücken dieser Taste kann man einen Pitch-
Bereiche von +/-4%, 8%, 16% auswählen. Bei aus
-
gewähltem Pitch-Bereich leuchtet die entsprechen-
de LED auf.
13.Pitch-Bend-Tasten
Die Abspielgeschwindigkeit erhöht sich solange die
„+“-Taste betätigt wird. Wird die Taste losgelassen,
so kehrt die Abspielgeschwindigkeit in das Aus
-
gangstempo zurück. Die Abspielgeschwindigkeit
verringert sich solange die „-“-Taste betätigt wird.
Wird die Taste losgelassen, so kehrt die Abspielge
-
schwindigkeit in das Ausgangstempo zurück.
14.Search-Tasten
Durch Betätigen dieser Tasten kann man innerhalb
eines Tracks schnell vor- oder zurückspulen.
15.Play/Pause-Taste
Diese Taste wird verwendet um einen Track wieder
-
zugeben oder um in den Pause-Modus zu wechseln.
Die Taste leuchtet auf, wenn sich der Player im Pau
-
se-Betrieb befindet.
16.Cue-Taste
Drückt man während der Wiedergabe die Cue-Taste,
kehrt man an den Anfangspunkt der Wiedergabe zu
-
rück. Die Wiedergabe erfolgt ab dem gespeicherten
Cue-Punkt. Befindet sich das Gerät im Pause-Mo
-
dus, so kann man mit dem Jog Wheel -17- einen neu
-
en Anfangspunkt bestimmen. Dieser wird durch Be
-
tätigen der Play/Pause-Taste -15- im Frame-Search
Modus oder der In-Taste -3- im Wiedergabe-Modus,
gesetzt. Durch erneutes Drücken der Cue-Taste -16-
kehrt man zum letzten gesetzten Punkt zurück.
17.Jog-Wheel
Das Jog-Wheel wird für drei verschiedene Funktio
-
nen verwendet, je nach ausgewähltem Betrieb.
- Befindet man sich im Pause-Modus so wird das
Jog-Wheel zum Frame-genauen (Framesearch) vor-
und zurück spulen (1/75 Sek.) verwendet.
- Befindet man sich im Wiedergabebetrieb und die
Suchfunktion ist nicht aktiviert, so kann man mit
dem Jog-Wheel temporär die Geschwindigkeit erhö
-
hen oder verringern (Pitch Bend).
- Ist die Suchfunktion aktiviert, so ist es möglich in
-
nerhalb der Tracks schnell vor- und zurückzuspulen
(Quick Search)
18.Ein/Aus-Taste
Diese Taste wird verwendet um das Gerät einzu
-
schalten oder um es in den Standby-Modus zu
schalten.
(a) Im Standby-Modus muss diese Taste betätigt
werden, um das Gerät einzuschalten. Auf dem LCD-
Bildschirm erscheint der Hinweis „Insert Memory
Device“, die SD1-LED leuchtet dann rot auf und die
SD2-LED leuchtet grün auf.
(b) Um das Gerät in den Standby-Modus zu schalten,
muss diese Taste länger als zwei Sekunden gedrückt
werden.
19.Tempo-Lock-Taste
Wenn die Tempo-Lock-Taste gedrückt wird, wird
die ursprüngliche Tonhöhe des Tracks unabhängig
von der eingestellten Geschwindigkeit beibehalten.
Durch erneutes Drücken der Taste, wird die Tempo-
Lock-Funktion deaktiviert.
10. Track Knob
This knob is used to select a track or a folder,
depending on which of the two following functions
has been activated.
Track Mode: In this mode it is possible to select a
track by turning the knob. Pressing the knob and
then turning it the device will skip through the
tracks by 10 tracks per click.
Folder Mode: By turning the knob in this mode it is
possible to select different folders. If such folders
have been installed on the SD or SDHC card or on
the USB storage medium
11. Pitch On/Off Button
By pressing this button one can turn the pitch
function on and off. When turned on the according
LED will be lit.
12. Pitch Select Button
By pressing this button one can set the pitch range
to +/-4%, 8%, 16%. The according LED will be lit
corresponding to the selected pitch range.
13. Pitch Bend Buttons
The speed rises as long as the “+” button is pressed.
If the button is being released the track will return
to its original speed. The speed drops as long as the
“-” button is pressed. If the button is being released
the track will return to its original speed.
14. Search Buttons
By pressing these buttons it is possible to fast
forward and rewind through a track.
15. Play/Pause Button
This button must be pressed in order to start a track
or to switch to pause mode. If the device is in pause
mode this button will flash.
16. Cue Button
Pressing the Cue Button during playback provides a
return to the position at which playback was started.
Playback starts from the programmed cue point.
If the device is in pause mode one can determine
a new starting point via the Jog Wheels -17-. This
can be set by pressing the Play/Pause button -15-
while in frame search mode or by pressing the In
Button -3- while in playback mode. By pressing the
Cue Button again the track will return to the last
set point.
17. Jog Wheel
The Jog Wheel serves three functions, depending on
the selected mode.
While in pause mode the Jog Wheel is used for
frame search (1/75 sec.).
While in playback mode with deactivated search
function it is possible to temporarily pitch bend a
track.
While in activated search mode it is possible to fast
forward and rewind a track.
18. Power Switch Button
This button is used to switch the power on or to put
the device in standby mode.
(a) In standby mode one must press this button in
order to turn the device on. “Insert Memory Device”
will be shown on the display, the SD1 LED will glow
red and the SD2 LED will glow green.
(b) In order to put the device in standby mode it is
necessary to press and hold this button for more
than 2 seconds.
19. Tempo Lock Button
By pressing this button the original key will be
kept when changing a track‘s pitch. By pressing
this button again the tempo-lock function will be
deactivated.
6
10.Molette Track
Manipuler cette molette pour sélectionner une
piste ou un classeur, selon la fonction respective
sélectionnée.
Fonction Track : cette fonction permet de
sélectionner différentes pistes en tournant la
molette à gauche ou à droite. Enfoncer la molette
et la tourner pour naviguer par étapes de 10 parmi
les pistes. Si la carte SD ou SDHC ou supports de
domées tels que baton USB.
Fonction Folder : si la carte SD/SDHC on supports
des données tels que báton USB est organisée en
classeurs, cette fonction permet d‘effectuer la
sélection en tournant la molette.
11.Touche Pitch-On/Off
Appuyer sur cette touche pour activer ou désactiver
la fonction Pitch. Lorsque la fonction est activée, la
touche est allumée.
12.Touche Pitch-Select
Appuyer sur cette touche pour sélectionner une
gamme de vitesse de +/-4%, 8%, 16%. La DEL
respective de la gamme de vitesse sélectionnée
s‘allume.
13.Touches Pitch-Bend
La vitesse de lecture augmente tant que la touche
„+“ est actionnée. Lorsque vous relâchez la touche,
la vitesse de lecture retourne à la vitesse initiale.
La vitesse de lecture diminue tant que la touche „-“
est actionnée. Lorsque vous relâchez la touche, la
vitesse de lecture retourne à la vitesse initiale.
14.Touches Search
Appuyer sur ces touches pour avancer ou reculer
rapidement dans une piste.
15.Touche Play/Pause
Cette touche sert à lancer la lecture d‘une piste ou
à commuter en mode Pause. Lorsque le lecteur est
en mode Pause, cette touche s‘allume.
16.Touche Cue
Appuyer sur la touche Cue pendant la lecture pour
retourner au point initial de la lecture. La lecture
reprend alors à partir du point Cue mémorisé. Si le
lecteur est en mode Pause, la Jog Wheel -17- permet
de définir un nouveau point initial. Pour activer ce
point, il faut actionner la touche Play/Pause -15- en
mode Frame-Search ou la touche In -3- en mode de
lecture. Appuyer une fois de plus sur la touche Cue
-16- pour repasser au dernier point défini.
17.Molette Jog-Wheel
En fonction du mode sélectionné, la molette Jog-
Wheel s‘utilise pour trois différentes fonctions.
- En mode Pause, la Jog-Wheel s‘utilise pour
rechercher
un
point
Cue
avec
précision
(Framesearch, 1/75 sec.).
- En mode de lecture, si la fonction de recherche
n‘est pas activée, la molette Jog-Wheel permet
d‘augmenter ou de réduire momentanément la
vitesse (Pitch Bend).
- Si la fonction de recherche est activée, la molette
permet la recherche rapide en avant et en arrière
dans la piste (Quick Search)
18.Touche Marche/Arrêt
Cette touche s‘utilise pour allumer l‘appareil ou le
commuter en mode Standby.
(a) En mode Standby, il faut appuyer sur cette
touche pour éteindre l‘appareil. L‘écran ACL affiche
„Memory Device“, la DEL SD1 s‘allume en rouge et
la DEL SD2 en vert.
(b) Pour commuter l‘appareil en mode Standby, il
faut enfoncer cette touche pendant plus de deux
secondes.
19.Touche Tempo-Lock
Lorsque la touche Tempo-Lock est activée, la
hauteur de ton initiale de la piste est conservée
indépendamment de la vitesse réglée. Il faut ensuite
appuyer une nouvelle fois sur cette touche pour
désactiver la fonction Tempo-Lock.
Summary of Contents for SMP-1
Page 12: ......


