4
4.2 Basic Instructions - Riser Mounting Bracket
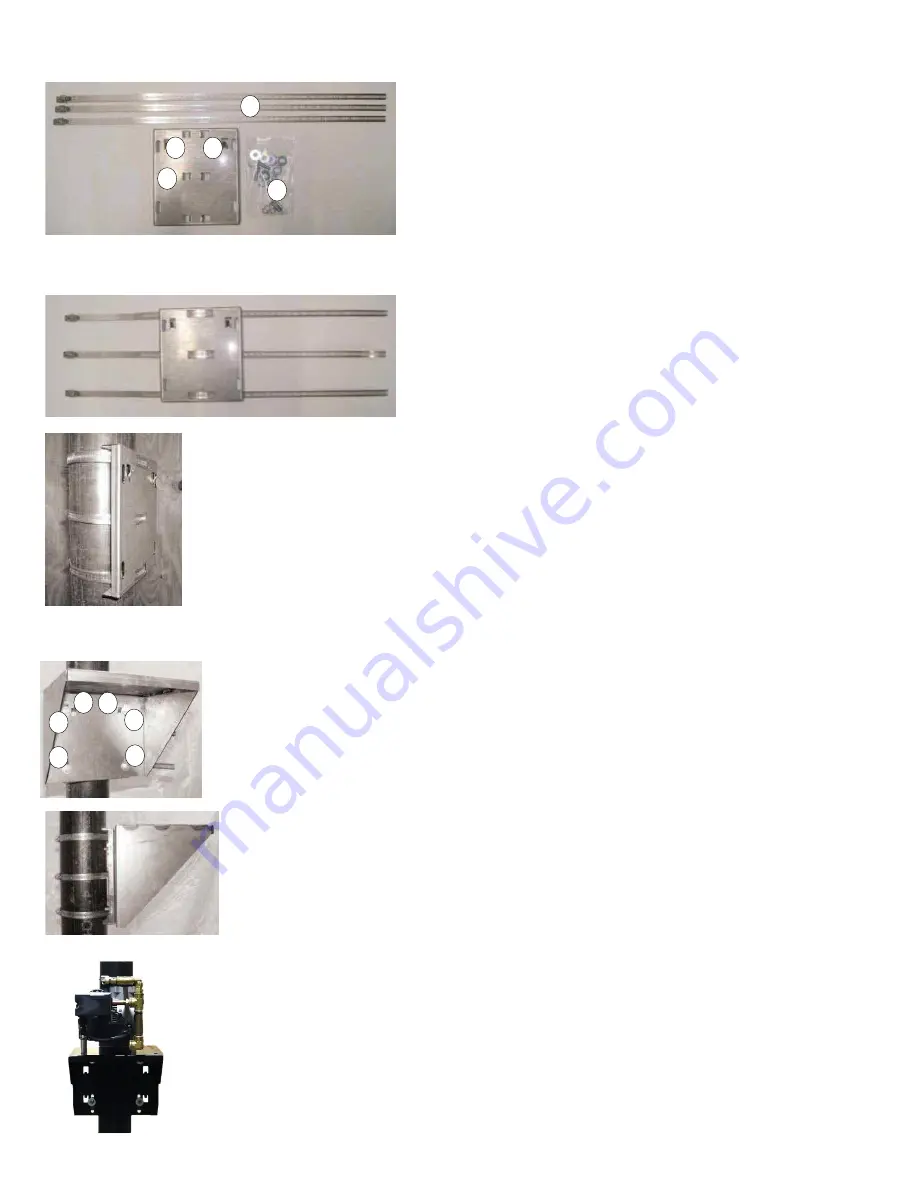
Riser Mounting Kit (RMK) Contents:
A - Mounting Straps:
Each RMK comes with 3 mounting straps.
B - Riser Mounting Plate
C - Nuts, Bolts, and Washers.
Necessary for mounting the QRM2- Bracket.
D - Mounting Hooks
Riser Mounting Kit (RMK) Mounting:
Bring the mounting straps in from the back side
through the left hole. Pass over the front of the
Plate and put the strap through the right. Repeat
for straps
2
and
3
.
Ensure that the hooks are at the top when installed and that all three straps are fastened tight against
the riser (no slack).
Straps must be 90° angle to riser for proper installation.
IMPORTANT NOTE:
Torque straps screws to
35
to
40 in - lbs.
4.3 Basic Instructions
– QRM2- Mounting Bracket
1 & 2
- Use the rectangular holes on the bracket to rest it on the riser plate hooks.
A, B, C, D -
Securely fasten the QRM2- compressor bracket to the riser plate through the slots
using the hardware from the RMK (riser mounting kit). A socket extension may be required to insert
the bolts.
IMPORTANT NOTE:
Torque bolts to
12 ft - lbs
Before mounting the compressor, check that the top surface of the QRM2- bracket is level and
parallel to the top edge of the riser plate.
The compressor comes factory mounted to the compressor bracket.
NOTE:
Each QRM2- model has
different mounting feet. Mounting holes for all compressors are provided on the QRM2- bracket.
IMPORTANT NOTE:
Torque compressor mounting bolts to
12 ft - lbs
B
A
D
D
C
1
2
A
B
C
D


