background image

Installation

40

Connect Communication

REFUsol 50K-3T

982081 | 03 | 2021-03

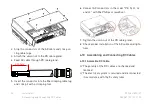
1. Slightly loosen the union nut of the PG screw con

-

nection.

2. Remove the blind plug from the PG gland and feed 

the shielded network cable through the cable gland 
and seal.

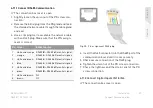
3. Plug in the terminal strip for the digital inputs.
4. Assemble the network cable and connect the wires 

to the digital inputs of the terminal strip IN1, IN2, 
IN3, IN4 and GND.

5. Tighten the union nut of the PG screw connection.
6. Check the tightness and the strain relief of the PG 

screw connection.

4.11.3Connect Relay Cables

The 

REFUsol 50K-3T

 has a multifunction relay on the 

communication board, with a configurable output. It 
can be configured as a normally open contact as well 
as a normally closed contact. The relay has 4 different 
control functions that are set via the LCD display.

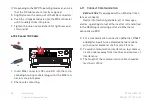
The connection box cover is open.

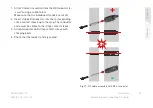
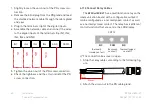
1. Strip the relay cables according to the following fig

-

ure.

2. Attach the union nut to the PG cable gland.

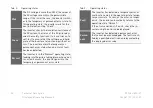
IN1 

IN2 

IN3 

IN4 

GND 

DRM0 

100%


60%


30%


0%


CNT10

NC

(common 

contact)

(normally open 

contact)

(normally 

closed contact)

COM

NO

8 mm

20 mm

Summary of Contents for 851P050.300

Page 1: ...Document No Issue 982081 03 Issue Date 2021 03 Operating manual Solar Inverter REFUsol 50K 3T Product REFUsol 50K 3T Language English English Deutsch ...

Page 2: ...vent of the grant of a patent utility model or design Liability The data specified is only used to describe the product and should not be interpreted as warranted characte ristics in the legal sense The right to change the con tent of this documentation and the availability of the products are reserved Publisher REFU Elektronik GmbH Marktstraße 185 72793 Pfullingen GERMANY 49 7121 4332 0 49 7121 4...

Page 3: ...ules When Working on Electrical Systems 9 3 Technical Description 10 3 1 Functionality of the Inverter 10 3 2 Cooling Concept 12 3 3 Requirements for the Infrastructure 14 3 4 Compatible Grid Types 15 3 5 Components and Dimensions 16 3 6 Communication Interfaces 20 3 7 Display and Operating Elements 22 3 7 1 Keys 22 3 7 2 Status LEDs 22 3 7 3 Information of the LCD display 23 3 7 4 Menu Display 25...

Page 4: ...44 5 2 Commissioning the Inverter 44 6 Operation 44 6 1 Operation Navigation and Key Functions 44 6 2 Main Menu v2 6 45 6 2 1 Main Menu 1 Enter Setting 45 6 2 2 Main Menu 2 Event List 49 6 2 3 Main Menu 3 System Info 49 6 2 4 Main Menu 4 System Time 49 6 2 5 Main Menu 5 Software firmware Update 50 7 Error Messages and Troubleshooting 51 7 1 Maintenance 65 7 1 1 General Warnings 65 7 1 2 Maintenanc...

Page 5: ...n To enable you to handle your product safely and quickly with these instructions uniform warnings symbols designations and abbreviations are used 1 3 1 Symbols The following symbols indicate instructions which are intended to make the instructions easier to under stand Tab 1 Symbols signs Symbol Meaning Useful information on the optimal and most eco nomical use of the product Prerequisite for an ...

Page 6: ...SIGNAL WORD WARNING CATEGORY Type and source of danger Consequences of ignoring the warnings Measures required to avoid the danger DANGER Leads directly to death or serious personal injury if ig nored Follow the warnings to avoid death or serious injury WARNING May result in death or serious personal injury if ignored Follow the warnings to avoid serious injuries CAUTION May cause minor personal i...

Page 7: ...ore installing and using the product 2 2 Rules for Safe Installation and Operation Do not attempt to install or operate the product without proper training Ground the product properly Ground the metal supporting frame of the PV mod ules using potential equalization Only use PV modules of class A according to IEC 61730 and of the same type Connect all cables properly Before switching on check the A...

Page 8: ... therefore only be carried out by an appropriate specialist or a trained person under the supervision of a specialist A skilled person is a person who on the basis of his professional training his knowledge and experience as well as his knowledge of the relevant regulations can assess the work assigned to him recognize possible dangers and take suitable safety measures 2 7 General Safety Instructi...

Page 9: ...n determined that it complies with country spe cific rules regulations safety regulations certifi cates and application regulations 2 8 Personal Protective Equipment REFU Elektronik GmbH recommends to wear the following personal protective equipment Safety shoes Protective gloves If required transport aid Safety goggles Observe the instructions of the respective manufac turer All components of the...

Page 10: ...the input board These can be operated in parallel mode or in independent mode The input board provides extensive functions including insulation monitoring DC voltage and cur rent monitoring and reverse polarity protection EMC filtering is also performed on this board to suppress unwanted noise levels at the DC input The DC DC boost converter controls the level of the DC voltage which is fed to the...

Page 11: ...he communication of the inverter with other IT devices PC smartphone and web portals Depending on the design of the PV system and the wiring of the individual PV modules the PV strings can be connected to three MPP trackers and operated in parallel mode or independent mode Independent mode default If different PV outputs are expected at the three MPPT inputs due to shading or different orientation...

Page 12: ...Technical Description 12 Cooling Concept REFUsol 50K 3T 982081 03 2021 03 3 2 Cooling Concept Fig 4 Cooling of the inverter ...

Page 13: ...SO 3 IN1 IN2 A B C D IN3 A B C D A B C D A B C D A B C D A B C D ISO 1 DC SPD DC switch DC EMC filter DC DC booster Isolation monitoring AC residual current detection DC AC inverter AC grid relais AC EMC filter AC output microSD card Ethernet WiFi optional RS485 In Out Remote control Alarm optional Display and control panel Control board Communication DC input ...

Page 14: ...installations for handling substances hazardous to water chemicals prohibi tion ordinance technical instructions for noise pro tection and regional building regulations The REFUsol 50K 3T has 3 independent MPP track ers All PV modules connected to the same MPPT should be of the same type and have the same ori entation When planning the system selecting operating equipment installation commissionin...

Page 15: ...s The REFUsol 50K 3T is compatible with the TN S TN C TN C S and TT grid types When using the TT mains the voltage between the neutral conductor and earth should be less than 30 V Fig 6 Overview of the grid types PEN L1 L2 L3 N PE L1 L2 L3 PEN TN S TN C REFUsol 20K 2T 33K 2T REFUsol 20K 2T 33K 2T L1 L2 L3 N PE L1 L2 L3 N PE TN C S TT REFUsol 20K 2T 33K 2T REFUsol 20K 2T 33K 2T Transformer Transfor...

Page 16: ... 3T 1 DC switch 2 DC connection 3 DC connection 4 Relay contact digital input 5 RS485 input cable gland 6 RS485 output cable gland 7 Ethernet or WiFi interface 8 AC cable gland 9 Inverter bracket 10 Pressure compensation membrane 11 Heat sink with fans 12 PV connection IN3 MPPT3 13 PV connection IN2 MPPT2 14 PV connection IN1 MPPT1 RS485 2 RS485 2 WiFi GPRS RS485OUT RS485IN RELAY IO ...

Page 17: ...2081 03 2021 03 English Deutsch Fig 9 Parts of the REFUsol 50K 3T 1 Inverter housing cover 2 LED display with keys and status LEDs 3 Connection box cover Fig 10 Connection box open 1 2 3 1 Communication board 2 AC output connection 3 DC SPD Surge protection device 3 2 1 ...

Page 18: ...cription 18 Components and Dimensions REFUsol 50K 3T 982081 03 2021 03 Fig 11 Structure of the type code Fig 12 Dimensions front view Rated output power 50K 3T Number of MPP trackers REFUsol Brand name 751 mm 721 mm ...

Page 19: ...Technical Description 19 Components and Dimensions REFUsol 50K 3T 982081 03 2021 03 English Deutsch Fig 13 Dimensions side view Fig 14 Dimensions rear view 298 mm 285 mm ...

Page 20: ... mm 5 min Model No REFUsol 50K 3T 851P050 300 Max DC input voltage Operating input voltage range 1 000 V 250 960 V 40 A 30 A 30 A 48 A 36 A 36 A 3 N PE 400 V 80 A 50 60 Hz 50 kVA 0 8 ind 0 8 cap IP65 25 60 C Class I Max current per MPPT Max short current per MPPT Nominal grid voltage Max output current Nominal grid frequency Max AC power Adjustable power factor range Type of protection Ambient tem...

Page 21: ...tion 4 GPRS WiFi connection 5 RS485 IN connection 6 RS485 OUT connection 7 microSD card slot 8 Digital inputs 9 Relay connection CNT10 IN2 IN4 IN6 DRM0 5V IN1 IN3 IN5 OUT GND IN2 IN4 IN6 DRM0 5V IN1 IN3 IN5 OUT GND 9 Tab 2 Communication ports digital inputs Terminal connection Designa tion IN1 IN2 IN3 IN4 GND DRM0 Function circuit for power re duction IN1 GND PN 0 IN2 GND PN 30 IN3 GND PN 60 IN4 G...

Page 22: ...K ERROR ON GROUND FAULT Today Total Power kWh kWh kW 100 6 9 12 18 15 21 V A V A 7 1 2 3 4 5 6 8 Status LED 1 Ground fault detection 2 Normal operation On 3 Alarm fault 4 OK key Confirm selec tion or value 5 key Menu level downwards 6 key Menu level upwards 7 ESC key Cancel or return 8 LCD display Key Description OK Return to the previous menu or open up the main menu via the standard display One ...

Page 23: ... green flashing Waiting or test state on Normal operation inverter in feed mode off Fault or permanent fault condition ERROR red flashing Fan error on Inverter in fault state off Normal operation inverter in feed in operation Status LED Operating status Description 1 2 1 Operating status and communication status 2 Real time measured values AC and DC mains 1 Modbus address 2 RS485 interface active ...

Page 24: ...perature 6 Flashes during frequency and power derating Lights up during remote shutdown 4 2 3 1 5 6 1 Lights up when DC voltage exceeds 250 V 2 Measuring channel MPPT1 MPPT2 IN1 IN2 3 DC voltage and current per measuring channel changes every three sec onds 4 Lights up in feed in opera tion normal 5 AC voltage of phases L1 L2 and L3 changes every three seconds 6 AC current of phases L1 L2 and L3 o...

Page 25: ...3 English Deutsch Fig 24 PV yield from 3 a m to 9 p m 3 7 4 Menu Display When the DC voltage exceeds 250 V the inverter starts and the LCD display shows Initializing is dis played Fig 25 Starting the inverter Initializing Wait 10 s Check Normal Feed in operation Fault temporary Permanent ...

Page 26: ...ioning without er rors The inverter enters the temporary or permanent error state when an error or fault has been detected Normal The inverter is in the Normal operating state feeding into the grid is taking place when an er ror or fault occurs the inverter goes into the temporary or permanent error state Fault The inverter has detected a temporary error or malfunction and is in the operating stat...

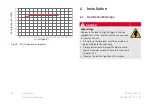
Page 27: ...iciency and Power Diagrams REFUsol 50K 3T 982081 03 2021 03 English Deutsch 3 8 Efficiency and Power Diagrams Fig 26 Efficiency diagram Fig 27 DC voltage power diagram Efficiency Rated output power AC output power kW DC voltage V ...

Page 28: ...AC voltage V DANGER High voltage Danger to life due to high voltages in the live components of the inverter which can cause fa tal electric shocks All work on the product must be carried out by qualified electricians only Always disconnect the inverter before work ing on it and observe the five safety rules see chapter 2 9 Observe the discharge time of 5 minutes ...

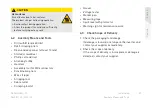
Page 29: ...ool s Hoover Voltage tester Marker pen Measuring tape Spirit level with protractor Warning sign for maintenance work 4 3 Check Scope of Delivery 1 Check the packaging for damage If damage is found do not unpack the inverter and contact your supplier immediately 2 Check the scope of delivery If the scope of delivery is incomplete or damage is detected contact your supplier CAUTION Hot surfaces Risk...

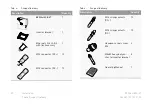
Page 30: ...uantity REFUsol 50K 3T 1 Inverter bracket 1 Ethernet stick LSE 3 with flash memory 1 MC4 connector DC 10 MC4 connector DC 10 MC4 crimp contacts DC 10 MC4 crimp contacts DC 10 Hexagon socket screw M6 2 M8x80 heavy duty an chor for inverter bracket 8 Operating Manual 1 Tab 4 Scope of delivery Description Quantity ...

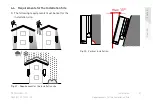
Page 31: ...tion Site REFUsol 50K 3T 982081 03 2021 03 English Deutsch 4 4 Requirements for the Installation Site The following requirements must be met for the installation site Fig 29 Requirement for the installation site Fig 30 Vertical installation max 15 ...

Page 32: ...Usol 50K 3T 4 5 Mounting the Inverter Bracket There are two options for mounting the inverter bracket Vertical wall mounting or wall mounting with a maximum inclination angle of 15 Requirements for the installation location accord ing to IEC 60364 7 712 for photovoltaic power sup ply systems are taken into account during planning 80 cm 50 cm 50 cm 50 cm 20 cm 100 cm 20 cm 30 cm ...

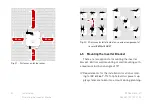
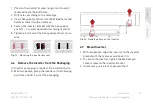
Page 33: ...alent fastening material 5 Tighten all screws of the heavy duty anchors cross wise Fig 33 Mounting the inverter bracket 4 6 Remove the Inverter from the Packaging Inverter packaging is ready at the installation site With two people grasp the inverter at the following positions and lift it out of the packaging Fig 34 Handle options on the inverter 4 7 Mount Inverter 1 With two people align the inve...

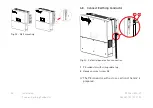
Page 34: ...Usol 50K 3T 982081 03 2021 03 Fig 35 Wall mounting 4 8 Connect Earthing Conductor Fig 36 Potential equalisation connection 1 PE conductor with crimp cable lug 2 Hexagon socket screw M6 The PE conductor with a cross section of 16 mm is prepared 2 1 ...

Page 35: ...cket screw M6 at the marked PE connection with a tight ening torque of 5 Nm 4 If necessary protect the PE connection against cor rosion 4 9 Connect AC Cable Tab 5 AC fuse and minimum cross sections of the AC cables The conductor cross sections shown in the table are minimum re quirements For longer cable lengths the conductor cross sections must be designed accordingly 1 Open the connection box co...

Page 36: ...to the M6 crimping cable lug and crimp it with a crimping tool 6 Connect AC conductors in the order PE N L1 L2 and L3 with M6 Phillips screwdriver 7 Tighten the union nut of the PG cable gland 8 Check proper installation of the AC cable and tight ness 4 10 Assembling and Connecting DC Cables 4 10 1Assemble DC Cable The polarity of the DC cables are checked and marked The electrical system is secur...

Page 37: ... suitable tool Make sure that no individual strands are cut off 2 Insert stripped conductors into the corresponding crimp contact sleeve up to the stop The conductor ends must be visible in the crimp contact sleeve 3 Crimp conductor and crimp contact sleeve with crimping pliers 4 Check that the ladder is firmly seated Fig 37 DC cable assembly with MC4 connector klࡁk ...

Page 38: ...ockets plugs until the MC4 con nectors snap into place 2 Check safe contacting 4 11 Connect Communication REFUsol 50K 3T is equipped with an Ethernet inter face as standard Device information yield data error messages alarms operating status of the inverter is transmitted to the REFUlog monitoring portal via Ethernet or optionally via WiFi For a communication connection Ethernet RS485 and digital ...

Page 39: ... connector into the RS485 port of the communication board until it locks securely 5 Check secure connection of the RJ45 plug 6 Tighten the union nut of the PG screw connection 7 Check the tightness and the strain relief of the PG screw connection 4 11 2Connect Digital Inputs IN1 to IN4 The connection box cover is open Pin Colour RS485 function 1 white and orange RS485 B RS485 differential signal 2...

Page 40: ...he PG screw connection 6 Check the tightness and the strain relief of the PG screw connection 4 11 3Connect Relay Cables The REFUsol 50K 3T has a multifunction relay on the communication board with a configurable output It can be configured as a normally open contact as well as a normally closed contact The relay has 4 different control functions that are set via the LCD display The connection box...

Page 41: ...ess Close the connection box cover using the Allen key and check that it is firmly seated 4 11 4Connecting the Ethernet Stick LSE 3 1 Remove the WiFi GPRS cover of the connection area with a Phillips screwdriver 2 Slightly loosen the cable gland of the Ethernet adapter 3 Plug the shielded RJ45 Ethernet cable into the Ethernet stick 4 Tighten the cable gland and check for tightness and strain relie...

Page 42: ...one is prepared 1 Connect the computer to the access point of the WiFi stick The name of the access point is AP followed by the serial number of the WiFi stick see WiFi stick type plate 2 Enter the password of the WiFi stick see WiFi stick type plate 3 Open the Internet browser and enter the address 10 10 100 254 4 Enter user name admin and password admin The status page opens 5 Click the Wizard b...

Page 43: ...ia WiFi or Ethernet the REFUsol 50K 3T automatically send their operating data to the REFUlog monitoring portal every 5 minutes The Ethernet and WiFi stick have an internal flash memory that temporarily stores the most important data in case of communication interruption As soon as communication is available again the stored data is automatically sent to the REFUlog monitoring portal To view the i...

Page 44: ...t 5 minutes 6 Switch on the DC switch 7 Switch on the AC switch The inverter goes into feed in operation normal 8 Check and document the correct settings of all safety related parameters 6 Operation 6 1 Operation Navigation and Key Functions Fig 39 LCD display with keys and status LED 1 Ground fault detection 2 Normal operation On 3 Alarm Fault 4 OK key Confirm selection or value 5 key Menu level ...

Page 45: ...e menu display The default password is 0001 For the software update and ON OFF control the password is 0715 6 2 Main Menu v2 6 6 2 1 Main Menu 1 Enter Setting Normal 1 Enter Setting 2 Event List 3 System Info 4 System Time 5 Software Update Normal 1 Enter Setting 1 Set Time 2 Clear Energy 3 Clear Events 4 Set Country Code 5 On Off Control 6 Relay Command1 7 Enable Set Country 8 Set Total Energy in...

Page 46: ...ly becomes effective after the inverter has been restarted 18 Set Power Derating 19 PE Line Control1 20 Set Reflux Power 21 MPPT Scan1 22 Set Election Meter1 23 Logic Interface digital inputs 24 DRMs0 25 Protocol 1 Modbus 9600N 2 USS 57600E 1 Function not available Normal 1 Enter Setting Tab 6 Overview of the available country codes Code Country 000 Germany VDE AR N4105 001 CEI 0 21 Italy 002 Aust...

Page 47: ...gy for more than 24 hours the country code can only be changed after entering a password Contact REFU 013 Germany BDEW 014 Germany VDE 0126 015 Italy CEI 0 16 016 UK G83 017 Greece Island 018 EU EN50438 019 IEC EN61727 020 Korea 021 Sweden 022 Europe General 023 Customer VDE0126 024 Cyprus 025 India 026 Philippines 027 New Zealand 028 Brazil 380V 029 Slovakia VSD 030 Slovakia SSE 031 Slovakia ZSD ...

Page 48: ...mode Set parallel or independent mode of the MPP track ers 11 Set Language Change the language of the user interface of the LCD display 12 Set Start Parameter 16 Relay Test Function not available 17 Set Reactive Power Set the reactive power value 18 Set Power Derating active power reduction Set active power reduction in 19 PE Line Control 22 Set Election Meter Function not available 23 Logic Inter...

Page 49: ...enu 3 System Info The system information interface displays the unit information and important settings 6 2 4 Main Menu 4 System Time Display current system time Handshake no Data bits 8 Stop bit 1 Tab 7 RS485 interface settings REFU USS Parameter Value Main Menu 3 System Info 1 Inverter Type 2 Serial Number 3 SoftVersion software 4 HardVersion hardware 5 Country 6 Input Mode MPPT mode 7 Relay Com...

Page 50: ...rm ware folder to the microSD card directory 6 Insert the microSD card into the microSD card slot of the unit 7 Select the Software update menu in the LCD dis play of the inverter and confirm with OK key 8 Enter password 0715 The system updates the processors DSP1 DSP2 For each processor it displays an OK message af ter success If it indicates Fail switch off the inverter via the DC switch Wait un...

Page 51: ... OK key DSP communication fail If the connection between the control board and the communication board fails the LDC display will show the error DSP communicate fail Tab 8 Event list with error and information messages ID Event name Event description Measure ID01 GridOVP AC voltage in the mains is too high The inverter automatically returns to normal operating status when the AC voltage is again w...

Page 52: ...e cause of the fault has been rectified ID09 PvOVP DC voltage is too high ID06 VLvrtlow AC voltage is too low Check the applied AC voltages if critical voltage conditions persist contact your pow er supply company ID07 ID08 Reserved ID10 IpvUnbal ance DC current is dis tributed asymmet ricallytotheMPPT inputs Check that the PV strings are correctly assigned and connected at both MPPT inputs The ma...

Page 53: ...e PV cables or MC4 connections ID13 GridFault AC mains error If this error occurs frequently check the measured values of the AC network fre quency voltage current on the display ID14 HwBoos tOCP The DC current is too high the hard ware protection is active Check that the DC current is within the maximum limits and check the connection to the MPPT inputs If no troubleshooting is possible contact R...

Page 54: ...ossible con tact REFU Service ID16 AcRmsOCP The AC current is too high ID17 HwADFaultI Grid Error in AC cur rent measure ment ID18 HwADFault DCI Error in DC cur rent measure ment ID19 HwADFault VGrid ErrorinAC voltage measurement ID20 GFCIDevice Fault Error in DC volt age measure ment ID21 MChip_Fault Master chip DSP error ID22 HwAuxPow erFault Auxiliary voltage error ID23 BusVoltZer oFault Measur...

Page 55: ...th MPPT inputs and on the display If no troubleshooting is possible contact REFU Service ID27 VbusUnbal ance DC bus voltage is unbalanced ID28 DciOCP DC current is too high Check if the MPPT mode parallel or independent is set correctly according to the PV system configuration change if necessary When the correct MPPT mode is set switch off the DC switch wait 5 minutes and switch on the DC switch ...

Page 56: ... high Check that the PV strings are correctly assigned and connected at both MPPT inputs The maximum DC currents should be almost symmetrical at both inputs If no trou bleshooting is possible contact REFU Service ID31 ID48 Reserved Tab 8 Event list with error and information messages ID Event name Event description Measure ...

Page 57: ...inverter switch off the DC switch wait 5 minutes and switch on the DC switch again If no troubleshooting is possible contact REFU Service ID50 Consist entFault_F Grid Comparison of AC frequency read ings between master DSP and slave DSP is not consistent failed ID51 Consist entFault_DCI Comparison of DC current readings between master DSP and slave DSP is not consist ent failed Tab 8 Event list wi...

Page 58: ...act REFU Service ID53 Spi CommLose SPI communica tion between the master DSP and the slave DSP is faulty ID54 Sci CommLose SCI communica tion between the master DSP and the slave DSP is faulty ID55 RelayTest Fail Faulty AC relay detected ID56 PvIsoFault The insulation re sistance is too low If the insulation fault occurs frequently and lasts for a long time the insulation resist ance of the PV sys...

Page 59: ...Check the solar radiation conditions and the ambient temperature at the inverter Check the proper function of the cooler dirt and the function of the fans ID58 OverTemp Fault_Boost The boost temp is too high ID59 OverTemp Fault_Env The ambient tem perature is too high ID60 PE Connect Fault Connection error PE conductor Check secure contacting of the PE conductor ID61 ID64 Reserved Tab 8 Event list...

Page 60: ...is possible contact REFU Service ID66 Unrecover BusOVP DC bus voltage an error cannot be reset ID67 UnrecoverIa cRmsUnbal ance AC current is too high a fault can not be reset ID68 Unrecover IpvUnbal ance DC current is asymmetrical a fault cannot be re set ID69 Unrecov erVbusUn balance DC bus voltage is unbalanced an er ror cannot be re set ID70 UrecoverO CPInstantDC AC current is too high a fault ...

Page 61: ...PVInstant The DC current is too high an error cannot be reset ID74 ID77 are internal faults of the inverter switch off the DC switch wait 5 minutes and switch on the DC switch again If no troubleshooting is possible contact REFU Service ID75 Unrecover WRITEEE PROM The EEPROM is not recoverable ID76 Unrecover READEE PROM The EEPROM is not recoverable ID77 Unrecover RelayFail The relay has a permane...

Page 62: ...s too high The inverter automatically reduces the output power if the grid frequency is too high As soon as the grid frequency is back in the regular range derating is inactive again ID83 RemoteDer ating The inverter is in derating power reduction due to external power specification by the utility compa ny The inverter records ID83 in case of remote power derating operation Check the wir ing of th...

Page 63: ... the internal fan is working properly If no troubleshooting is possible contact REFU Service ID87 ID89 Reserved ID90 Fan3 alarm The fan 3 reports an error Check acoustically and visually that the fan in question is functioning correctly If no troubleshooting is possible contact REFU Service ID91 Fan1 alarm Fan 1 reports an error ID92 Fan2 alarm Fan 2 reports an error ID93 Lightning protection alar...

Page 64: ... and switch on the DC switch If no troubleshooting is possible contact REFU Service ID96 RTC clock chip anomaly The internal RTC clock is in error state ID97 Invalid Coun try The set country code is invalid Check if the correct country code is set if not enter the correct country code and re start the inverter Switch off the DC switch wait 5 minutes and switch on the DC switch If no troubleshootin...

Page 65: ... be carried out by qualified electricians only Always disconnect the inverter before work ing on it and observe the five safety rules see chapter 2 9 Observe the discharge time of 5 minutes CAUTION Hot surfaces Risk of burns due to hot surfaces The product can get hot during operation Avoid contact during operation Allow the product to cool down sufficiently before carrying out any work Measures t...

Page 66: ... the inverter in the original carton or use an equivalent carton that is suitable for loads of more than 60 kg 8 3 Store Inverter Store inverters in a dry place with an ambient tem perature between 25 and 70 C Visual inspection and check of all electrical connections 12 months Function test of the insulation monitoring 12 months Checking AC and DC voltages 12 months Checking the starting behaviour...

Page 67: ...t No 50K 3T 851P050 300 Max recommended PV power 66 5 kWp Max input voltage 1 000 V Operating input voltage range 250 V 960 V Start up input voltage 350 V Rated input voltage 600 V Number of independent MPPT 3 Number of DC inputs per MPPT 4 3 3 Rated power MPPT voltage range 530 V 800 V Max power per MPPT input 22 16 16 kW Max current per MPPT 40 30 30 A Max short circuit current per MPPT 48 36 36...

Page 68: ...on at night 1 W Feed in start power 50 W REFUsol Inverter Type Art No 50K 3T 851P050 300 REFUsol Inverter Type Art No 50K 3T 851P050 300 DC switch Integrated Safety protection Anti Islanding DC reverse polarity overtemperature overvoltage over current RCD and insulation monitor ing String monitoring Each MPPT String fuses Protection class Class I Overvoltage category DC II AC III External environm...

Page 69: ...perature 25 to 60 C 45 derating Topology Transformerless Type of protection IEC 60529 IP65 Permissible range of relative humidity 0 100 Max installation height above sea level 4 000 m Noise level 60 dBA Cooling Fan Dimensions H W D 751 721 298 mm Weight 66 5 kg Display and control panel LCD display with keys and status LED Certificates EN 61000 6 2 EN 61000 6 4 EN 61000 3 11 EN 61000 3 12 IEC 6210...

Page 70: ...ted Offenders will be held liable for the payment of damages All rights reserved in the event of the grant of a patent utility model or design The data specified is only used to describe the product and should not be interpreted as warranted characteristics in the legal sense The right to change the content of this documentation and the availability of the products are reserved REFU Elektronik Gmb...

Page 71: ...Solarwechselrichter Dokumentnummer Ausgabe 982081 03 Ausgabedatum 2021 03 Bedienungsanleitung Produkt REFUsol 50K 3T Sprache Deutsch English Deutsch REFUsol 50K 3T ...

Page 72: ...uster oder Designeintragung vorbehal ten Haftung Die angegebenen Daten dienen nur zur Beschreibung des Produkts und sind nicht als zugesicherte Eigen schaften im rechtlichen Sinne zu verstehen Das Recht zur Änderung des Inhalts dieser Dokumentation und der Verfügbarkeit der Produkte bleibt vorbehalten Herausgeber REFU Elektronik GmbH Marktstraße 185 72793 Pfullingen GERMANY 49 7121 4332 0 49 7121 ...

Page 73: ...e Schutzausrüstung 9 2 9 Fünf Sicherheitsregeln beim Arbeiten an elektrischen Anlagen 10 3 Technische Beschreibung 10 3 1 Funktionsprinzip des Wechselrichters 10 3 2 Kühlungskonzept 13 3 3 Anschlussvoraussetzungen 15 3 4 Kompatible Netzformen 16 3 5 Baugruppen und Abmessungen 17 3 6 Kommunikationsschnittstellen 21 3 7 Anzeige und Bedienelemente 23 3 7 1 Tasten 24 3 7 2 Status LEDs 24 3 7 3 Informa...

Page 74: ...5 2 Wechselrichter in Betrieb nehmen 45 6 Bedienung 46 6 1 Bedienung Navigation und Tastenfunktionen46 6 2 Hauptmenü V2 6 47 6 2 1 Hauptmenü 1 Einstellungen eingeben 47 6 2 2 Hauptmenü 2 Ereignisliste 51 6 2 3 Hauptmenü 3 SystemInfo 51 6 2 4 Hauptmenü 4 Systemzeit 51 6 2 5 Hauptmenü 5 Software Firmware aktualisieren52 7 Fehlermeldungen und Störungsbeseitigung 53 7 1 Wartung 65 7 1 1 Allgemeine War...

Page 75: ...t dem Produkt die Bedie nungsanleitung und insbesondere das Kapitel Sicherheit und Verantwortung vollständig durch 1 3 Darstellung von Informationen Damit Sie mithilfe dieser Anweisungen sicher und schnell mit dem Produkt arbeiten können werden ein heitliche Warnungen Symbole Bezeichnungen und Abkürzungen verwendet 1 3 1 Symbole Die folgenden Symbole kennzeichnen Hinweise die der Verständlichkeit ...

Page 76: ...er Software die nacheinander angeklickt werden soll SIGNALWORT WARNHINWEISKATEGORIE Art und Quelle der Gefahr Folgen bei Nichtbeachtung der Warnungen Erforderliche Maßnahmen zur Vermeidung der Gefahr Tab 1 Symbole Zeichen Symbol Bedeutung GEFAHR Führt bei Missachtung unmittelbar zum Tod oder zu schweren Personenschäden Befolgen Sie die Warnungen um Todesfälle oder schwere Verletzungen zu vermeiden...

Page 77: ... Informationen und Sicherheitshinweise durch bevor Sie das Produkt installieren und einsetzen 2 2 Regeln für die sichere Installation und den sicheren Betrieb Das Produkt nur nach einer entsprechenden Schu lung installieren oder betreiben Das Produkt ordnungsgemäß erden Der Metallrahmen der PV Module per Potenzial ausgleich erden Nur PV Module der Klasse A nach IEC 61730 und gleichen Typs verwende...

Page 78: ... zulässig 2 6 Anforderungen an Elektrofachkraft Zur Gewährleistung der sicheren Nutzung dürfen diese Tätigkeiten daher nur von einer geeigneten Elek trofachkraft oder von einer geschulten Person unter Aufsicht einer Elektrofachkraft durchgeführt werden Bei einer Elektrofachkraft handelt es sich um eine Person die aufgrund ihrer beruflichen Ausbildung ihrer Kenntnisse und Erfahrungen sowie ihrer Ke...

Page 79: ...ile auszuschließen sind nur von der REFU Elektronik GmbH zugelassene Zubehör und Ersatzteile zu verwenden Die technischen Daten und die in der Bedienungs anleitung angegebenen Umgebungsbedingungen beachten Sicherheitshinweise und Anweisungen in den Doku mentationen von Drittanbietern beachten Das Produkt darf erst in Betrieb genommen wer den wenn nach einer Erstinbetriebnahmeprüfung festgestellt w...

Page 80: ... sichern kennzeichnen Auf Spannungsfreiheit prüfen DC und AC Erden und kurzschließen Benachbarte unter Spannung stehende Teile abde cken oder abschranken 3 Technische Beschreibung 3 1 Funktionsprinzip des Wechselrichters Der REFUsol 50K 3T ist ein Multi String Wechsel richter mit drei MPP Trackern der die von den Photo voltaik Modulen erzeugte Gleichspannung in Wechselspannung umwandelt und die Le...

Page 81: ... eine EMV Filterung des AC Stroms die Fehlerstromüber wachung und die Trennung vom AC Netz durch redun dant ausgeführte AC Relais Die Steuer und Regelpatine überwacht regelt und steuert zentral alle Gerätefunktionen Zu diesem Zweck werden alle Sensordaten erfasst verarbeitet und der Betriebszustand des Wechselrichters zur Anzeige LCD gebracht Dazu zählen unter anderem die aktuellen Betriebsdaten F...

Page 82: ...gungswinkel an den MPPT Eingängen unterschiedliche PV Leistungen zu erwarten sind sollte der Independent Modus zum Zweck der PV Ertragsoptimierung verwendet werden Parallel Modus Wenn alle PV Strings über eine Combiner Box oder Y Kabel parallel geschalten sind muss der Par allel Modus verwendet werden Fig 3 Beispiele für MPPT Betriebmodi 1 Parallel Modus Freifläche mit gleicher Ausrichtung 2 Indep...

Page 83: ...Technische Beschreibung 13 Kühlungskonzept REFUsol 50K 3T 982081 03 2021 03 English Deutsch 3 2 Kühlungskonzept Fig 4 Kühlung des Wechselrichters ...

Page 84: ... D IN3 A B C D A B C D A B C D A B C D A B C D ISO 1 DC SPD DC Eingang DC Trennschalter DC EMV Filter DC DC Hochsetzsteller DC AC Wechselrichter AC Netzrelais AC EMV Filter AC Ausgang microSD Karte Ethernet WiFi optional RS485 In Out Remote Control Alarm optional Steuerungskarte Anzeige und Bedienfeld Isolations überwachung AC Fehlerstromerkennung Kommunikation ...

Page 85: ...ordnung Technische Anleitung zum Schutz gegen Lärm und die regionalen Bauvorschriften Der REFUsol 50K 3T verfügt über 3 unabhängige MPP Tracker Alle PV Module die an denselben MPPT angeschlossen sind sollten vom gleichen Typ sein und die gleiche Ausrichtung besitzen Bei der Anlagenplanung Betriebsmittelauswahl Installation Inbetriebnahme und Inbetriebnahme prüfung sind die angegebenen Bemessungsda...

Page 86: ...TT kompatibel Bei Anwendung des TT Netzes sollte die Spannung zwischen Neutralleiter und Erde weniger als 30 V betragen Fig 6 Übersicht der Netzformen PEN L1 L2 L3 N PE L1 L2 L3 PEN TN S TN C REFUsol 20K 2T 33K 2T REFUsol 20K 2T 33K 2T L1 L2 L3 N PE L1 L2 L3 N PE TN C S TT REFUsol 20K 2T 33K 2T REFUsol 20K 2T 33K 2T Transformator Transformator Transformator Transformator ...

Page 87: ...Fi GPRS RS485OUT RS485IN RELAY IO 1 DC Trennschalter 2 DC Plus Anschluss 3 DC Minus Anschlus 4 Relaiskontakt Digitaleingang 5 RS485 Eingangskabelverschraubung 6 RS485 Ausgangskabelverschraubung 7 Ethernet oder WiFi Schnittstelle 8 AC Kabelverschraubung 9 Wechselrichter Halterung 10 Druckausgleichsmembran 11 Kühlkörper mit Lüfter 12 PV Anschlussbereich IN3 MPPT3 13 PV Anschlussbereich IN2 MPPT2 14 ...

Page 88: ... 3T 982081 03 2021 03 Fig 9 Bauteile des REFUsol 50K 3T 1 Wechselrichter Gehäusedeckel 2 LED Display mit Tasten und Status LEDs 3 Anschlussboxdeckel Fig 10 Anschlussbox geöffnet 1 2 3 1 Kommunikationsplatine 2 AC Ausgangsanschluss 3 DC SPD Überspan nungsschutz 3 2 1 ...

Page 89: ... Baugruppen und Abmessungen REFUsol 50K 3T 982081 03 2021 03 English Deutsch Fig 11 Aufbau des Typenschlüssels Fig 12 Abmessungen Vorderansicht Nennausgangsleistung 50K 3T Anzahl der MPP Tracker REFUsol Markenname 751 mm 721 mm ...

Page 90: ...Technische Beschreibung 20 Baugruppen und Abmessungen REFUsol 50K 3T 982081 03 2021 03 Fig 13 Abmessungen seitliche Ansicht Fig 14 Abmessungen Ansicht von hinten 298 mm 285 mm ...

Page 91: ... mm 10 mm 394 mm 95 mm 95 mm 95 mm 5 min Model No REFUsol 50K 3T 851P050 300 Max DC input voltage Operating input voltage range 1 000 V 250 960 V 40 A 30 A 30 A 48 A 36 A 36 A 3 N PE 400 V 80 A 50 60 Hz 50 kVA 0 8 ind 0 8 cap IP65 25 60 C Class I Max current per MPPT Max short current per MPPT Nominal grid voltage Max output current Nominal grid frequency Max AC power Adjustable power factor range...

Page 92: ... LCD Display 2 Anschluss der Steuerplatine 3 Anschluss Lüfter 4 GPRS WiFi Anschluss 5 RS485 IN Anschluss 6 RS485 OUT Anschluss 7 microSD Kartensteck platz 8 Digitale Eingänge 9 Relaisanschluss CNT10 Tab 2 Kommunikationsanschlüsse Digitaleingänge Klemmenanschluss Bezeich nung IN1 IN2 IN3 IN4 GND DRM0 Funktion Verschal tung für Leistungs reduzie rung IN1 GND PN 0 IN2 GND PN 30 IN3 GND PN 60 IN4 GND ...

Page 93: ...einen PC 4 Ethernet oder WiFi Schnittstelle für Data Logging 3 7 Anzeige und Bedienelemente Fig 19 LCD Display mit Tasten und Status LED PC 1 2 3 4 1 Erdschlusserfassung 2 Normal Betrieb Ein 3 Alarm Störung 4 Taste OK Auswahl oder Wert bestätigen 5 Taste Menüebene nach unten 6 Taste Menüebene nach oben 7 Taste ESC Abbruch oder zurück 8 LCD Display ESC OK ERROR ON GROUND FAULT Today Total Power kWh...

Page 94: ...ten ESC Auswahl oder den Wert bestätigen Status LED Betriebsstatus Beschreibung GROUND FAULT rot ein GFI Fehler überhöhter Feh lerstrom erfkannt aus kein GFI Fehler ON grün blinkend Warten oder Prüf Zustand ein Normal Betrieb Wechsel richter im Einspeisebetrieb aus Störung oder permanenter Fehler Zustand ERROR rot blinkend Lüfterfehler ein Wechselrichter im Fehler Zustand aus Normal Betrieb Wechse...

Page 95: ...üanzeige Fig 22 Anzeige der Leistungsdaten 1 Modbus Adresse 2 RS485 Schnittstelle aktiv 3 Ethernet WiFi Schnittstelle aktiv 4 Aktivität auf RS485 Bus 4 2 3 1 1 Täglicher PV Ertrag 2 Gesamter PV Ertrag 3 MPPT Scan Funktion 4 Echtzeit Leistung 5 Hohe Wechselrichter In nenraum Temperatur 6 Blinkt bei Frequenz und Leistungs Derating leuchtet bei Fernabschal tung 4 2 3 1 5 6 ...

Page 96: ...is 21 Uhr 1 Leuchtet bei einer DC Spannung über 250 V 2 Messkanal MPPT1 MPPT2 IN1 IN2 3 DC Spannung und Strom je Messkanal wechselt alle drei Sekunden 4 Leuchtet im Einspeisebe trieb Normal 5 AC Spannung der Phasen L1 L2 und L3 wechselt alle drei Sekunden 6 AC Strom der Phasen L1 L2 und L3 oder AC Fre quenz wechselt alle drei Sekunden 6 5 1 2 3 4 ...

Page 97: ...hselrichter in den temporären oder dauerhaften Fehlerzustand Der Wechsel richter wartet in diesem Betriebszustand auf den nächsten Initialisierungsschritt Prüfen Prüfen Der Wechselrichter überprüft den Isolationswi der stand der PV Anlage den Zustand der AC Netzrelais und weitere Sicherheitsfunktionen Außerdem führt er einen Selbsttest durch um sicherzustellen dass die Software und Hard ware des W...

Page 98: ...zustand Sobald der Fehler nicht mehr existiert kehrt der Wechselrichter automatisch in den Betriebszu stand Normal zurück Wenn der Fehlerzustand weiterhin besteht den Wechselrichter anhand des angezeigten Fehler codes überprüfen Perma nenter Fehler Perma nent Der Wechselrichter hat einen permanenten Fehler erkannt der nicht quittiert werden kann Die Fehlerbehebung erfolgt durch eine Elektro fachkr...

Page 99: ...kungsgrad und Leistungsdiagramme REFUsol 50K 3T 982081 03 2021 03 English Deutsch Fig 27 DC Spannungs Leistungsdiagramm Fig 28 AC Spannungs Leistungsdiagramm AC Ausgangsleistung kW DC Spannung V AC Ausgangsleistung kW AC Spannung V ...

Page 100: ...GEFAHR Hohe Spannungen Lebensgefahr durch hohe Spannungen in den spannungsführenden Bauteilen des Wechsel richters die tödliche Stromschläge verursa chen können Alle Arbeiten am Produkt sind ausschließlich von Elektrofachkräften auszuführen Vor Arbeiten am Wechselrichter stets frei schalten und die fünf Sicherheitsregeln be achten siehe Kapitel 2 9 Entladezeit von 5 Minuten beachten VORSICHT Heiße...

Page 101: ... 1 Verpackung auf Beschädigung prüfen Wenn Beschädigungen festgestellt werden den Wechselrichter nicht auspacken und umgehend Lieferanten kontaktieren 2 Lieferumfang prüfen Wenn der Lieferumfang unvollständig ist oder Beschädigungen festgestellt werden Lieferanten kontaktieren Tab 4 Lieferumfang Beschreibung Anzahl REFUsol 50K 3T 1 Wechselrichter Halterung 1 Ethernet Stick LSE 3 mit Flash Speicher...

Page 102: ... den Montageort Für den Montageort sind folgenden Anforderungen einzuhalten Fig 29 Anforderung an den Montageort MC4 Crimpkontakte DC 10 MC4 Crimpkontakte DC 10 Innensechskantschraube M6 2 M8x80 Schwerlastanker für Wech selrichter Halterung 8 Bedienungsanleitung 1 Tab 4 Lieferumfang Beschreibung Anzahl ...

Page 103: ...Installation 33 Anforderungen an den Montageort REFUsol 50K 3T 982081 03 2021 03 English Deutsch Fig 30 Vertikale Installation Fig 31 Abstände und Freiräume max 15 80 cm 50 cm 50 cm 50 cm ...

Page 104: ...Stromversorgungssysteme sind bei der Planung berücksichtigt 1 Wechselrichter Halterung positionieren mit Was serwaage ausrichten und die Bohrlöcher anzeich nen 2 Löcher entsprechend den Markierungen bohren 3 Schwerlastanker in die Bohrlöcher einsetzen und mit einem Hammer einschlagen 4 Wechselrichter Halterung mit den Schwerlastan kern befestigen oder gleichwertiges Befesti gungsmaterial wählen 5 ...

Page 105: ...rpackung heben Fig 34 Griffmöglichkeiten am Wechselrichter 4 7 Wechselrichter einhängen 1 Mit zwei Personen den Wechselrichter an der Wechselrichter Halterung mit den Aussparungen ausrichten und einhängen 2 Um den Wechselrichter zu sichern Innensechs kantschraube M6 an der Wechselrichter Halterung festziehen 3 Ggf zur Diebstahlsicherung ein Schloss verwenden Fig 35 Wandmontage ...

Page 106: ...er PA Leiter mit einem Querschnitt von 16 mm ist vorbereitet 1 Mit einer Abisolierzange den PA Leiter in geeigne ter Länge abisolieren 2 Blanken Leiter in den Quetschkabelschuheinführen und mit einer Crimpzange verpressen 3 Den Quetschkabelschuh und die Innensechskant schraube M6 am gekennzeichneten PA Anschluss mit Anziehdrehmoment von 5 Nm festziehen 4 Ggf den PA Anschluss gegen Korrosion schütz...

Page 107: ...lten Leiterquerschnitte sind Mindestan forderungen Bei größeren Leitungslängen sind die Leiterquerschnitte entsprechend auszulegen 1 Anschlussboxdeckel mit einem Inbusschlüssel öff nen 2 Die Leiter des AC Kabels abisolieren 3 Überwurfmutter an die PG Kabelverschraubung anbringen 4 AC Kabel durch PG Kabelverschraubung durchfüh ren Typ REFUsol 50K 3T Leiterquerschnitt 20 mm Sicherung 160 A 220 mm ...

Page 108: ...C Kabel konfektionieren und anschließen 4 10 1DC Kabel konfektionieren Die Polarität der DC Kabel sind geprüft und gekennzeichnet Die elektrischen Anlage ist gemäß den 5 Sicher heitsregeln gesichert und getrennt 1 DC Leiter 4 6 mm2 mit einem geeigneten Werk zeug 10 mm abisolieren Darauf achten dass keine einzelnen Litzen abge schnitten werden 2 Abisolierte Leiter in die entsprechenden Crimpkon tak...

Page 109: ...nung der DC Kabel zu achten 5 Überwurfmutter der MC4 Steckverbinder leicht lösen 6 Gecrimpten Leiter in den MC4 Steckverbinder schieben bis es hörbar einrastet 7 Überwurfmutter festziehen und auf Dichtigkeit sowie Zugentlastung prüfen 4 10 2DC Kabel anschließen 1 MC4 Steckverbinder DC und DC an den entspre chenden Gehäusebuchsen steckern einstecken bis die MC4 Steckverbinder einrasten 2 Sichere Ko...

Page 110: ...n den Leitungen und von Störquellen verlegen Die Länge des Kommunikationskabels sollte weni ger als 1000 m betragen 4 11 1Kommunikation RS485 anschließen Anschlussboxdeckel ist geöffnet 1 Überwurfmutter der PG Verschraubung leicht lösen 2 Den Blindstopfen aus der PG Verschraubung ent nehmen und das abgeschirmte Netzwerkkabel durch die Kabelverschraubung und Dichtung füh ren 3 Mit Hilfe einer Crimp...

Page 111: ... die Zugentlastung der PG Ver schraubung prüfen 4 11 2Digitaleingänge IN1 bis IN4 anschließen Anschlussboxdeckel ist geöffnet 1 Überwurfmutter der PG Verschraubung leicht lösen 2 Den Blindstopfen aus der PG Verschraubung ent nehmen und das abgeschirmte Netzwerkkabel durch die Kabelverschraubung und Dichtung füh ren 3 Klemmleiste Digitaleingänge einstecken 4 Netzwerkkabel konfektionieren und die Ad...

Page 112: ...ßer als auch als Öffnerkontakt konfiguriert werden Das Relais hat 4 verschiedene Steuerfunktionen die über das LCD Display eingestellt werden Anschlussboxdeckel ist geöffnet 1 Relaisleiter gemäß der folgenden Abbildung abiso lieren 2 Überwurfmutter der PG Kabelverschraubung über das Relaiskabel aufstecken 3 Relaiskabel durch PG Kabelverschraubung durch führen 4 Relaisleiter konfektionieren und an ...

Page 113: ...reuzschlitz Schraubendreher entfernen 2 Kabelverschraubung des Ethernet Adapters leicht lösen 3 Geschirmtes RJ45 Ethernetkabel in den Ethernet Stick einstecken 4 Kabelverschraubung festziehen und auf Dichtigkeit sowie Zugentlastung prüfen 5 Ethernet Stick in den Anschluss WiFi GPRS ein stecken 6 Ethernet Stick mit zwei Schrauben befestigen 4 11 5WiFi Stick LSW 3 anschließen optional 1 WiFi GPRS Ab...

Page 114: ... klicken um die Einstellun gen des WiFi Sticks zu konfigurieren Bei korrekter Konfiguration wird der WiFi Stick im Netzwerk erkannt und beginntÜberwachungsdaten an REFUlog zu senden Um den Konfigurationsassistent direkt zu starten den auf dem Wifi Stick aufgeklebten QR Code ein scannen und den gezeigten Anweisungen folgen 4 11 6Überwachungsportal REFUlog Sobald eine Internetverbindung über WiFi od...

Page 115: ...1 durchführen 5 2 Wechselrichter in Betrieb nehmen 1 DC Trennschalter einschalten Der Wechselrichter startet und nach kurzer Warte zeit ister bereit für Einstellung und Parametrierung des Wechselrichters 2 Menüsprache einstellen 3 Datum und Uhrzeit einstellen 4 Ländercode einstellen 5 DC Trennschalter ausschalten und 5 Minuten war ten 6 DC Trennschalter einschalten 7 AC Schalter einschalten Der We...

Page 116: ...s Hauptmenü aufzurufen Wenn eine Einstellung passwortgeschützt ist OK Taste drücken um das Passwort einzugeben Mit der Taste OK Auswahl bestätigen Nach einer erfolgreichen Einstellungsveränderung wird in der Menüanzeige Erfolg angezeigt ESC OK ERROR ON GROUND FAULT Today Total Power kWh kWh kW 100 6 9 12 18 15 21 V A V A 7 1 2 3 4 5 6 8 Status LED 10 9 1 Erdschlusserfassung 2 Normal Betrieb Ein 3 ...

Page 117: ...llen 2 Energie löschen 3 Ereignisse löschen 4 Ländercode einstellen 5 EIN AUS Steuerung 6 Relaisbefehl1 7 Einstellung Landaktivierung 8 Energie einstellen Eingabe in kWh Einspeiseli mit 9 Adresse eingeben Modbus Adresse 10 Set Inputmode Parallel Independent Modus 11 Sprache einstellen 12 Set Start Parameter1 13 Set Safety Voltage1 14 Set Safety Frequenc1 15 Set Insulation1 16 Relaistest1 17 Set Re...

Page 118: ...in neuer Ländercode wird erst nach einem Neustart des Wechselrichters wirksam 24 DRMs0 25 Protocol 1 Modbus 9600N 2 USS 57600E 1 Funktion nicht verfügbar Normal 1 Einstellung eingeben Tab 6 Übersicht der verfügbaren Ländercodes Code Land 000 Deutschland VDE AR N4105 001 CEI 0 21 Italien 002 Australien 003 Spanien RD1699 004 Türkei 005 Dänemark 006 Griechenland Kontinent 007 Niederlande 008 Belgien...

Page 119: ... Wenn der Wechselrichter mehr als 24 Stunden lang Energie produziert hat kann der Ländercode nur nach Eingabe eines Passworts geändert werden Den REFU Service kontaktieren um ein Passwort für die Aktivierung zu erhalten Das Aktivierungs Passwort ist nur 24 Stunden gül tig 018 EU EN50438 019 IEC EN61727 020 Korea 021 Schweden 022 Europa allgemein 023 Kunde VDE0126 024 Zypern 025 Indien 026 Philippi...

Page 120: ... der Bedienoberfläche des LCD Displays ändern 12 Set Start Parameter 16 Relais Test Funktion nicht verfügbar 17 Set Reactive Power Blindleistung Blindleistungswert einstellen 18 Set Power Derating Wirkleistungsreduzierung Wirkleistungsreduzierung in einstellen 19 PE Line Control 22 Set Election Meter Funktion nicht verfügbar 23 Logik Schnittstelle Digitaleingänge aktivieren oder deaktivieren 24 DR...

Page 121: ...eine einzelne Ereignis ID Nummer mit Ereigniszeit anzuzeigen 6 2 3 Hauptmenü 3 SystemInfo In der Systeminformationsschnittstelle werden die Geräteinformationen und wichtige Einstellungen ange zeigt 6 2 4 Hauptmenü 4 Systemzeit Aktuelle Systemzeit anzeigen Normal 3 SystemInfo 1 Inverter Typ 2 Seriennummer 3 Softwareversion 4 Hardwareversion 5 Land 6 Eingabemodus MPPT Mode 7 Relaisbefehl 1 8 Safety ...

Page 122: ...in das Verzeichnis der microSD Karte kopieren 6 microSD Karte in den microSD Kartensteckplatz des Geräts einsetzen 7 Im LCD Display des Wechselrichters das Menü Software Update auswählen und mit OK bestä tigen 8 Passwort 0715 eingeben Das System aktualisiert die Prozessoren DSP1 DSP2 Für jeden Prozessor zeigt es nach Erfolg eine OK Meldung an Wenn es Fail anzeigt den Wechselrichter über den DC Tre...

Page 123: ...tionsfehler Wenn die Verbindung zwischen der Steuerplatine und der Kommunikationsplatine ausfällt wird auf der LDC Display der Fehler DSP communicate fail angezeigt Tab 8 Ereignisliste mit Fehler und Hinweismeldungen ID Ereignisname Beschreibung des Ereignisses Maßnahme ID01 GridOVP AC Spannung im Stromnetz ist zu hoch Der Wechselrichter kehrt automatisch in den normalen Betriebszu stand zurück we...

Page 124: ...egenden AC Spannungen bei fortwähren den kritischen Spannungsverhältnissen kontaktieren Sie ihr Ener gieversorgungsunternehmen ID07 ID08 Reserviert ID10 IpvUnbalance DC Strom ist unsymmetrisch auf die MPPT Eingänge verteilt Überprüfen Sie die an beiden MPPT Eingängen ob die PV Strings korrekt zugeordnet und angeschlossen sind Die maximalen DC Ströme sollten an beiden Eingängen nahezu symmetrisch s...

Page 125: ...rte des AC Netzes Frequenz Spannung Strom ID14 HwBoostOCP Der DC Strom ist zu hoch der Hardware Schutz ist aktiv Prüfen Sie ob sich der DC Strom innerhalb der maximalen Grenz werte befindet und überprüfen Sie den Anschluss an den MPPT Eingängen Wenn keine Fehlerbehebung möglich ist wenden Sie sich an den REFU Service Tab 8 Ereignisliste mit Fehler und Hinweismeldungen ID Ereignisname Beschreibung ...

Page 126: ...den Sie sich an den REFU Service ID16 AcRmsOCP Der AC Strom ist zu hoch ID17 HwADFaultIGrid Fehler bei der AC Strommes sung ID18 HwADFaultDCI Fehler bei der DC Strommes sung ID19 HwADFaultV Grid Fehler bei der AC Spannungs messung ID20 GFCIDevice Fault Fehler bei der DC Spannungs messung ID21 MChip_Fault Master Chip DSP Fehler ID22 HwAuxPower Fault Hilfsspannungsfehler ID23 BusVoltZero Fault Messf...

Page 127: ...Wenn keine Fehlerbehebung möglich ist wenden Sie sich an den REFU Service ID27 VbusUnbalance DC Busspannung ist unsymmet risch ID28 DciOCP DC Strom ist zu hoch Überprüfen Sie ob der MPPT Modus Parallel oder Independent entsprechend der PV Anlagenkonfiguration korrekt eingestellt ist gegebenenfalls ändern Wenn der korrekte MPPT Modus eingestellt ist den DC Trenn schalter ausschalten 5 Minuten warte...

Page 128: ...n MPPT Eingängen ob die PV Strings kor rekt zugeordnet und angeschlossen sind Die maximalen DC Strö me sollten an beiden Eingängen nahezu symmetrisch sein Wenn keine Fehlerbehebung möglich ist wenden Sie sich an den REFU Service ID31 ID48 Reserviert Tab 8 Ereignisliste mit Fehler und Hinweismeldungen ID Ereignisname Beschreibung des Ereignisses Maßnahme ...

Page 129: ...der AC Frequenz messwerte zwischen Master DSP und Slave DSP ist nicht kon sistent fehlgeschlagen ID51 Consistent Fault_DCI Der Vergleich der DC Strom messwerte zwischen Master DSP und Slave DSP ist nicht kon sistent fehlgeschlagen ID52 Consistent Fault_GFCI Der Vergleich der Isolations messwerte GFCI zwischen Mas ter DSP und Slave DSP ist nicht konsistent fehlgeschlagen ID53 SpiCommLose Die SPI Ko...

Page 130: ...ob der Wechselrichter gemäß den Vorgaben dieses Handbuches entsprechend montiert und installiert wurden ist Prüfen Sie die Sonneneinstrahlungsverhältnisse und die Umge bungstemperatur am Wechselrichter Überprüfen Sie die ordnungsgemäße Funktion des Kühler Ver schmutzung und die Funktion der Lüfter ID58 OverTemp Fault_Boost Die Boost Temp ist zu hoch ID59 OverTemp Fault_Env Die Umgebungstemperatur ...

Page 131: ... Unrecover IacRmsUnba lance AC Strom ist zu hoch ein Fehler lässt sich nicht zurücksetzen ID68 UnrecoverIp vUnbalance DC Strom ist unsymetrisch ein Fehler lässt sich nicht zurückset zen ID69 UnrecoverVbus Unbalance DC Busspannung ist unsymmet risch ein Fehler lässt sich nicht zurücksetzen ID70 UrecoverOC PInstantDC AC Strom ist zu hoch ein Fehler lässt sich nicht zurücksetzen ID71 UnrecoverP vConf...

Page 132: ...gstemperatur im Derating Leistungsreduzierung Überprüfen Sie ob der Wechselrichter gemäß den Vorgaben dieses Handbuches entsprechend montiert und installiert wurden ist Überprüfen Sie ob der Wechselrichter gemäß den Vorgaben dieses Handbuches entsprechend montiert und installiert wurden ist Prüfen Sie die Sonneneinstrahlungsverhältnisse und die Umge bungstemperatur am Wechselrichter Überprüfen Sie...

Page 133: ...ng ID85 UnderFreqDe rating Der Wechselrichter befindet sich aufgrund einer zu hohen Netzfre quenz im Derating Leistungsre duzierung Der Wechselrichter reduziert automatisch die Ausgangsleistung wenn die Frequenz des Stromnetzes zu hoch ist Sobald sich die Netzfrequenz wieder im regulären Bereich befindet ist das Dera ting wieder inaktiv ID86 Fan4 Alarm Der Lüfter 4 meldet einen Fehler Überprüfen S...

Page 134: ... Sie den DC Trennschalter aus warten Sie 5 Minuten und schalten Sie den DC Trennschalter ein Wenn keine Fehlerbehebung möglich ist wenden Sie sich an den REFU Service ID96 RTC clock chip anomaly Der interne RTC Clock ist im Fehlerzustand ID97 Invalid Country Der eingestellte Ländercode ist ungültig Überprüfen Sie ob der korrekte Ländercode eingestellt ist falls nicht den korrekten Ländercode einge...

Page 135: ...kt sind ausschließlich von Elektrofachkräften auszuführen Vor Arbeiten am Wechselrichter stets frei schalten und die fünf Sicherheitsregeln be achten siehe Kapitel 2 9 Entladezeit von 5 Minuten beachten VORSICHT Heiße Oberflächen Verbrennungsgefahr durch heiße Oberflächen Das Produkt kann während des Betriebs heiß werden Berührungen während des Betriebs vermei den Das Produkt vor Durchführung von ...

Page 136: ...echselrichter möglichst im Originalkarton verpa cken oder einen gleichwertigen Karton verwenden der für Lasten von mehr als 60 kg geeignet ist Sichtprüfung und gegebenenfalls Reinigung des Kühlkörpers 12 Monate Sichtprüfung und Überprüfung aller elektri schen Anschlüsse 12 Monate Funktionsprüfung der Isolationsüberwachung 12 Monate Überprüfung von AC und DC Spannungen 12 Monate Überprüfung des Sta...

Page 137: ...im normalen Hausmüll entsorgen Der REFUsol 50K 3T ist RoHS konform Für eine vollständige Rücknahme des Produkts den REFU Service kontaktieren 9 Technische Daten 9 1 DC Daten REFUsol Typ Artikel Nr 50K 3T 851P050 300 Empfohlene max PV Leistung 66 5 kWp Max DC Spannung 1 000 V DC Betriebsspannungsbereich 250 V 960 V DC Startspannung 350 V DC Nennspannung 600 V Zahl der unabhängigen MPPT 3 Anzahl der...

Page 138: ...ctive 0 8 capacitive AC Anschluss Ring cable lugs M6 REFUsol Typ Artikel Nr 50K 3T 851P050 300 Max Wirkungsgrad 98 5 Europ Wirkungsgrad 98 3 MPPT Wirkungsgrad 99 9 Eigenverbrauch Nacht 1 W Einspeisung ab 50 W REFUsol Typ Artikel Nr 50K 3T 851P050 300 DC Schalter integriert Schutzfunktionen Anti Islanding DC Verpolung Übertem peratur Überspan nung Überstrom RCD und Isolationsüber wachung String Mon...

Page 139: ...ional Art Nr 924022 REFUsol Typ Artikel Nr 50K 3T 851P050 300 REFUsol Typ Artikel Nr 50K 3T 851P050 300 Umgebungstemperatur 25 60 C 45 Derating Topologie transformatorlos Schutzart IEC 60529 IP65 Zulässiger Bereich der rela tiven Luftfeuchtigkeit 0 100 Max Aufstellhöhe 4 000 m über NHN Geräuschpegel 60 dBA Kühlung Lüfter Abmessungen H B T 751 721 298 mm Gewicht 66 5 kg Anzeige Bedienfeld LCD Displ...

Page 140: ... untersagt Zuwiderhandlungen verpflichten zu Schadenersatz Alle Rechte für den Fall der Patent Gebrauchsmuster oder Designeintragung vorbehalten Die angegebenen Daten dienen nur zur Beschreibung des Produkts und sind nicht als zugesicherte Eigenschaften im rechtlichen Sinne zu verstehen Das Recht zur Änderung des Inhalts dieser Dokumentation und der Verfügbarkeit der Produkte bleibt vorbehalten RE...

Reviews: