background image

© Red20RC 2014 

14 

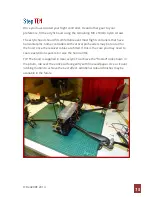
Now things get a bit fiddly! 

Place the top plate onto the frame using those two modified spacers as a guide. 
It will take a bit of wiggling to get all the cables contained but once you are ready 
use the two remaining 30mm spacers on the top plate to hold things together 
while you work. 

First line-up and fit the booms using the supplied M3 x 10mm button head 
screws. The shorter black M3 screws shown are optional and should be provided 
in the Talon kit. These do not add structural strength to the booms but help to 
prevent rotation of the booms in a heavy landing. It is up to you if you want to 
source and fit these. 

With the booms in place, add the seven M3 x 10mm nylon screws to the spacers. 
Do not over tighten. 


Summary of Contents for R630 FPV SPIDER

Page 1: ...R630 FPV Spider Quadcopter...

Page 2: ...dcopter REMEMBER RC Aircraft are not toys This is a complicated flying machine that requires skill to build and fly Whilst the R630 FPV Spider Quad is a stable and capable flyer it is not really inten...

Page 3: ...Red20RC 2014 3...

Page 4: ...es Acrylic protective hood Flight controller anti vibration mount FPV camera mounting brackets HD camera vibration isolation plate ESC mounting fins A complete fixings and fasteners pack Although qual...

Page 5: ...iver FPV camera micro 21mm size and transmitter Battery 4000 5200mah 3S LiPo recommended HD recording camera to capture your exploits Motors NTM 2826 1100kv short shaft version ESCs MultiStar 30A BEC...

Page 6: ...bration plate These vibration balls are a pain to fit but take your time and you ll soon get them all in Now add the 6 ESC vertical mounting brackets These will be a tight fit and may require a little...

Page 7: ...structure by adding the three plates that make up the FPV camera bracket Again these will more than likely be a tight fit so take you time and sand a slight bevel on the edges of the tabs to help with...

Page 8: ...nting bracket is pre drilled to suit the Turnigy range of micro FPV cameras Access to this area will be difficult later on in the build so now is a good time to mount the camera using the M2 screws pr...

Page 9: ...uare 8 output board from HobbyKing Place your ESCs vertically in between the mounting brackets as shown and solder directly to the PDB There is a maximum of 25mm depth permissible inside the frame and...

Page 10: ...lon kit Replace the countersunk 3mm screws with the M3 x 10mm button head screws provided Next add the remaining 25mm nylon spacers to the bottom plate using the supplied M3 x 10mm nylon screws In tot...

Page 11: ...lts At this stage you should also decide how you are going to mount your flight controller An anti vibration mounting plate is included that will suit most APM style flight controllers The top plate i...

Page 12: ...Red20RC 2014 12 Prepare your Talon booms as per the instructions included with the frame...

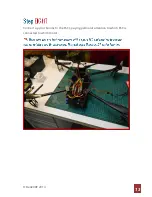
Page 13: ...Red20RC 2014 13 Connect up your booms to the ESCs paying particular attention to which ESC is connected to which motor...

Page 14: ...o hold things together while you work First line up and fit the booms using the supplied M3 x 10mm button head screws The shorter black M3 screws shown are optional and should be provided in the Talon...

Page 15: ...Some controllers with vertical pin headers may be too tall for the hood once the receiver cables are fitted If this is the case you may need to source extension spacers to raise the hood a little TIP...

Page 16: ...e largest battery we have managed to slip in there is a Multistar 5200mah 3S 10C pack Although the battery should be a tight fit it is a good idea to fit some kind of battery retention system In the p...

Page 17: ...icular is successful The PIDs and settings we are using are included on the R630 product page http store red20rc org product r630 fpv spider quadcopter We will keep these up to date with the best sett...

Reviews: